This week we improved on our Ghostcatcher game from last week.
We introduced a new concepts which we haven’t used before, animation and next week we will start another new concept which is broadcasting.
Using a simple technique of changing between costumes and having a waiting time we can animate our Sprites. In our case, we animated the Ghosts so they were blinking or sticking out their tongue. You could of course use this technique to have a sprite look like they are walking etc.
Hope you all enjoyed the session and we will be using animation and broadcasting over the next couple of months.
This week at Advancers, we took some time out from programming to review image editing, and play around using the highest quality free image editor in the world, the GNU Image Manipulation Program, also known as “The Gimp“.
Mastering Gimp, or a tool like it, is essential to be able to produce the images you will need for high quality games. It’s also very useful for touching up photographs, chopping people’s heads off and sticking them on others, etc!
After taking some time to get it installed on most people’s laptops, we reviewed the most important parts of this incredibly powerful program:
Installation of Gimp
The basics of how to open and create a new image file
The Gimp toolbox, how to change colors and use the brushes to paint.
Layers and how they can make your life so much easier when it comes to image editing
Selections, what they are used for and how to use them
Installing Gimp
On windows or Mac, GIMP can be installed by browsing to https://www.gimp.org/ and selecting “Download”. On linux it can be installed from the app store/package manager on your distribution. Note: some people last week had Chromebooks and I mistakenly told them that gimp wasn’t available on those devices – I since checked and it is available, though as it’s a web-app it is not as good as a locally installed version – check out this video for instructions on installation: https://www.youtube.com/watch?v=NtdcukXILJg . It is also not quite free too since you need to pay to save your files. Click read more for more details!
This week we started our first game in earnest. Let’s talk about the design and the steps we took to begin implementing it.
Game Design
The game involves a simple play area with pins. The players tries to knock down the pins by controlling the direction and force at which the ball is projected. The number of pins knocked constitutes the score. The game shares element of classic games such as pinball, bowling and skittles, to name a few.
Setting up the play area
To establish the play area, we used a plane (for the ground) and four cubes stretched to size to provide the walls:
Because we don’t want gaps in our walls, we’ve been careful to be precise with the positions of everything.
Applying a Force to our Sphere
We added a sphere to our scene and made sure that it had a RigidBody body component. The RigidBody component makes it so that the physic engine takes care of the movement of the sphere.
To test adding a force to the sphere we added a temporary script to the sphere and had it add a force to the RigidBody as soon as the game starts.
Immediately it was clear that the force was too weak, so we added a property to the script which allowed us to scale the force. In testing 1000 proved to be a good value. Here is the script:
using UnityEngine;using System.Collections;publicclassPushSphere:MonoBehaviour{publicfloatPushStrength=1.0f;//Usethisfor initializationvoidStart(){Rigidbodyrb;rb=GetComponent<Rigidbody>();rb.AddForce(Vector3.back*PushStrength);}//Updateiscalledonceper framevoidUpdate(){}}
We also experimented with creating a physic material and assigning it to the sphere. Different levels of friction and bounciness give different behaviours.
Testing With a Single Pin
To test the sphere colliding with a pin we added a single cylinder to the scene. Like the sphere, we made sure it had a RigidBody component attached to it. When the game started the ball shot forward and knocked the pin, as we’d hoped.
Aimer
To aim our sphere and control the strength of our shot, we created an aimer. The aimer is composed of an empty object containing two cylinders, one pointing forwards and one pointing crossways.
We didn’t want the aimer cylinders interacting with anything so we made sure to remove the colliders from the cylinders.
We also wanted the aimer to be partially transparent so we created a new material, setting the Rendering Mode to “Transparent”, choosing a colour from the Albedo colour picker and setting the Alpha value to a value less than 255.
Project
Updated project files for this week’s project can be found here. This requires Unity Version 5.4.1f1 or later.
Our WiFi set up worked much better this week with an issue with only one of our routers which decided to give up half way through the session.
We started to write our own functions today, functions are very important in programming as they allow us to run the same code multiple times without rewriting the code several times. Instead, you can put that code inside a function and call the function several times. This has the added benefit that if the function’s code has a mistake, you only have one place in the program to fix it.
If we use names that relate to our function’s operation it will make our code much easier to understand.
Functions make designing and testing bigger programs much easier as we can break the project down to manageable chunks and we can write and test these functions individually.
As we saw last week the GPIO Zero library contains robot functions which turn our robot’s wheels forwards or backwards or in opposite directions to go left or right until we call the robot.stop() function. We are going to take these functions and the sleep() function and put them in functions that will make our robot go forward or backwards by a specified amount of Centimetres or will turn it left or right by an amount of degrees. This week we wrote a function that makes our robot go forward. See code here. Here are this weeks slides writing-functions . Next week we will write the rest of our functions.
Some Bodgers and their parents have been asking about buying Raspberry Pis but I would advise holding off until we decide on our projects as some people may end up using Arduinos or Raspberry Pi Zeros depending on their project.
However if you want to get one to experiment at home with I would recommend the following sites. https://shop.pimoroni.com/ and https://thepihut.com/ for Raspberry Pi and accessories. If you are buying a case for your Pi I would recommend Pibow Coupé from Pimoroni as the GPIO pins are numbered and easy to get at. For electronic components such as sensors etc. http://www.bitsbox.co.uk/ are very good, they also do cheap Arduino clones. Avoid starter kits as you should be able to get your hands on stuff like keyboards if you ask friends and relations for them, do get SD cards as you can have different set ups on different cards e.g. Retropi, Kodi.
Great to see so many of you there on Saturday, 77 Ninjas!. Hope you had a good time. And a special welcome to our new Ninjas.
This week we created a Ghostcatcher game. We used the paint editor in Scratch for the first time. As I said on Saturday, It makes things easier if you think in shapes.
Using the code we have learned so far, we moved the Ghostcatcher with the mouse and the Ghosts randomly. We also added some sound.
We are going to continue on next week and improve this game, adding some Variables and some levels.
We’ve been busy the last two weeks covering the basics of Unity. Among the topics we’ve touched on are:
Customising the Unity layout
Explaining what the main Unity windows (Scene, Game, Hierarchy, Project and Inspector) are each for
Talked about 3D space and vectors and talked about the difference between local and global axes (child objects)
Shown how to place objects in the scene and how to position, rotate and scale them
Shown how to “fly” around the scene view
Explained how the physics engine works (Physics clock monitoring and moving rigidbodies and tracking collisions and other interactions)
Built a simple physics-based scene which had a ball fall, hit a ramp and roll into a bunch of stacked block
Wrote a script to have the camera follow the ball as it moves
Additionally Mike kindly filled in and talked about the basics of object oriented programming, classes and class diagrams. There is a post from last year that covers this well for those who’d like to read it.
Additionally, the basics of the C# language that we discussed are covered in both that post which we have already linked to above and another which can be found here. The topics we touched on were:
Curly braces as “containers” and the requirement that they occur in pairs.
How semicolons (;) mark the end of statements
Using directives and namespaces.
A basic class declaration
Properties, both public and private
Methods, both public and private
How Unity automatically calls certain methods at certain times, and some specific examples of this:
Start() called when we start the game
Update() called every time the scene is drawn
The up-to-date project file can be found here. Please note it will require Unity 4.5.1 or later.
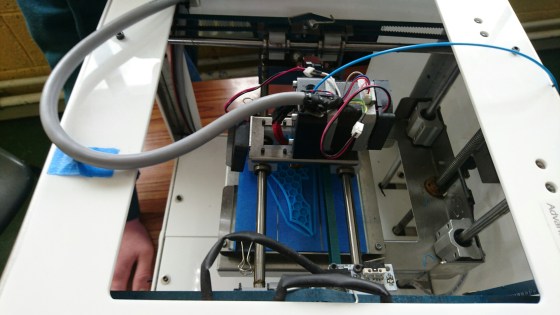
We were very pleased this week to be able to let the first members of the Hackers group take home 3D printers for the week to experiment with them. We will continue to do this in the coming weeks.
Here are some guidelines on safely using a 3D printer, prepared again by Kevin from Boston Scientific:
We are still having network difficulties with WiFi on our Raspberry Pi3s but I will work on finding a solution or a work around during the week.
We managed to connect to two of our robots and we wrote a simple hello world script and a script to control our robots. When we use Python and the Gpio Zero module all it takes to control a wheeled robot like ours is 9 different lines of code these are:
from time import sleep – this will allow us to call the sleep function later in the code.
from gpiozero import Robot – this will allow us to call all the robot functions from Gpio Zero.
robot = Robot(left=(22,23),right=(24,25)) – this is the most complicated line in our code, all it does is assign which gpio pins will be used to control our robot. This will become much clearer when we start to build simpler circuits later in the year.
robot.forward() – this function drives all our motors forward.
robot.backward() – this function drives all our motors backward.
robot.left() – this function drives the motors on the right forward and the motors on the left backward.
robot.right() – this function drives the motors on the left forward and the motors on the right backward.
sleep() – this function pauses the program.
robot.stop() – this function stops the motors.
If we want to drive our robot forward for five seconds we would use the following code
from time import sleep
from gpiozero import Robot
robot = Robot(left=(22,23),right=(24,25))
robot.forward()
sleep(5)
robot.stop()
We had a brainstorming session about what we might do for our projects and we came up with some great ideas which we talk more about on Saturday. My slides from Saturday are here robot-intro.
Great to see you all there on Saturday. This weeks starting point was our game from last week. We wanted to add extra functionality. We added code to the Snowflake so that something happened when the Penguin touched it. Most people added some sound.
We also made our first variable. We did this so that we could keep track of our score. Using this score we also could add code to make something happen when you reached a certain score and win the game. Again here we added a sound and switched backgrounds.
We learned and used a lot of new code this week and we will see over the coming weeks how we can incorporate it into many different types of games.
Why don’t you try using all the code you have learned so far to create your own game.
At the Hackers group, we started learning how to use 3D printers this week. 3D printers are a fantastic technology for turning 3D computer models into physical objects. They are also impressively inexpensive, with the Arduino-based Materia 101 printer that we are using costing about €600.
Thanks a million to Kevin Madden who joined the group to show us how to use 3D printers. Thanks also to his employer, Boston Scientific, who have loaned three 3D printers to us and are also covering the cost of the plastic “ink” used in them. Thanks also to Kevin’s colleague Cathal Egan of Boston Scientific, who initially offered the printers to us.
Here are Kevin’s notes on how to set up a 3D printer: 3d-printer-setup (PDF)
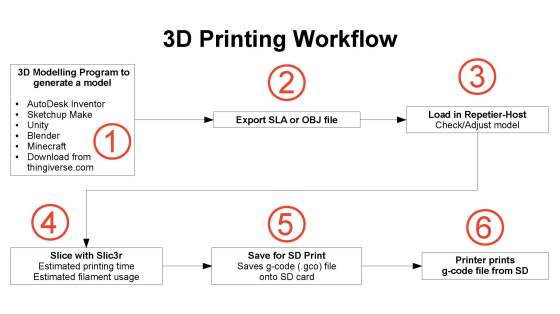
And here also is a diagram Kevin prepared, showing the 3D printing workflow:
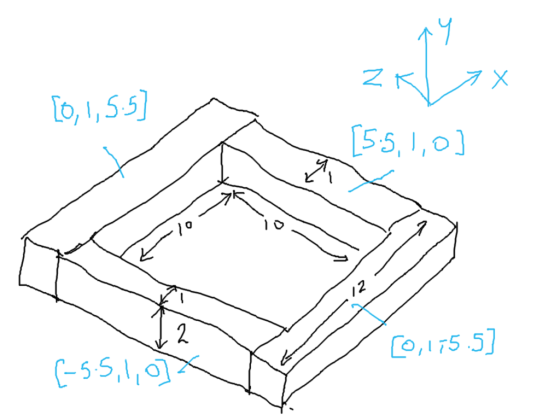
At our next session, we will look at how to do some 3D modelling to create objects we can print. Should be fun!
Hi everyone,
We completed our Mario game this week. We coded Mario so that he always floated down on to the wall. We added a fraction of a second of a wait so that it appears that he floats as he comes down. This also allows time for you to navigate left or right as needed.
We also introduced a more advanced concept, the Parallax effect, whereby objects further away appear to move slower than objects nearer. We coded mountains and a Sun to demonstrate this.