Hackers – Controlling Robot Wheels and Handling Interrupts in Arduino

IMG_20190202_135834

Controlling Robot Wheels

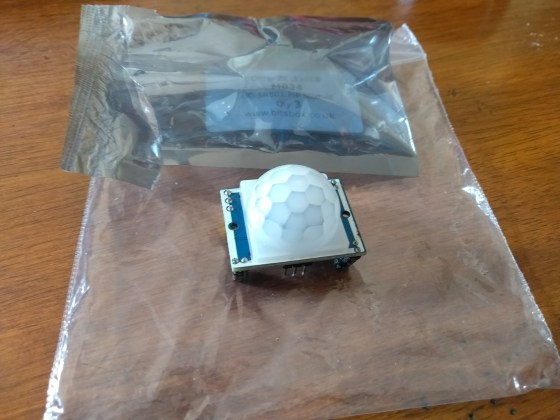
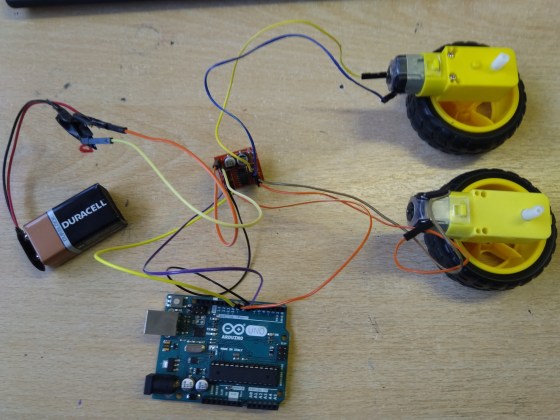
Last week, we figured out how to control a motor with a H-bridge. We expanded this to controlling a pair of wheels using the H-bridge. Above is a photo of the hardware. The wiring of the H-bridge is:

  • H-bridge [+] and [-] are connected to a 9V battery
  • H-bridge [IN1] to [IN4] is connected to Arduino Pins 6, 7, 8, 9
  • H-bridge [Motor A] and [Motor B] pins are connected directly to the two motors

Below is Arduino code by Hackers member Luke to control this.

// Luke Madden, CoderDojo Athenry
// Control motors using a H Bridge

// The H bridge has 4 input pins: in1-in4
#define in1 6
#define in2 7
#define in3 8
#define in4 9

int fast = 150;// range 1-255
int slow = 80;// slower speed
int hyperspeed = 255;// hits the hyperdrive

void setup() {
  pinMode(in1, OUTPUT);
  pinMode(in2, OUTPUT);
  pinMode(in3, OUTPUT);
  pinMode(in4, OUTPUT);
  Serial.begin(9600);
}

void loop() {
  drive();
}

 void drive() {
  // Test the functions
  Serial.println("move forward");
  forward();
  delay(2000);

  Serial.println("hit the hyperdrive");
  hyperdrive();
  delay(2000);

  Serial.println("go backwards");
  backwards();
  delay(2000);
}

void forward() {
  //makes motor go forwards
  analogWrite(in1, fast);
  analogWrite(in2, 0);
  analogWrite(in3, fast);
  analogWrite(in4, 0);
}

void hyperdrive() {
  //hits the hyperdrive
  analogWrite(in1, hyperspeed);
  analogWrite(in2, 0);
  analogWrite(in3, hyperspeed);
  analogWrite(in4, 0);
}

void backwards() {
  //makes motor go backwards
  analogWrite(in1, 0);
  analogWrite(in2, fast);
  analogWrite(in3, 0);
  analogWrite(in4, fast);
}

void stopping(){
  //makes it stop
  analogWrite(in1, 0);
  analogWrite(in2, 0);
  analogWrite(in3, 0);
  analogWrite(in4, 0);
}

Handling Interrupts in Arduino

In Arduino, you can set up special functions that are a called depending on the state of some digital pins – these are called Interrupt Service Routines (ISRs). These routines are called separately from the main loop() that is always running, even if the main loop() is in the middle of another operation.

For controlling our robots, our Arduino might receive a signal on a pin, and if we want the robot to react quickly, an ISR can handle it. The ISR can send a signal on a different pin or change the state of a variable.

This code is simple and correctly-working demonstration of how interrupts work. Note that you don’t need to build any circuitry to try this out. A built-in LED on the Arduino, at pin 13, turns on/off depending on whether Pin 2 is connected/disconnected from the the GROUND pin.

There are three main tasks:

  1. Define the ISR function: this is a function declared as void with no arguments: for example, our ISR is called changed and is defined as:
    void changed() { … }
    In our code, it sets the value of a variable called controlState and it turns the LED on/off. Note that the value of controlState is printed out repeatedly in the main program loop, showing how the ISR can change a variable that is used elsewhere.
  2. In the setup() function, set the pin mode of the control pin to INPUT or INPUT_PULLUP (see below for the difference). For example, we have defined the variable control to have value 2 and are setting its mode like this:
    pinMode(controlPin, INPUT_PULLUP);
  3. In setup(), attach the ISR to the pin:
    attachInterrupt(digitalPinToInterrupt(controlPin), changed, CHANGE);

One extra note about the above line of code: all pins have numbers and all interrupts have numbers, and these are not (necessarily) the same numbers. The function digitalPinToInterrupt() returns the interrupt number corresponding to a given digital pin.

Some other things to note:

  • The Interrupt Service Routine (ISR) should be short and run fast: delay() calls are ignored and print() can cause problems.
  • You can’t attach two interrupts to the one pin: use CHANGE and then test pin state
  • If you initiate the pin with INPUT_PULLUP, it is triggered by connecting it to GROUND; otherwise, if you initiate it with INPUT, you need a circuit with 10k resistor.
  • On an Uno, can only attach interrupts to pins 2 and 3.
  • If you are changing a variable in the ISR and need to use it elsewhere, declare it as volatile.

Here is the full Arduino code:

// Michael Madden, CoderDojo Athenry
//
// Test a pin interrupt to which an interrupt service routine (ISR) is attached.
// When the control pin is connected to GROUND, the LED on the board is turned on.

// Things we have figured out:
// * The interrupt service routine (ISR) is a function declared as void with no arguments.
// * It should be short and run fast: delay() calls are ignored and print() can cause problems.
// * You can't attach two interrupts to the one pin: use CHANGE and then test pin state
// * If you initiate the pin with INPUT_PULLUP, it is triggered by connecting it to GROUND;
// * otherwise, with INPUT, you need a circuit with 10k resistor.
// * On an Uno, can only attach interrupts to pins 2 and 3.
// * If you are changing a variable in the ISR and need to use it elsewhere, declare it as volitile.  

const byte controlPin = 2; // Want to react when this pin is triggered
const byte ledPin = 13; // no circuit needed: there is a built in LED on 13
volatile int controlState = 0; // will change this value in ISR

void setup() {
  pinMode(ledPin, OUTPUT);
  pinMode(controlPin, INPUT_PULLUP);
  attachInterrupt(digitalPinToInterrupt(controlPin), changed, CHANGE);

  Serial.begin(9600);
}

void loop() {
  // The main loop does not do much, it just prints out the value of the
  // control pin's state every 2 seconds.
  Serial.print("Current value of control pin = ");
  Serial.println(controlState);
  delay(2000);
}

void changed()
{
  // This is our interrupt service routine.
  // It is triggered when the control pin changes,
  // so we check its state and turn on/off the LED.
  //
  controlState = digitalRead(controlPin);
  if(controlState > 0) {
    digitalWrite(ledPin, HIGH);
  }
  else {
    digitalWrite(ledPin, LOW);
  }
}

Bodgers – Motors and Robots

This week in the Bodgers group we looked at controlling motors and robots withe the Raspberry Pi.

You can find the code for this weeks session here and my notes are here motors and robots

We also talked about ideas for the projects we will be working on for the rest of the year. Tomorrow we will continue to look at robots and we will also do some brain-storming for our projects.

See you then.

Declan, Dave and Alaidh

Creators: Robot Arm

cpccg_screening_robot

This week we looked at a representation of a robot arm. The body of our robot is allowed to slide horizontally and the arm can pivot at the shoulder (where the upper arm attaches to the body) and at the elbow (where the lower arm attaches to the upper arm).

Transformations

An important point about this project was to show how transformations add up together. Transformations include translations (moving in straight line), rotations (turning about a pivot point) and scaling (changing size). We’ve used translations and rotations for our robot.

In P5, the origin, or place where the x and y coordinates are both zero is at the upper left-hand corner of the screen. The x coordinate gets bigger as we move right and the y coordinate gets bigger as we move down.

When we translate, we move the origin to somewhere else. This is handy for a few reasons but if we are performing rotations. All rotations happen around the origin, wherever that happens to be at the time.

This diagram shows all the transformations we use for our robot:

Robot DOFs (1)

  1. Translate to move the origin to the centre of the robot body
  2. Translate to move the origin to the shoulder
  3. Upper arm rotation at the shoulder
  4. Translate to move the origin to the elbow
  5. Lower arm rotation at the elbow

Because these transformations stack up on top of each other, this is what each part experiences:

  1. Body – Transformations: 1
  2. Upper Arm – Transformations: 1, 2, 3
  3. Lower Arm – Transformations: 1, 2, 3, 4, 5

The body is only affected by one, but the lower arm is affected by all five.

Movement

To move the robot, we set up three variables:

  1. bodyPos to store the body position (our first transformation)
  2. upperArmAngle to store the rotation at the shoulder (our third transformation)
  3. lowerArmAngle to store the rotation at the elbow (our fifth transformation)

We created a function called handleInput() called from the draw() function (which is called every frame). In that we used the keyIsDown() function from P5 to check for keys being held down. We made the left/right arrow keys move the body horizontally, the up/down arrow keys rotate at the shoulder and the Z/X keys to rotate at the elbow.

Source Code

As always, the code can be downloaded from our GitHub repository.

Bodgers – Pioneers Challenge Results

Hello again Everyone.

I didn’t realize when I posted yesterday that the results of the Pioneers Challenge were out today.

Here is the Raspberry Pi Blog post announcing the winners.

Congratulations to Barry, Kevin and Zack the Zombie Trolls whose project Zombie In The Middle won the We Appreciate What You’re Trying To Do prize. the following is a quote from the website.

“Playing piggy in the middle with zombies sure is a unique way of saving humankind from total extinction! We loved this project idea, and although the Zombie Trolls had a little trouble with their motors, we’re sure with a little more tinkering this zombie-fooling contraption could save us all.”

IMG_20170930_133533

Well done to the three boys and well done to all the Bodgers because all the Pioneers teams helped each other out, most importantly at the beginning when we were trying to come up with ideas for our entries.

See you all in January.

Declan, Dave and Alaidh

Bodgers – Videos From The Pioneers Challenge and Robot Wars Bodgers Style

Last Saturday we finished up for the break with our Christmas party. We played video of the projects we entered in the Raspberry Pi Foundation’s Pioneers Challenge “Only You Can Save Us”. The challenge involved teams working on projects that would help people if there was a zombie apocalypse.


We then gave everyone an opportunity to have a go at a robot wars style game with our Raspberry Pi robots.


Happy Christmas  Everyone, we’re really looking forward to next year and building more cool stuff.

Declan, Dave and Alaidh.

Bodgers – Making More Progress

This weekend in the Bodgers Group our three Raspberry Pi Pioneers teams continued to work on their projects.

The Zombie Herders were working on a PIR (passive Infra-red) sensor which is the type of sensor commonly found in burglar alarms.

IMG_20171022_141129

They used the GPIOZero library for Python and sample code which can be found here. However they didn’t have much success so we need to do more testing on our sensor and if necessary order a new one.

The zombie trolls worked on creating a 3-D model for their project using FreeCAD which they will print out when we return after the break.

stopper_3d

I’m afraid I not allowed to discuss what it will be used for at this point :-).

Team Green Fingers worked on more scripts for their project including using their Arduino and a relay to switch a 12 volt automobile bulb on and off.

flash

As with most projects like this we had a little trouble getting it going as we forgot to set the pin we used on the Arduino as an Output. Thanks to James and his Dad for bringing in the 12 volt powerpack.

We are off for the next two Saturdays and we’re back again on the 11th of November.

See you all then

Declan, Dave and Alaidh.


Bodgers – Making Movies

There was great excitement at this weeks session as the Pioneers teams opened their gifts from the Raspberry Pi Foundation. Each team member received a Raspberry Pi USB wristband, a Pioneers Lanyard, stickers and some sweets. Each team also got a copy of the Makers Guide to the Zombie Apocalypse and some zombie make-up.

We also got to see what was in our “Mystery Box” and I’m sure we are going to get great use out of it in future projects.

We then talked about the videos we’ll need a part of our entry and we had a look at a video from Pioneers on we need to put in our videos.

Then the teams spent some time planning out what they are going to do for their films.

Next week we are going to get back to working on our our projects.

See you then.

Declan, Dave and Alaidh

Bodgers – Make Your Ideas

Hi Everyone

We started today’s session with some information about the group and our plans for the year ahead.

We spoke about Digital Making, Digital Makers use technology to make something and learn about that technology while doing so. Technology available to Digital makers includes Raspberry Pi, Arduino, Fritzing, Sensors, Displays, 3D Printing and basic components.

Our Philosophy in the Bodgers group is that the most important thing is to get the project working. We don’t worry about how secure, how robust or how pretty our project is as long as it works long enough to show it works and that we understand how it works. We will use whatever resources we can get our hands on, online tutorials, online code, cheap components and cheap and easily available materials.

This year we will focus on projects, I will do some demos but there won’t be classroom type sessions. We would like you to work in teams. We will do one project between now and Christmas and another between Christmas and June. We would like everyone to work on the Pioneers Challenge between now and Christmas, after Christmas you can work on anything you want maybe Coolest Projects, Scifest or even PiWars.

We watched an excellent Video by @estefanniegg who takes a similar approach to project building as we do.

We then had a brainstorming session for the Pioneers Challenge and as you can see we had some great ideas.IMG_20170923_134312

We have narrowed down our ideas to a few projects and the mentors are busy trying to source materials for next week.

We will enter some of our projects next week and we might have a look at 3D printing software.

See you then,

Declan, Dave and Alaidh

By the way don’t forget to check out our Twitter account @CDA_Bodgers

Bodgers – Belts And Other News

Hi Everyone.

I haven’t posted here for a while as we’ve been working on projects for the past few months.

First of all I would like to congratulate the seventeen Bodgers who were awarded belts yesterday. It’s been a pleasure mentoring you and you are all welcome to return in September and spend another year with us in the Bodgers group.18673158_1465672443453618_5357526197824397574_o

I would like to thank Dave for helping me out with the group and thanks also to Alaidh who helped us up until Christmas.

Dave and I are already making plans for next year and we’re very excited about what we are going to do. Tune in next September when we will have more information.

In other news the CoderDojo Foundation and the Raspberry Pi Foundation have merged. I’m sure this will make very little difference to what we do day to day at CoderDojo Athenry, it may mean more resources will be available for us as a group involved in STEM activities. You can read more about it from CoderDojo here and from Raspberry Pi here.

Enjoy the summer and see you in September.

Declan

Bodgers – Robot Duels At CoderDojo Athenry

Hi Everyone

As part of the show and tell session the Bodgers group held a Robot Wars Style event. We used the two wheeled robots from last year controlled by Nintendo Wii Remotes.

If you want to build your own two wheeled robot you can check out my notes from last year here.

To control the robots using the Wiimote I followed Matt Hawkins Wiimote tutorial from here (If you have a Raspberry Pi 3 you can skip step 2 as Bluetooth is already working. Don’t forget step 3  install Python Cwiid). I then added the code to control the robot using GPIO Zero, you can get my code wii_robot.py here.

Happy Christmas everybody.