Thanks to Ninja James for these excellent and detailed instructions, and for setting up a GitHub repository for us to share our code when working on the Countries Mod.
How to stage files to a repository.
WARNING: Please upload your mod in a folder with your topic.
Step 1. Create a folder with the name of the topic your doing for the country mod.
Step 2. Install git = www.git-scm.com, keep pressing next as we will not need any changes to the installation.
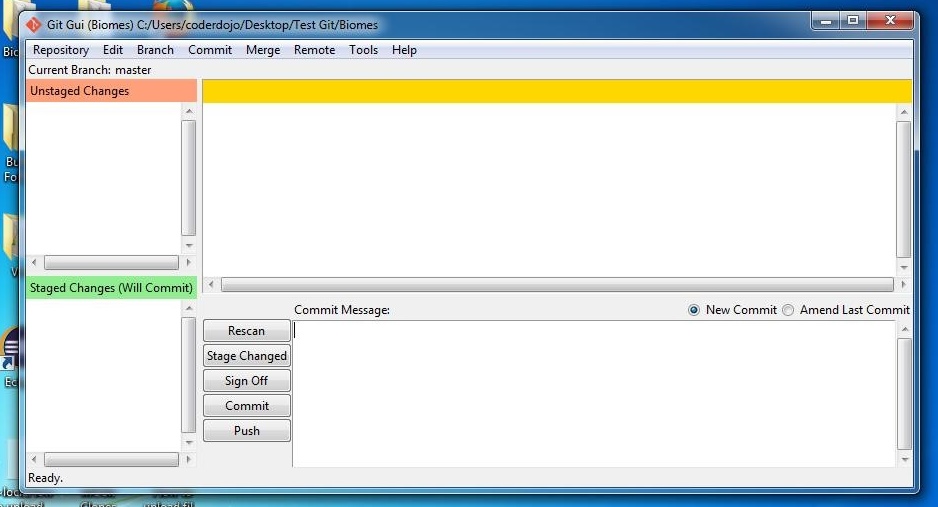
Step 3. For example I have my folder on my desktop, so I right click my desktop and click “GIT GUI”. A box should pop up.
Now the Target directory is your folder, click browse and find your folder, for example mine would be on the desktop, its called biomes, select your folder.
Example : My target dir is C:/Users/coderdojo/Desktop/Test Git/Biomes.
Click Clone, This may take a couple of minutes depending on your internet speed.
Step 5. A window should pop up, looks like this ——->
For this example im going to put 2 files in my CLONED FOLDER!. WARNING: Put your your forge files in a folder with your name. Then once your have done that click [RESCAN], your forge files should pop up. Then click [STAGE CHANGED] and click [YES], all your files should move into the [GREEN AREA]. In the box that says [COMMIT MESSAGE], put a message that is related to your Topic in the mod.
Step 6. Click [COMMIT] after you have written your message.
Your files in the [GREEN AREA] should not be there.
Step 7. Now click [PUSH], a box should pop up click push again!
It should ask for my details… Username = FrictionlessPortals
My Password, you will have to ask me through skype, Due to security reasons.
If it says [SUCESS] you’ve sucessfully put your files on github!
If you want more help add me on skype as hypixel.jamertheredstonegamer.
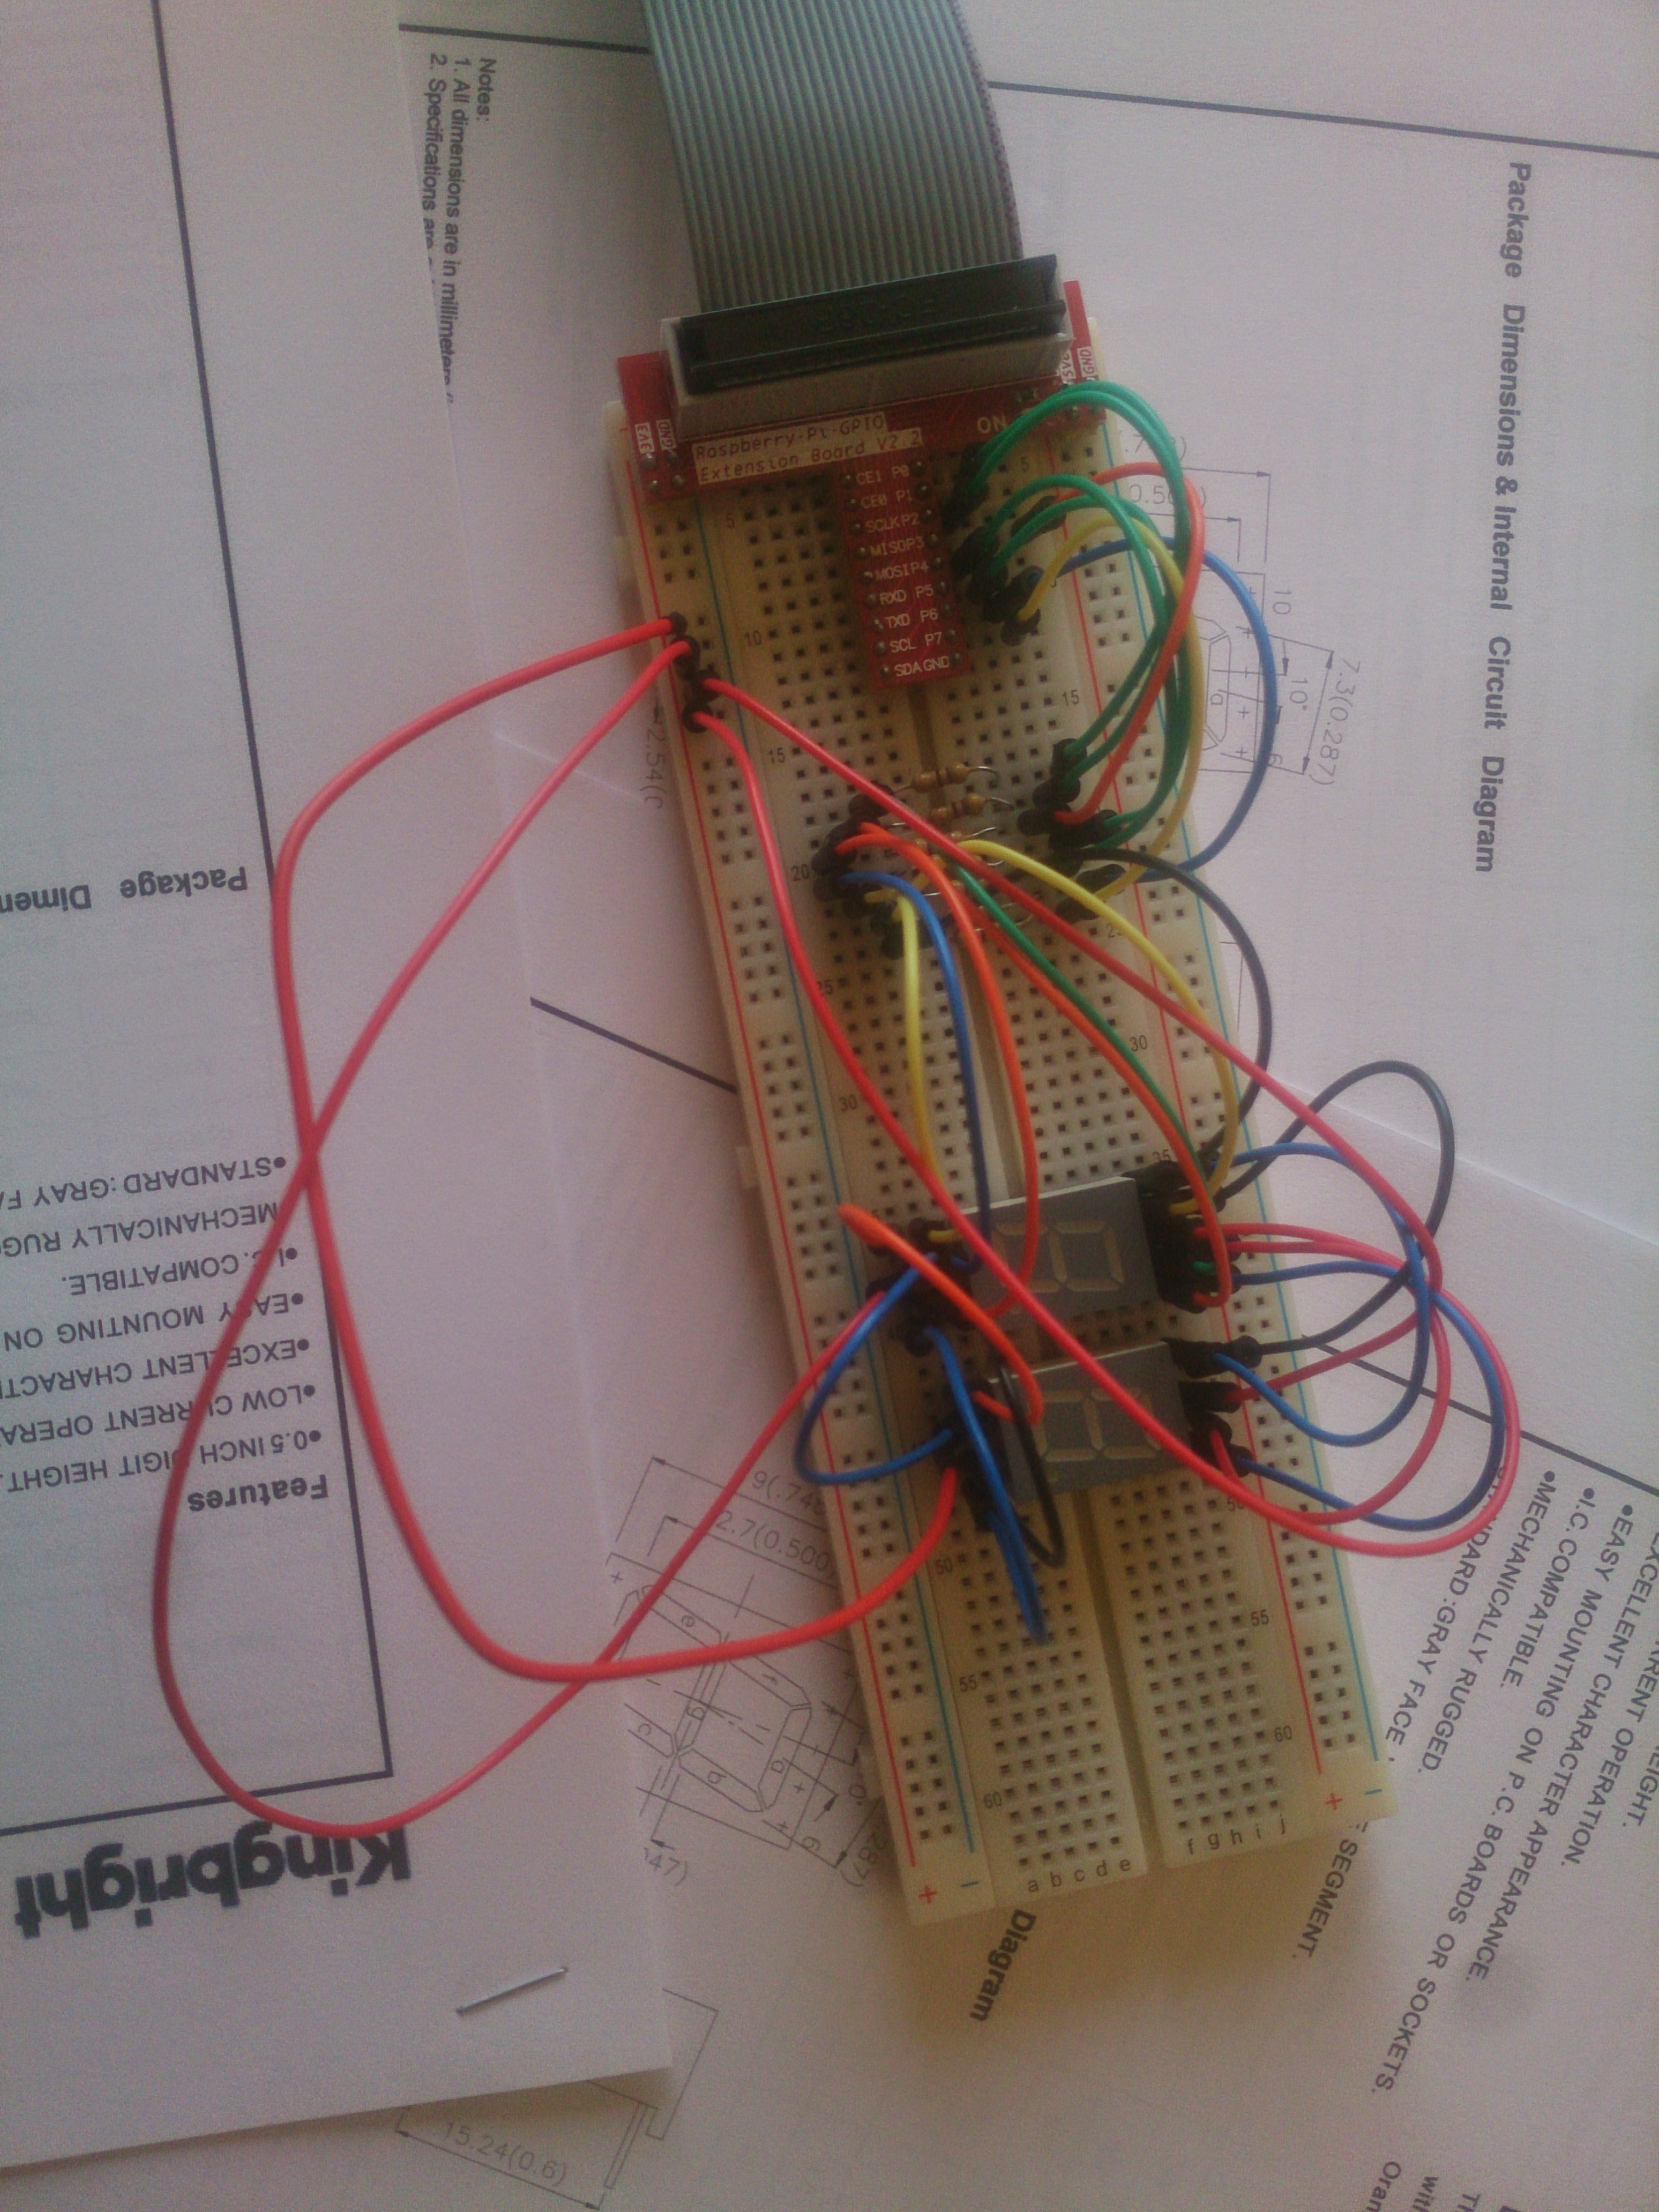
This weekend we continued to explore the Raspberry Pi’s GPIO pins. We had a look at a Data Sheet for a 7-segment display then we went through the code needed to write the number 8 on one and then the Ninjas had a go at writing their own messages on it.
Our 7-Segment display wired up and ready to go.
Afterwards we tested some code for sending data to two 7-Segment displays by flashing each LED on and off for a fraction of a second and we also had a look at the time.strftime() method which is useful when we need the “time of day” in our code.Next week we will do a little more work with clocks and we will start putting together a measuring device which uses the HC-SR04 Ultrasonic Sensor.
Thank you all for coming yesterday on such a lovely day.
Thank you to Sean Shanley for demoing a 2D plotter that is controlled by Arduino, with 3D printed parts, and programmed with a Scratch variant called mblock.
The Arduino kits are available to buy on Amazon and the website where you can get all the ideas and instructions is called Instructables.
This week we did a simple Piano.
We only had to draw two keys, and then could duplicate these and change the names. The same applied to the code. The code is the same for each key apart from one small change so the note is the appropriate for the key.
See you all next week, our last session before we have a one week break for the bank holiday and then we will be back working on individual projects, getting ready for our final day and the day we will award the belts.
A few weeks ago we were lucky enough to have a visit from YouTuber and professional Minecraft modder (for the HyPixel server) codename_B (a.k.a. VladToBeHere, a.k.a. Ben).
Ben (left) addresses CoderDojo Athenry. Also pictured: Auburn, Ben’s girlfriend, and our own Michael Madden
Ben is an extraordinary programmer who just breathes code. On his YouTube channel he regularly creates a complete MineCraft plugin in only sixty seconds!
After addressing the entire Dojo, Ben showed our modder group and a few other more advanced coders how to make a quick plugin which causes chickens to explode when a player kills them.
Ben’s mod was written in Java and used the Bukkit API to interface with MineCraft.
Porting the Plugin to ScriptCraft
ScriptCraft is built on top of Bukkit. Because of this, almost all the Bukkit API is available for use in ScriptCraft. I believe there are a few Java-only bits in Bukkit, but I haven’t encountered them.
I realized that, in theory at least, it should be possible to port Ben’s plugin to ScriptCraft. In practice, it proved to be more straightforward than I could have hoped. If you don’t already know Java, ScriptCraft is a great place to start if you want to create MineCraft mods.
ScriptCraft and Bukkit References
When writing something new, you’ll need to be able to look-up things that you are not familiar with. Two references I used for this script, apart from Ben’s original code, were:
Browsing these resources is also a good way to see what can be done and to thereby generate new ideas.
Anatomy of the Plugin
The plugin is composed of four parts:
Two variables to represent the Bukkit types which represent chickens and players respectively
A loading function which we will run when the plugin loads
An event handling function which will be called whenever one entity damages another
A call to the loading function, at the bottom of the file, to make it run as soon as ScriptCraft reads it
Let’s talk about each of these parts in turn.
Variables to Represent Bukkit Types
After a require(‘events’) line (to make sure we can reference the events object), there are two lines as follows:
var bkPlayer = org.bukkit.entity.Player;
var bkChicken = org.bukkit.entity.Chicken;
These are ‘types’ which represent an entity of type Player and an entity of type Chicken respectively. We’ll use them in a bit to determine, when we’re told one entity has damaged another, that it was a Player entity causing damage to a Chicken entity.
The Loading Function
The next part of the script is the loading function. It’s short and really only does two things:
Announces that the plugin has loaded by printing a message to the console
Tells Bukkit that we’d like a function of our own to be run each time that a particular event occurs. In this case it’s the event that fires every time one entity damages another.
Here’s the code:
// The function which will run when we load this module
var _loadMod = function()
{
  // Announce ourselves to the console
  console.log("Exploding Chickens: [Loading ScriptCraft Mod]");

  // Tie our code into the event that fires every time one entity damages another
  events.entityDamageByEntity(_entityDamageByEntity);
}
We’re passing events.entityDamageByEntity() the name of our function we’d like to have run. That function (_entityDamageByEntity) and this function (_loadMod) both have underscores at the start of their names. It’s a JavaScript convention which indicates that we’re never be calling these functions by name from outside this file. They’re private or internal functions.
The Event Handling Function
This is the most complex part of the module, but not terribly so. Here’s the code:
// The code that we want to run each time one entity damages another
var _entityDamageByEntity = function(event)
{
  // Find out, from the event, who's getting damaged and who did the damage
  var damagedEntity = event.getEntity();
  var damagingEntity = event.getDamager();

  // If it's a chicken getting damaged by a player, game on...
  if (damagedEntity instanceof bkChicken && damagingEntity instanceof bkPlayer)
  {
    // Announce in the console that we've detected a player damaging a chicken
    console.log("Exploding Chickens: [A player damaged a chicken]");

    // Schedule a task to run in five seconds.
    server.scheduler.scheduleSyncDelayedTask(__plugin, function()
    {
      // Check to see if the damage brings the chicken's health
      // down to, or below, zero. If so, it's dead...
      if (damagedEntity.getHealth() - event.getDamage() <= 0)
      {
        // Get the chicken's location
        var loc = damagedEntity.location;

        // Create an explosion at the chicken's location.
        // A big one...
        loc.world.createExplosion(loc, 10.0);
      }
    }, 20 * 5);
  }
}
What does it do?
Gets the entity that caused the damage and the entity that was damaged and check to see if they’re a player and a chicken respectively
If they are a player and a chicken, Schedule a task to run in aprox. five seconds. This task can result in an explosion, so it’s nice to have a little “getting away” time.
When our task runs, see if the amount of damage inflicted was enough to bring the chicken’s health down to zero (or below) and if it was, make a massive explosion where the chicken was.
The Bukkit function scheduler.scheduleSyncDelayedTask() needs a reference to the plugin which is asking for the task to be scheduled. In this case it’s ScriptCraft and there is a special automatic variable, __plugin, which ScriptCraft can use to refer to itself when it needs to.
And that’s pretty much it!
Getting it All Going
The last line in the file is just a call to our _loadMod() function. This will get run immediately by ScriptCraft when it read it, setting the mod into action:
// Run this script as soon as the file's loaded
_loadMod();
Finally
Here’s the mod in action:
Sorry chickens*.
The script file can be downloaded from here. I hope this inspires you to create your own server mods using ScriptCraft.
* The author is a vegetarian and general soft touch who even tends to feel bad about exploding virtual animals…
We completed our Mario game this week. We coded Mario so that he always floated down on to the wall. We added a fraction of a second of a wait so that it appears that he floats as he comes down. This also allows time for you to navigate left or right as needed.
We also introduced a more advanced concept, the Parallax effect, whereby objects further away appear to move slower than objects nearer. We coded mountains and a Sun to demonstrate this.