Notes for weeks 9-12 covering the creation of the lantern, candle, lantern stand and tree.
Copies of files can be found on our Github.
Notes for weeks 9-12 covering the creation of the lantern, candle, lantern stand and tree.
Copies of files can be found on our Github.
This week we:
Making Missiles Destroy the Enemy
To make our missiles destroy the enemy, we first created a new function in missile.gd called _on_body_entered():
func _on_body_entered(body : Node2D):
	body.queue_free()
This function we then connected to the body_entered signal by updating the _ready() function as follows:
# Called when the node enters the scene tree for the first time.
func _ready() -> void:
	body_entered.connect(_on_body_entered)
Now when a body is detected entering the Area2D that defines the missile, that body is removed from the game.
The last part of the process was to set the collision layer and layer mask correctly. Missiles are player projectiles and belong in layer 5 and only interact with enemies, which are layer 4. This is how the correctly set-up layer and layer mask look for the missile:

One quirk at the moment is that the missiles don’t get destroyed when they hit something. We may update this later.
Adding a Score to the GameManager
We first set a class name first in game_manager.gd by editing the first line to read:
class_name GameManager extends Node2D
This will be convenient to us later.
We then added a new exported variable, of type int, called score:
@export var score : int = 0
Finally we also added a function to increase the score by an amount:
func increase_score(amount : int) -> void:
	score = score + amount
Now we have a score we can increase. To allow us to see the score, we added a Label called ScoreLabel to the main scene. We then added a variable in game_manager.gd to allow us to reference it from that code:
@export var score_label : Label
We then assigned this value in the inspector to hold a reference to ScoreLabel:
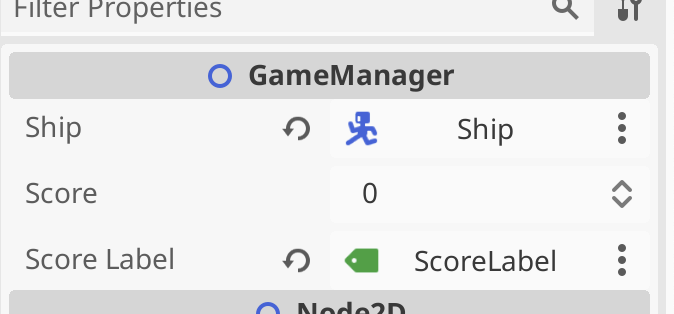
Finally, to update the label with the value of score, we added a _process() function to keep them in sync every frame:
func _process(delta: float) -> void:
	if (score_label):
		score_label.text = str(score)
Because it’s possible that score_label hasn’t been assigned, we check that it’s not null before we set it’s text property. Note the use of the str() function that takes a number and turns it into text.
Increase Score when Enemies Die
One of the signals all nodes have access to is one that is triggered just before the node is about to exit the tree. As an enemy, we can use this as a good time to inform the GameManager that we have died and that the score should be increased.
We first added a new exported score variable to ememy.gd:
@export var score : int = 100
We then also created a variable to store a reference to the GameManager:
@onready var game_manager: GameManager = %GameManager
Godot automatically writes this line of code for us if we drag and drop the GameManager from the tree into our code, holding down the CTRL (or CMD on Mac) key just before releasing the left mouse button. The @onready means that this variable assignment happens once this node is added to the tree. Is is a variable of type GameManager and it looks for a node in the tree with the unique name “GameManager”.
We then created a new function _on_tree_exiting():
func _on_tree_exiting() -> void:
	game_manager.increase_score(score)
And in _ready() we connected it to the tree_exiting signal:
# Called when the node enters the scene tree for the first time.
func _ready() -> void:
	vp_rect = get_viewport_rect()
	set_wander_change_dir_time()
	tree_exiting.connect(_on_tree_exiting)
Now when ever an enemy is removed from the tree, regardless of why, the score in the game manager is increased accordingly.
Adding New Enemy Type
We wanted to introduce a new enemy behaviour: pursuing the player instead of just wandering aimlessly. We also decided to have a percentage that could be dialed up or down so that the enemy could spend part of the time pursuing and part of the time wandering. We added a new exported variable to control this:
@export var persuit_percent : float = 0
We also drag-and-dropped the GameManager into the code (holding down CTRL just before releasing the mouse button) to get this:
@onready var game_manager: GameManager = %GameManager
Then we wrote a new function pick_direction():
func pick_direction() -> void:
	if (randf() < persuit_percent && game_manager.ship != null):
		direction = game_manager.ship.position - position
		direction = direction.normalized()
	else:
		pick_random_direction()
This function checks a random number between 0 -> 1 against the pursuit percentage to see if it should be pursuing the player. It also checks the the reference to the player in the GameManager is set, as it needs this to know where the player is. If these checks both pass, it calculates the direction from the enemy to the player and normalises it (makes it length 1). Otherwise, it picks a random direction instead.
Finally we just replaced the call to pick_random_direction() in _process() to call pick_direction() instead:
# Called every frame. 'delta' is the elapsed time since the previous frame.
func _process(delta: float) -> void:
	wander_change_dir_time -= delta

	if (wander_change_dir_time < 0):
		pick_direction()
		set_wander_change_dir_time()
We then duplicated the existing enemy_0.tscn in the scenes folder as enemy_1.tscn. With a new sprite and updated settings to make it faster, change direction quickly and pursue the player all the time, we got a brand new enemy type.
Getting the Code
All our code for this year is available on our GitHub.
This week we took our Blender creations back into Unity. We started with the same file, ShipsAndEnv3.5,blend, which can be found here on our Teams site (for site members only).

Blender offers extensive export options and we quickly ran through the list. The one we’re going to use is FBX. It’s a widely used format, well supported in lots of 3D software, with good material and animation support.

To export the file, we made sure all object were unhidden, and chose File|Export|FBX. We left all the options as-is except the “Apply Transforms” option, which we selected. This option has a warning next to it, as it doesn’t work with animations, but that doesn’t apply to us here.
The resulting FBX file was saved to the same folder as our BLEND file.
To import the FBX file into Unity, we created a new folder called “Model” and dragged the FBX file from Windows Explorer/macOS Finder into it.
We decided to extract the materials from the file. This will allow us to change them in Unity. To do that we selected the FBX in the Model folder in Unity and in the Inspector window, went to the Material tab and chose “Extract Materials”. All the materials in the FBX were then extracted as Unity materials in the same folder as the FBX file.
We then wanted to break apart the combined FBX file into it’s separate parts. To do that we first created a blank scene and dropped the model from the “Model” folder into the Hierarchy window. We checked the Inspector window to make sure it was positioned at (0, 0, 0) and adjusted it if needs be.
Note that Unity showed the model coloured blue in the Hierarchy. This means it was treating it as a “Prefab”. A prefab in Unity is just a collection of GameObjects and components that are treated as a template. It’s easy to create copies of them at run-time.
We want prefabs of all the things in the FBX file, not the FBX model itself. To separate out the bits from the FBX model, we right-clicked on it in the hierarchy and chose Prefab|Break Apart Completely. Not much obviously changed except everything in the hierarchy turned black, indicating it was no longer a prefab, just normal objects.
We then created a new folder called “Prefabs” and dragged everything inside the FBX model (but not the FBX model itself) into it. That’s all you have to do to make something you already have in a Unity scene into a prefab, drag it into the Project window. Now we can create copies of all these objects at run-time very easily.
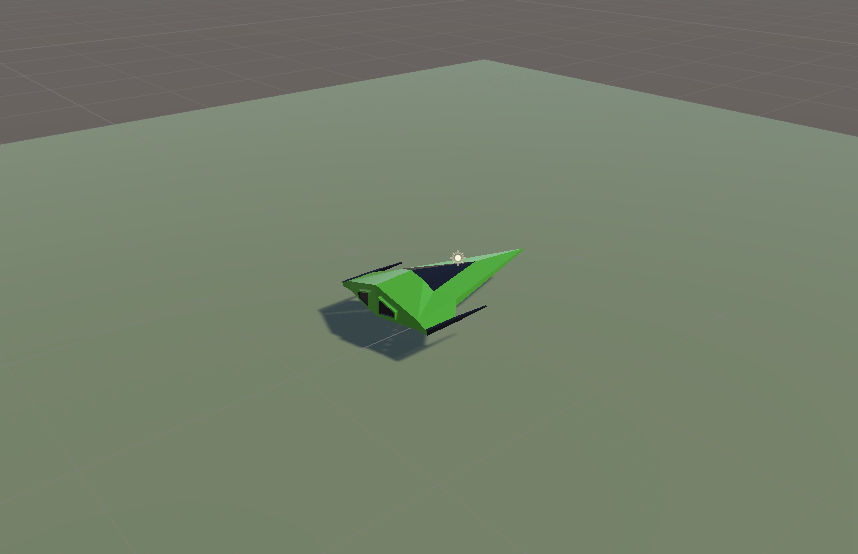
To add our ship to the scene, we dragged the Ship prefab from the Prefabs folder and dropped it onto the Player gameobject in the Hierarchy. The Ship model was then a child of the Player object. We needed to rotate the Ship by -90 around the Y axis to make it point in the correct direction. We also set the scale of teh Plater object to (1, 1, 1) and removed the Mesh Filter, Mesh Renderer and Box Collider components from Player, as these were no longer needed.
Our game looks better already with a ship model rather than a flying mattress!
We tested two simple components on a test cube added to the scene. One which created constant movement in a particular direction and the other which deletes the attached gameobject once we’ve traveled a set distance from where we started.
The first of these, ConstantMovement.cs looks like this:
using UnityEngine;

public class ConstantMovement : MonoBehaviour
{
  public Vector3 Direction = Vector3.forward;
  public float Speed = 10.0f;

  // Update is called once per frame
  void Update()
  {
    Vector3 offset = Direction.normalized * Speed * Time.deltaTime;
    transform.position = transform.position + offset;
  }
}
Two public variables define the direction and speed respectively. In Update() we calculate how to move this frame by multiplying the normalised version of the Direction (normalised meaning the length is set to 1) by the speed and Time.deltaTime (the time since the last frame). We then set a new value for the position by adding this offset to the previous position.
The second DestroyAfterDistance.cs looks like this:
using UnityEngine;

public class DestroyAfterDistance : MonoBehaviour
{
  public float Distance = 10.0f;

  private Vector3 _initPos;

  // Start is called before the first frame update
  void Start()
  {
    _initPos = transform.position;
  }

  // Update is called once per frame
  void Update()
  {
    Vector3 offset = _initPos - transform.position;
    float offsetDist = offset.magnitude;

    if (offsetDist >= Distance)
    {
      Destroy(gameObject);
    }
  }
}
It just has once public variable, the distance the GameObject is allowed to travel. It also has one private variable, set in Start(), which stores the initial position.
In Update() we check how far we’ve travelled by getting the vector difference between the start position and our current position and then getting it’s magnitude (aka length). This tells us how far we have moved. if this distance is greater than the the specified Distance, we call Destroy(gameObject) thereby destroying the GameObject this component is attached to.
All the code we’re made this year is on our GitHub. It can be found here. If you don’t have the latest version of our code before any session, use the green Code button on that page to get the “Download ZIP” option which will give you a full copy of all code we’ll be writing this year.
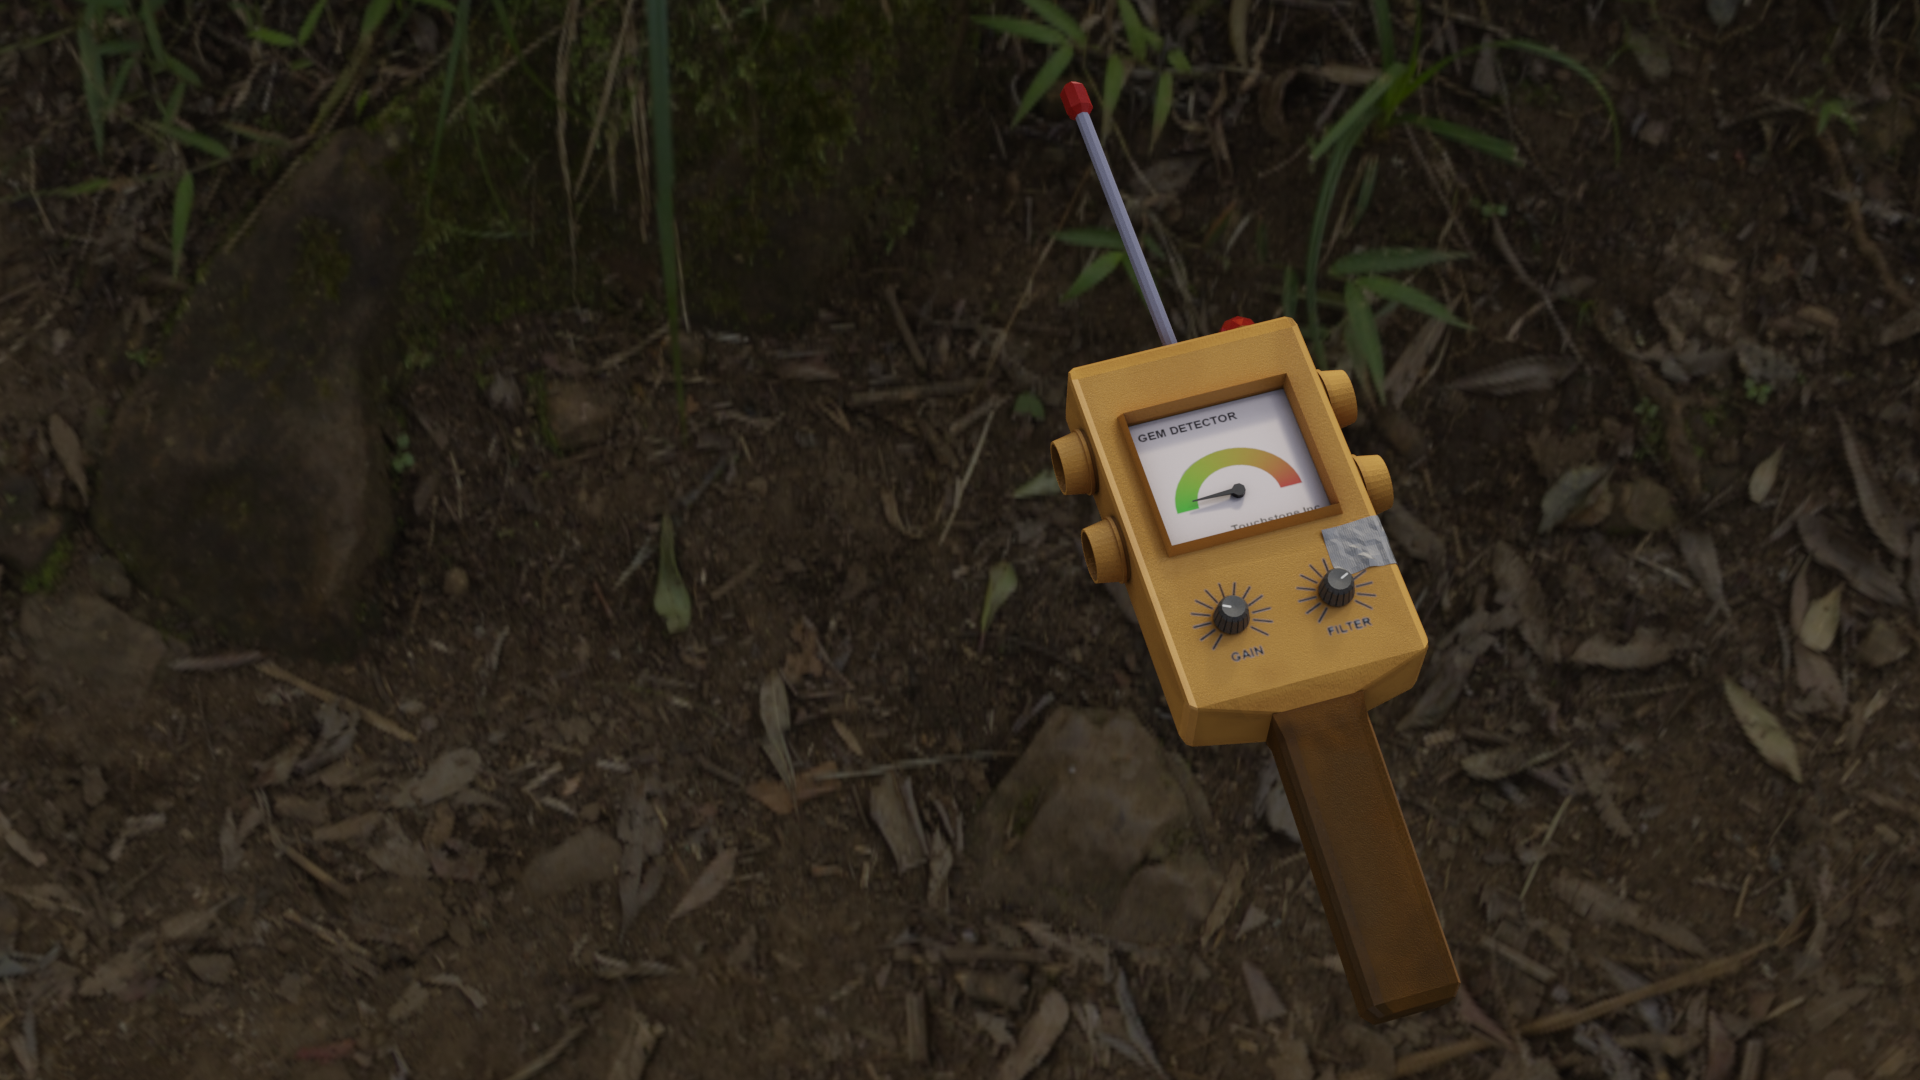
We downloaded the Gem Detector FBX from from our Teams channel and imported it into Unity, in a new folder called ‘Models’. In the Inspector, we used the “Extract Textures” and “Extract Materials” options to take the textures and materials stored inside the FBX and place them into our project as items we could edit. When extracting the textures, Unity warned that two were Normal Maps and offered to mark them as such for us, which we accepted.
A normal map is just a texture file. It is used to cheaply, from the point of view of rendering time, provide fine detail in models. The little video below illustrates this. There are two square plates, side-by-side.
The plate on the left has been modelled to have a circular feature that rises up in a lip and then back down again. It uses many vertices and polygons to model this.
The plate on the right is just a single quad, but it has a normal map applied to it. How was this normal map created? It was “baked” from the plate on the left. This plate is always flat, but it reacts to light as if it isn’t.
See how they both behave very similarly when a light is passed over them. It isn’t until the camera tilts down to a very low angle that the illusion breaks and the plate on the right starts to look a little odd. The video shows the wireframes at the end so you can see the difference in the two plates from a geometry standpoint.
To light up the detector, we need two elements. A point light to cast light on the rest of the model and an emissive material we can switch to to make the glass cover on the bulb look lit-up.
With our extracted materials and textures, we now had a material called ‘Light Cover’ in our ‘Models’ folder. This is used for the lamp cover at the top of the sensor. It’s supposed to be transparent, so we selected that material and in the Inspector changed the Rendering Mode setting from Opaque to Transparent and we then opened the Albedo colour and reduced the A value (which stands for Alpha and is the degree of transparency) down to about 175.
We then duplicated this material and renamed this copy as ‘Light Cover (On)’. We edited this one to enable emission by clicking on the Emission check box, then opening the Emission Colour dialog and setting the colour to a red colour and finally pressing +2 at the bottom of that dialog once to brighten the colour.
Then we added a new object, a point light, as a child of the “Light Cover” object in the detector and manoeuvred it into position.
Finally, we downloaded a sound file, of a beep sound, from our Teams channel to an ‘Audio’ folder in our project and set it as the AudioClip for an AudioSource component, with Play On Wake disabled, attached to our Light Cover object.
Here is the code for turning on and off the light and swapping the material on the light cover:
using System.Collections;
using System.Collections.Generic;
using UnityEngine;

public class SensorLight : MonoBehaviour
{
  public Material MaterialOff;
  public Material MaterialOn;

  private bool _isOn = false;
  private MeshRenderer _mr;
  private AudioSource _as;
  private Light _bulb;

  // Start is called before the first frame update
  void Start()
  {
    _mr = GetComponent<MeshRenderer>();
    _as = GetComponent<AudioSource>();
    _bulb = GetComponentInChildren<Light>();
  }

  // Update is called once per frame
  void Update()
  {
    if (_isOn)
    {
      _mr.material = MaterialOn;
      _bulb.enabled = true;
    }
    else
    {
      _mr.material = MaterialOff;
      _bulb.enabled = false;
    }
  }

  public void TurnOn()
  {
    _as.Play();
    _isOn = true;
  }

  public void TurnOff()
  {
    _isOn = false;
  }
}
Note that it uses GetComponent<T>() and GetComponentInChildren<T>() to find the different components we need to interact with, rather than having them as public property we’d have to set manually. This approach can be a little easier to maintain.
We downloaded a finished version of the Gem Sensor ProximitySensor.cs script from our Teams channel. Very much based on last week’s code, but with the addition of logic to work out the flashing light’s timing.
The final thing was a very simple class to tie the ProximitySensor and the ItemScatterer together:
using System.Collections;
using System.Collections.Generic;
using UnityEngine;

public class LinkScatterToSensor : MonoBehaviour
{
    public ItemScatterer ItemScatter;
    public ProximitySensor ProximitySensor;

    // Update is called once per frame
    void Update()
    {
        if (ItemScatter.nearestItem != null)
        {
            ProximitySensor.Target = ItemScatter.nearestItem.transform;
        }

    }
}
The code for this week’s project is on our GitHub, as always.
This week we looked at colour and generating textures.
White light contains all other colours; we can see this when a prism splits it into a rainbow. A green object appears green because it absorbs other colors and bounces the green light back and into our eyes.
When we render an object in Blender, or any other 3D software, we want the renderer to generate the highlights (specular reflections) and shadow on the object. Any texture we use should be as free of highlights and shadow as possible.
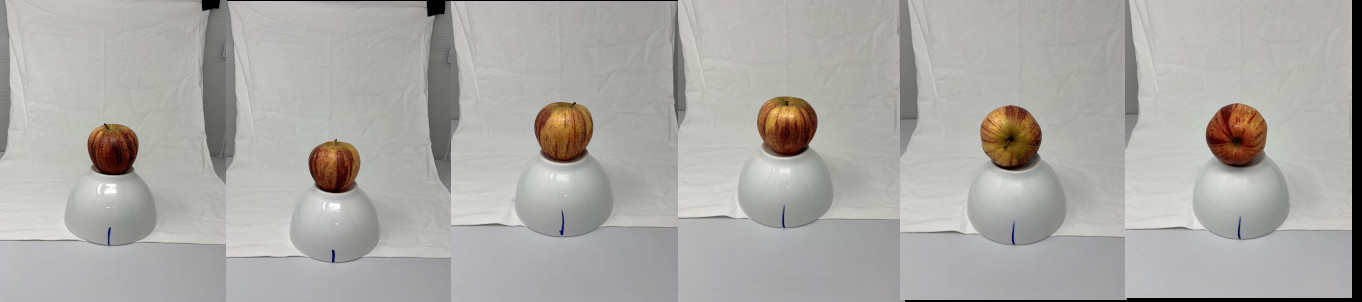
To generate a relatively highlight and shadow-free texture of an apple, we used a pop-up portable photo studio. The interior of this box is white and reflective and lights the object relatively evenly on all sides.

We photographed the object, an apple in this case, at four angles around the circumference and once again for the top and bottom of the apple respectively. This left us with six shots of the apple from all sides.
I then opened each shot in Gimp (the image editing software), and removed as much of the rest of the image, everything that wasn’t apple, as possible. To do this I:
Once I had each photo of the apple cleaned up, I created a new image, and pasted all the individual images into it, scaling them so that they were close to the same size. The result is here:
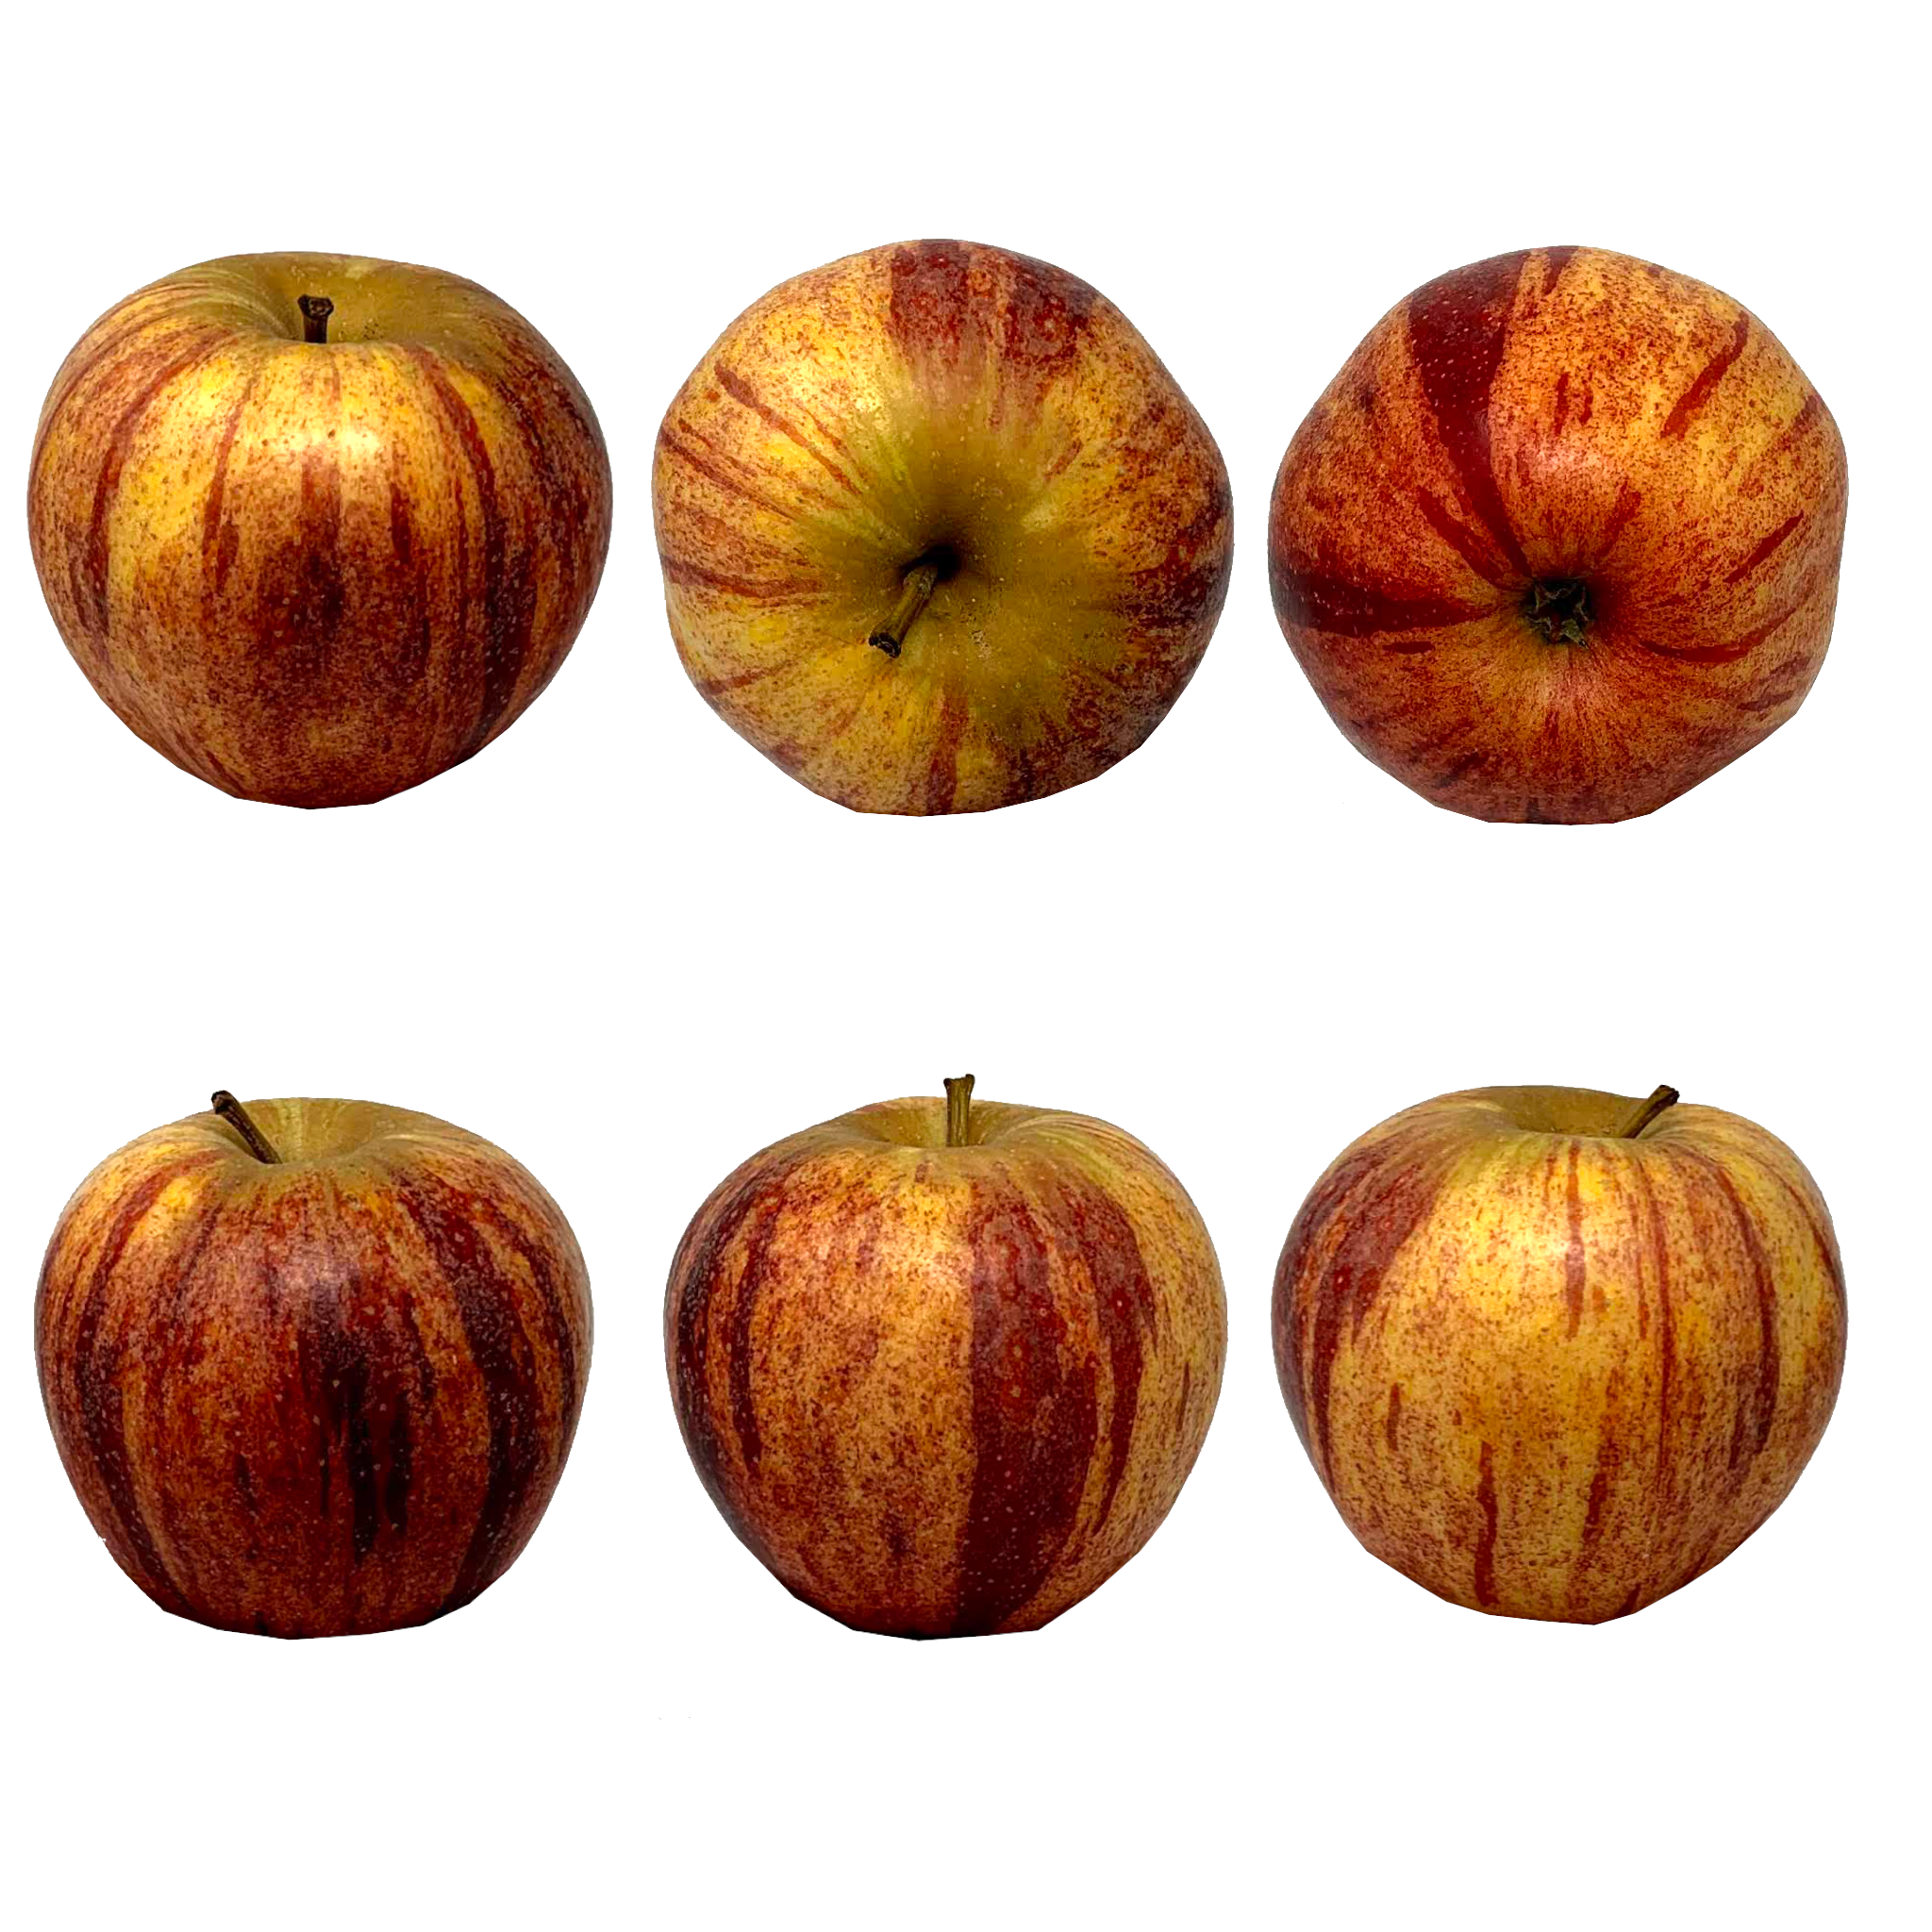
We also built a simple apple model by shaping a UV sphere. Next week we are going to stencil paint the apple model with this texture.
The apple model can be found here.
 These are the notes from our first week of 2013 in CoderDojo Athenry.
This was a really exciting new challenge: to learn about how computers communicate with each other, and apply these ideas to setting up Meshing in Scratch so that Scratch programs running on two different computers can exchange information with each other.
The big ideas behind this challenge were:
We started to apply these ideas to build a multi-player, multi-computer chat game. We will extend this next week and move on to other networked games. Stay tuned!
Here are my notes from the day (PDF format): CDA-S2-Challenge11-NetworkChat
Here is my version of the chat program: http://scratch.mit.edu/projects/cdathenry/2591598 (note that you need a separate version for each person in the chat, and you have to have enabled Mesh networking as described in the notes.)
If you would like a copy of my slides in PowerPoint format, get in touch via Twitter or the comments.
What are we going to do this week:
1. Re Cap on the exam.
2. A Magic Eight Ball, Question and Answer Game.
3. Flow Charts – how to explain code with pictures 🙂
1. Re Cap on the exam
I though we might have a quick review of a couple of the questions from the Exam. There was one question that nearly everyone missed and I think it might have been the way I wrote the question, so we’ll just go over it quickly.
Question 8:
If you want two pieces of code to run together (parrallel processing) circle all the ones that you could use:
a. Broadcast
b Broadcast and wait
c. Green Flag
The Broadcast and wait will NOT run things in parallel, it will Wait for the other code to finsh before continueing.
2. A Magic Eight Ball, Question and Answer Game.
I thought we would use some of the List skills that we used in the Christmas Game to build a Magic Eight Ball type Question and Answer game.
So here are the requirements:
1. A Genie should appear from a Lamp.
2. There should be a friendly Sprite Character who will ask if you if you have any questions.
3. There will be a place to type in your Question
4. Questions can only be ones that have a Yes or No Answer.
5. A nice background to match your friendly Sprite
6. A random answer should be selected from the following list:
It is certain
It is decidedly so
Without a doubt
Yes – definitely
You may rely on it
As I see it, yes
Most likely
Outlook good
Yes
Signs point to yes
Reply hazy, try again
Ask again later
Better not tell you now
Cannot predict now
Concentrate and ask again
Don’t count on it
My reply is no
My sources say no
Outlook not so good
Very doubtful
I decided to use a Genie in the Desert, emerging from a Lamp to answer my Questions.
Here are my Sprites:


And here is my stage:

The Code is Quite simple, again I have used the Stage as the Starting point for all the Code as I think this makes quite good sense as there is only one Stage, but generally many Sprites.
First we have to populate our Answer List with the different possible answers.
Then we can let the Genie know it is time to do the talking…
Now, I added the Lamp as, we need code under the Lamp to get things started. I decided that you should have to rub the Lamp to make the Genie appear. Once the Genie was out of the Lamp, we will let you ask the Genie a Question.
The code, well you know how to populate lists, so I’m not going to go through that.
For the Lamp, we need to check to see if the Mouse is touching the lamp and the Mouse Button is down, if it is we will keep counting up till we reach 10 and then let the Genie take over. We can do that with a Broadcast. But don’t forget that we also want the Genie to appear out of the Lamp, so as we are counting to 10, we need to make the Genie grow.
This is what I came up with…

For the Genie, there are a few pieces of code, one to set him up, one to make him appear and grow, and finally the one where he gets you to ask a Question.

And finally, I came up with a third, invisible Sprite, but it allows the Giraffe on the background to say a few things as well. I came up with another list of things that he could say and populated those at the begining as well.

And I have been really kind and uploaded the finished Scratch Project onto the Scratch WebSite.
