Notes for weeks 9-12 covering the creation of the lantern, candle, lantern stand and tree.
Copies of files can be found on our Github.
Notes for weeks 9-12 covering the creation of the lantern, candle, lantern stand and tree.
Copies of files can be found on our Github.
This week we:
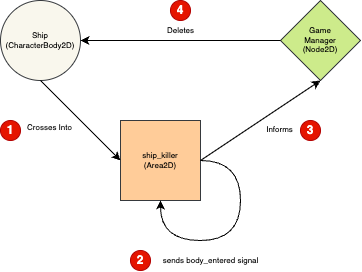
ShipKiller and GameManager
Godot nodes can emit a bunch of signals that indicate when things happen. For something like Area2D we’re usually most interested in signals like body_entered, which emits when something crossed into that area.
We can connect to these signals from our code. This works well when we have a small number of things to connect, but it’s not so useful when we have a lot of things to connect or for allowing us to connect to things dynamically created at run-time.
For our ShipKiller, we wanted a script that we could attach to any Area2D node and not require any further set-up for it to work. This will allow us to really easily use it for static obstacles, enemies and even enemy projectiles.
To make this work so simply, we made the GameManager class and attached it to a node of the same name. We gave this node a unique name. This means two things:
Here’s out basic game_manager.gd script:
extends Node2D

@export var ship : Node2D

func inform_body_entered(body) -> void:
	if (body == ship):
		ship.queue_free()
and here’s our ship_killer.gd script:
extends Area2D

func _on_body_entered(body: Node2D) -> void:
	%GameManager.inform_body_entered(body)
Here is the sequence of actions:
Enemy and Wandering Behaviour
We designed a multi-frame animated sprite at https://www.piskelapp.com/ and imported it into Godot as a spritesheet.
We created an Area2D node and called it Enemy0. Under that we placed a CollisionShape2D node, with a 32×32 RectangleShape2D defining it’s shape. We also placed an AnimatedSprite2D and used our enemy sprite sheet to define the animation.
We also added a Node2D under Ememy0, called it Mover and added a new script to it. This script is intended to be attached to the child of an existing node and so we’ll always be moving the parent, not the node the script is attached to. Again, this is to help us reuse this general purpose script.
Here is the version of mover.gd that we wrote:
extends Node2D

@export var direction : Vector2
@export var speed : float
@export var wander_time_min : float
@export var wander_time_max : float

var parent : Node2D
var vp_rect : Rect2
var wander_change_dir_time : float

# Called when the node enters the scene tree for the first time.
func _ready() -> void:
	parent = get_parent() as Node2D
	vp_rect = get_viewport_rect()
	set_wander_change_dir_time()

func set_wander_change_dir_time() -> void:
	wander_change_dir_time = randf_range(wander_time_min, wander_time_max)

# Called every frame. 'delta' is the elapsed time since the previous frame.
func _process(delta: float) -> void:
	if (parent == null):
		return

	wander_change_dir_time -= delta

	if (wander_change_dir_time < 0):
		pick_random_direction()
		set_wander_change_dir_time()

	correct_dir_for_bounds()
	parent.position += direction.normalized() * speed * delta

func correct_dir_for_bounds() -> void:
	if (direction.x < 0 && parent.position.x < 0):
		direction.x = 1
	if (direction.x > 0 && parent.position.x > vp_rect.size.x):
		direction.x = -1
	if (direction.y < 0 && parent.position.y < 0):
		direction.y = 1
	if (direction.y > 0 && parent.position.y > vp_rect.size.y):
		direction.y = -1

func pick_random_direction() -> void:
	direction = Vector2.ZERO
	while (direction == Vector2.ZERO):
		direction.x = randi_range(-1, 1)
		direction.y = randi_range(-1, 1)
The exported variables in the script define a direction of travel, a speed and a minimum and maximum time before the item changes direction.
Private variables are used to store the parent node and the viewport rectangle (the bounds of the screen) and the time until we are going to change direction next.
In the _ready() function we set the parent and viewport rect variables and we call a function set_wander_change_dir_time() which randomly picks a time until the next direction change between the minimum and maximum values we’ve supplied.
In _process() we first make sure that the parent variable has been set; if it hasn’t we leave immediately. We then take delta (the time since the last frame) away from the time until the next direction change. This has the effect of counting it town to zero.
Once the time until the next direction change has dropped to zero or below, we call pick_random_direction() to pick a new direction and we also call set_wander_change_dir_time() to set the time to the next direction change.
The function pick_random_direction() is pretty simple, but it is setup to keep picking random directions until the direction isn’t (0, 0), which would cause the item to stop dead. The function will return one of eight directions: up, up right, right, down right, down, down left, left or up left.
Finally the code compares the direction we’re travelling in and how close we are to the edge of the screen in that direction and reverse the direction we’re travelling if we’re going to cross the edge and go off the screen.
Once all that’s done, we actually move the parent’s position.
Getting the Code
All our code for this year is available on our GitHub.
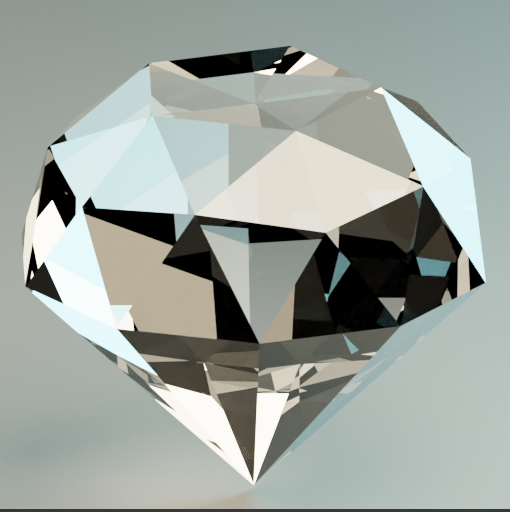
This week we started a new game called Gem Search. Here are some of the key design points:
We started first by creating a new project called “Gem Search”, using the 3D core template.
We took two free assets from the Unity Asset store as a basis for our game:
We logged into the Asset Store using the same login we use for Unity, searched for the above assets and on the web page for each one, chose “Add to my assets”.
After that, we returned to Unity and opened the Package Manager from the Window menu. In the package manager we changed the option from “Packages: In Project” to “My Assets”.
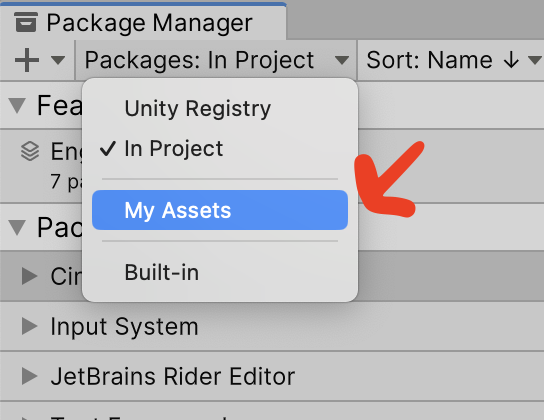
Our two packages from the Asset Store were then visible. We downloaded and imported them both. For the Starter Assets – First Person Character Controller package, there was an import warning about switching to the new input system, which we accepted.
We then spent a little time examining the assets we’d acquired; both asset packs have demo scenes in them.
We opened the LowPoly Environment Pack\Demo\Demo 3 scene and, after creating a Scenes folder at the top-level of our project, saved a a copy of this scene there as “Main”.
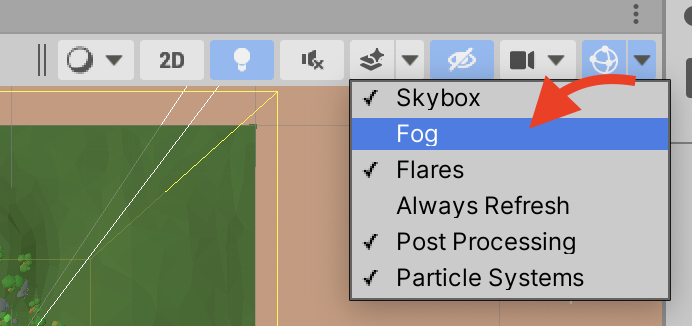
We then did a few adjustments. First we deleted the existing Main Camera. Immediately the fog in the scene was apparent (settings on the camera was suppressing it). We looked at where the fog settings were specified (select Window | Rendering | Lighting and then look on the Environment tab of this panel) and saw how it was causing a problem for the Scene View if we were zoomed out far enough to see the entire scene. We disabled the fog in the Scene View (it will still be visible in the game) from this drop down:
We noted that the entire terrain was offset by -2.6m vertically and rotated by 100% around the vertical. It woulds suit us better if it was square to the world and at (0, 0, 0). The difficulty was the if we moved or rotated the terrain, nothing would move with it and all the trees, bushes, rocks, etc. would end up misplaced. The solution that we followed was as follows:
Now the environment is still organised as before, but everything is neat and square.
The ground isn’t level and we are going to be looking for the height of the ground at any point we want to position a gem using the something called Physics.Raycast(). A ray-cast shoots an invisible ray looking to see if it hits a collider of any sort. We can control many things about this operation including:
All GameObjects start out in the “Default” layer, but it’s often handy to put things in specific layers when we want to be specific about them. This is one of those times. With any GameObject selected, we can add a layer by clicking the Layer drop-down at the upper right of the Inspector and choosing “Add Layer”. We took the first non-assigned Layer and called it “Ground”.

We then filtered the hierarchy to isolate those GameObjects with a MeshCollider by typing “t:MeshCollider” in the box at the top of the hierarchy. This showed that terrain and the rocks were the only ones; this is exactly what we want. We used Shift to select all of them and then changed them to layer “Ground”. We then cleared the box at the top of the Hierarchy to remove the filter.
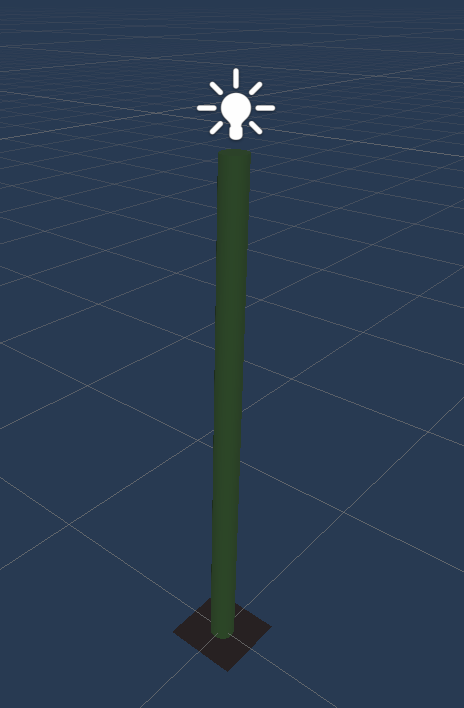
We made a Prefabs folder at the top-level of the project, right-clicked and choose Create | Prefab. We renamed this prefab Lamp Post and combined a plane, a cylinder and a lamp, using some materials that came from the LowPoly Environment Pack, into a simple lamp-like shape 2m tall:
We set out to create something that could scatter gems across our ground surface, comprised of the terrain and the rocks.
We made a scripts folder and created as new C# script there called ItemScatterer.cs.
Editing this we added a single property to start:
public Vector3 size;
This is to represent the size of the area over which we’ll be scattering our gems. It would be nice to be able to see this area. Unity allows you to draw Gizmos which show up in the Scene View (but never in the game). We add the following code:
    private void OnDrawGizmos()
    {
        Gizmos.color = Color.yellow;
        Gizmos.DrawWireCube(transform.position, size);
    }
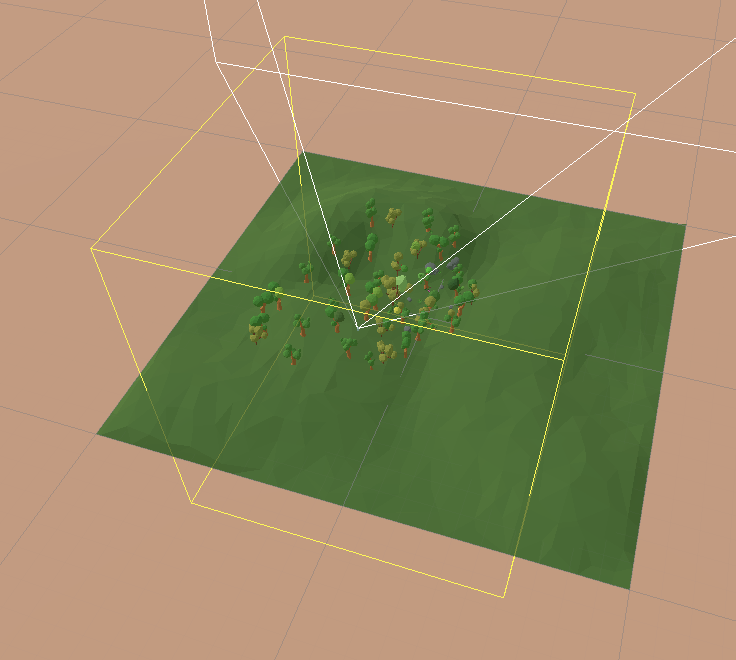
This is going to draw a yellow wireframe box at the position of the GameObject this component is attached to at the requested size.
We add an empty to our game, and call it “Item Scatterer”. We then attach our latest script to it. Setting the size to something like (150, 150, 150) we can see a large yellow box outlining our area. I move the area slightly to centre it closer to where the most trees are on the environment.
We progressed the scatter code a little, but I’ll cover it fully in next weeks notes.
The code for this week’s project is on our GitHub, as always.
This week we started a model of a car using box modelling techniques.
Here are the video instructions:
Here’s a link to the folder where we store all our files . You’ll find a new file in there called car.blend, containing everything we did this week.
This week, we took the mug we’d created the week before and UV unwrapped it again. We’d covered that last week too, and it’s in last week’s notes, but because we’d rushed a little we went over it again.
One the model was unwrapped, we created an image texture and manually painted it. We then used the GIMP image editing program to add an image to our texture.
Step-by-step notes can be found here:
The model file can be downloaded from here.
Hello Everyone,
Great to see you all on Saturday.
We made a slight departure from the games we have done in previous weeks. This weeks game was a mathematical Guessing Game.

We only had one sprite and one large block of code. We had to create variables and figure out all the possible situations that could occur when a guess was made.

Here are the notes in PDF form from this weeks session CDA-S8-Week_09-GuessNumbers.pdf
Martha
Iseult, Julie, Ruaidhrí and Eoin
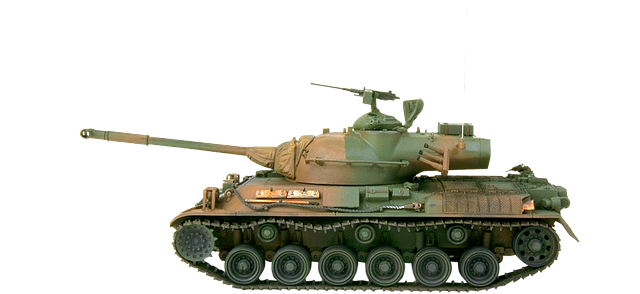
The main purpose of this week’s session was to explore the idea of transforms by using them to make a little top-down tank that we could drive about the screen. I close a tank because:
Origin and Axes
We don’t often use the word, but the top left of the screen (0, 0) can be referred to as the origin.
Another useful word is axes (plural of axis). We have two axes in 2D – the X-axis which normally runs horizontally left-to-right on the screen and the Y-axis that runs top-to-bottom.
Transforms
With these words in hand, let’s talk transform. P5 has three functions that allow us to make transforms. Once we call them, they effect everything that’s subsequently drawn. Here they are:
Design of our Tank class
Our Tank class has five main things:
We draw our tank as if it’s centered on (0, 0) and facing right. We then can use translate(this.pos) to move it and rotate(this.angle) to change its angle.
For turn() all we need to do is to to change this.angle by a requested amount.
For drive(), we do a little more. We:
Getting user input
We then need to get input from the user. In sketch.js we created a new function getInput() and put a call to it in our draw() function.
In getInput() we just look for the arrow keys. If we see Left or Right then we tell the tank to turn. If we see Up or Down we tell the tank to drive. We use the P5 function keyIsDown() for this.
Download
The files for this week can be found on our GitHub repository. The actual files uploaded have expanded the game a little. There are now two tanks and the Tank constructor takes two new arguments for the tank’s colours. The second tank is controlled not with the arrow keys but with WSAD and we use the P5 variables keyIsPressed and key to detect those being held down (as they’re different to the arrow keys).
Hi everyone,
You all did great work on Saturday, there was some quite complex thinking to be done to figure it out but you did great!


 CDA-S8-Week_9_18-MathsGame.pdfCan you improve our game??! Can you figure out how to subtract or multiply instead of add? Can you get the computer to add three numbers together or give the user 3 level options like: easy, medium or hard? The notes for the Maths Game are here:
See you Saturday
Martha
Julie, Ruaidhrí and Eoin

This week you guys amazed us! Kieran and I were blown away by the talent of the ninjas in Creators this week. We set you a task at the start of the session to create a snowy Christmas scene which … Continue reading
Hi everybody,

Hope you all enjoyed finishing up our drawing program. We made good use of costumes this week to make it look like we were dipping our paint brush in each of the different colours.
We also used a variable similarly to how we used in the Piano Game we made. We made it into a slider and then code select the Pen Size we wanted.
Here are the notes in PDF. CDA-S6-Week_08-Paint
See you next week for something a little Christmas themed!
Martha
