Notes for week 15 covering the importation of lantern and tree into our glade and the start of our moth creation.
Copies of files can be found on our Github.
Notes for week 15 covering the importation of lantern and tree into our glade and the start of our moth creation.
Copies of files can be found on our Github.
Please note that there was no Week 14 session as it had to be cancelled owing to bad weather.
When we finished our last session, our EnvController was creating random pieces of environment continuously and scrolling them under the ship. It looked good, but there were gaps between the environment pieces, getting larger the higher we set the environment speed.
Why was this gap happening? Well it’s easy to understand if you look at it this way: if something is moving and you shout stop at a random time, what are the chances that it’s moved some exact distance? Almost no chance of that at all. This is what the current code is doing and why, the faster it’s moving, the larger the gaps get.
The first thing we can do to make this easier is to check more often if the blocks have moved far enough to create a new one. By changing Update() to FixedUpdate() this helps because while Update() is called every frame, FixedUpdate() is called much more often and on a regular timer, independent of frame rate. It’s normally used for physics calculations.
The second thing we can do is to not create our new block at _spawnPoint but to work out the proper position to create it so it’s exactly 100m from the previous one. This is what that code looks like:
void FixedUpdate()
  {
    if (_lastGo == null)
      return;

    float distToLast = Vector3.Magnitude(_lastGo.transform.position -
                                         _spawnPoint);
    if (distToLast >= Spacing)
    {
      Vector3 spawnAt = _lastGo.transform.position + Vector3.right * Spacing;

      _lastGo = CreatePrefab(spawnAt);
    }
  }
I thought we’d done this ages ago, but we never implemented bounds checking for our ShipController. It’s only supposed to be able to move within a fixed area. To achieve this we added a new property to ShipController of type Vector2d called Bounds. We are going to use the x part of this property to store how far we want to allow the ship to move forward and backwards and we’re going to use the y part to store how much we want to allow the ship to move side-to-side. In testing we found good values for this were (20, 40). Here’s the change to the ShipController.Update() function:
    Vector3 newPos = transform.position +
                         new Vector3(moveInput.y * MoveSpeed * Time.deltaTime,
                                     0,
                                     -moveInput.x * MoveSpeed * Time.deltaTime);
    if (newPos.x > Bounds.x)
      newPos = new Vector3(Bounds.x, newPos.y, newPos.z);

    if (newPos.x < -Bounds.x)
      newPos = new Vector3(-Bounds.x, newPos.y, newPos.z);

    if (newPos.z > Bounds.y)
      newPos = new Vector3(newPos.x, newPos.y, Bounds.y);

    if (newPos.z < -Bounds.y)
      newPos = new Vector3(newPos.x, newPos.y, -Bounds.y);

    transform.position = newPos;
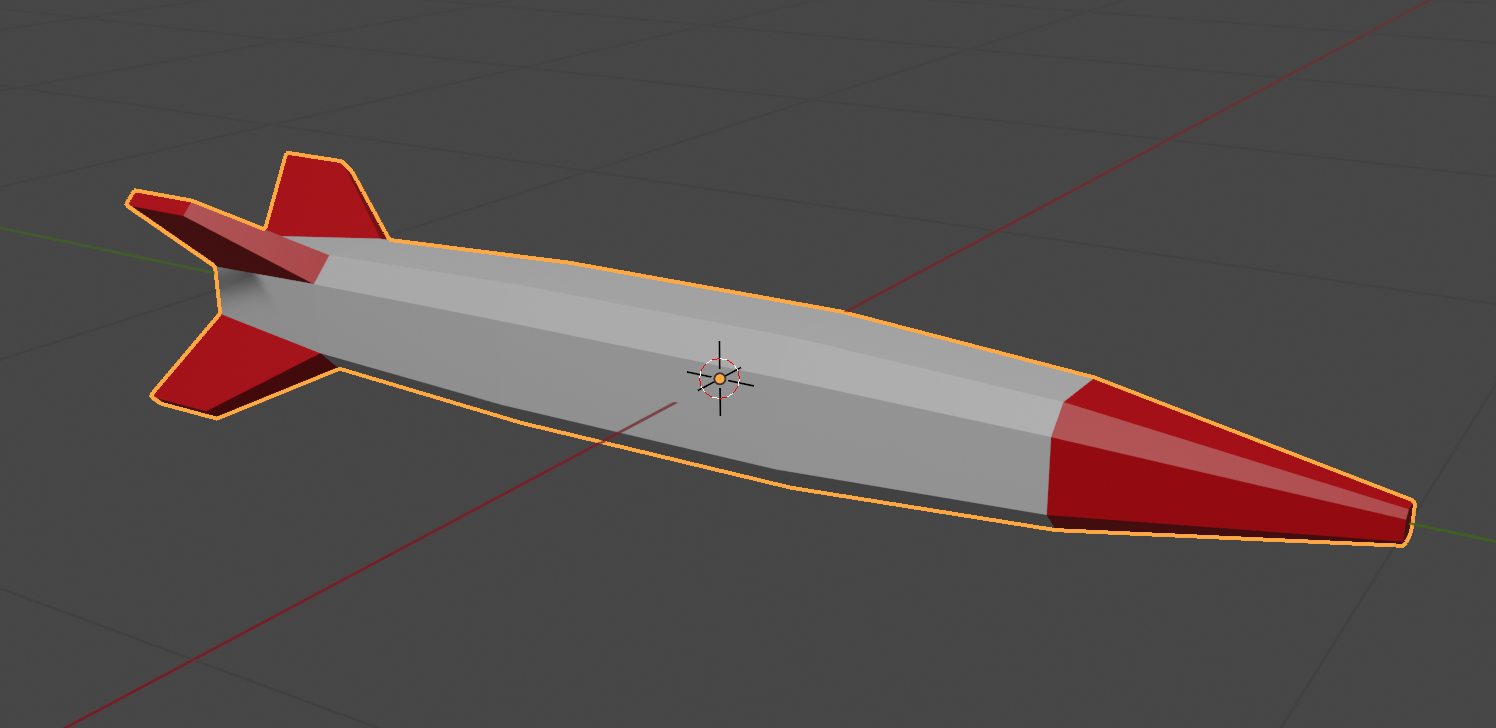
We made a simple missile in Blender and exported it as an FBX file and imported it into Unity. We then created and empty GameObject, placed the missile model under it in the hierarchy and created a prefab from them.
Once in the prefab folder, we edited the prefab and added a ConstantMovement behaviour and a DestroyOnDistance behaviour. This makes the missile fly and eventually destroy itself.

First we had to edit our ShipControlls.inputaction in our Inputs folder by double clicking on it. We then added a new action of type Button called Shoot with a single Binding to the Spacebar on the keyboard.


We used the Save Asset button on the dialog above to save the input actions.
In our code then in ShipController we added the following at the bottom of update:
    // Shooting
    if (_controls.Ship.Shoot.WasPerformedThisFrame())
    {
      Debug.Log("Shoot was pressed on frame " + Time.frameCount.ToString());
    }
This allowed us to see that the shoot command was being picked up with a message getting written to the console every time the spacebar was pressed.
We added two new properties to ShipController:
  public GameObject MissilePrefab;
  public Transform MissileSpawnPoint;
The first is to store our Missile prefab and the second is to store a location under the ship where the missile can be launched from. To create this we added an empty called MissileSpawnPoint under Player in the scene and, in a side view, moved it down below the ship and towards the front of the ship.

We could then assign this and the missile prefab to the appropriate properties of ShipContoller attached to the Player object.
In PlayerController we swapped the call in Update() to Debug.Log() for a call to a new private function Shoot() which we also created, to look like this:
  private void Shoot()
  {
    // Create a missile at the missile spawn point
    Instantiate(MissilePrefab,
                MissileSpawnPoint.position,
                MissileSpawnPoint.rotation);
  }
Every time now that the spacebar is pressed, a missile is created below the spaceship and flies forward for approx. 8 seconds before destroying itself.
It’s unrealistic to be able to shoot missiles as quickly as we can hit the spacebar, so some idea of fire rate is useful. It’s easy to convert a rate into an interval, all you have to do is divide one by the rate to get the interval. For example, if the rate is 2 per second then the minimum interval between shots is 1/2 = 0.5 seconds. Similarly, if the rate is 10 per second then the minimum interval between shots would be 1/10 = 0.1 seconds.
We add a new property to ShipController called FireRate.
public float FireRate = 1.0f;
We also add a couple of private properties:
  private float _minTimeBetweenShots;
  private float _lastShotTime = -10.0f;
The first of these is the minimum interval between shots. We calculate if from the rate, as described above. Since we just need to do this once, we pop the code in Start():
  void Start()
  {
    _minTimeBetweenShots = 1.0f / FireRate;
  }
The second private property stores the last time we fired a missile. We set it to a arbitrary large negative value so that at the start of the game it’s the same as if it’s been ages since we fired a missile, even though we’ve never actually fire one yet.
We can now check the time since we last fired a missile against the minimum time between shots in the Shoot() function:
  private void Shoot()
  {
    if (Time.time - _lastShotTime < _minTimeBetweenShots)
      return;

    // Create a missile at the missile spawn point
    Instantiate(MissilePrefab,
                MissileSpawnPoint.position,
                MissileSpawnPoint.rotation);

    _lastShotTime = Time.time;
  }
All the code we’re made this year is on our GitHub. It can be found here. If you don’t have the latest version of our code before any session, use the green Code button on that page to get the “Download ZIP” option which will give you a full copy of all code we’ll be writing this year.
This week we established a palette for our UI design, brought in a custom font, a custom UI background sprite and build a prefab to use when we find a gem that contained an animation.
Before we talk palettes, it’s good idea to introduce a new counting system called hexadecimal. The counting system we usually use is called decimal and it has ten digits, from 0 to 9. Hexadecimal is similar, but it has 16 digits. Counting in hexadecimal looks like this:
0, 1, 2, 3, 4, 5, 6, 7, 8, 9, A, B, C, D, E, F, 10, 11, 12, 13, 14, 15, 16, 17, 18, 19, 1A, 1B, 1C, ....So 10 (say one-zero, not ten!) written in hexadecimal is 16 in decimal.
The main reason we use hexadecimal when working with computers is that it aligns neatly with the way information is stored inside the computer itself. A byte or 8-bit value can always be written with two hexadecimal digits, a 16-bit value with four hexadecimal digits and so on.
There are combinations of colours that are inherently more pleasing to our eyes and there are rules that allow them to be calculated. There are lots of websites that will calculate a colour palette for you. We chose https://coolors.co/.
You can see that the colour are represented by six hexadecimal digits. This is three bytes (0-255 in decimal, 0-FF in hexadecimal) representing the red, green and blue components of the colour. It’s a tidy way to represent it and easy to share and reuse.
This is the palette I chose for our game:

It’s intended to be bright and cheerful and include some colours with a high contrast with each other.
In Unity we can add these colours to a custom palette, so we can recall them quickly any time we want. At the bottom of any colour-picker dialog you can find the option to create a “Swatch Library”
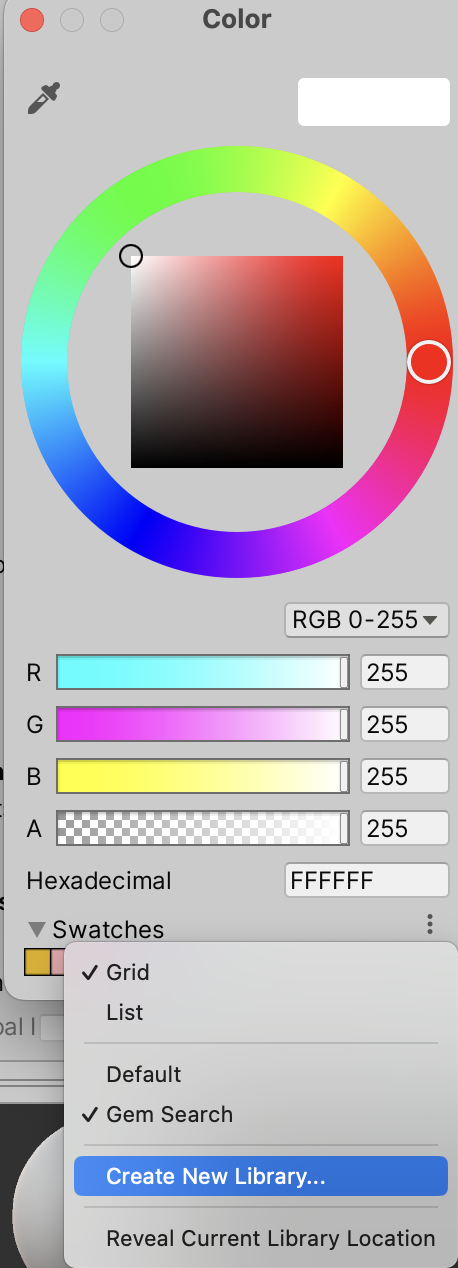
We can then add the current colour to the library by selecting the last button under “Swatches”.
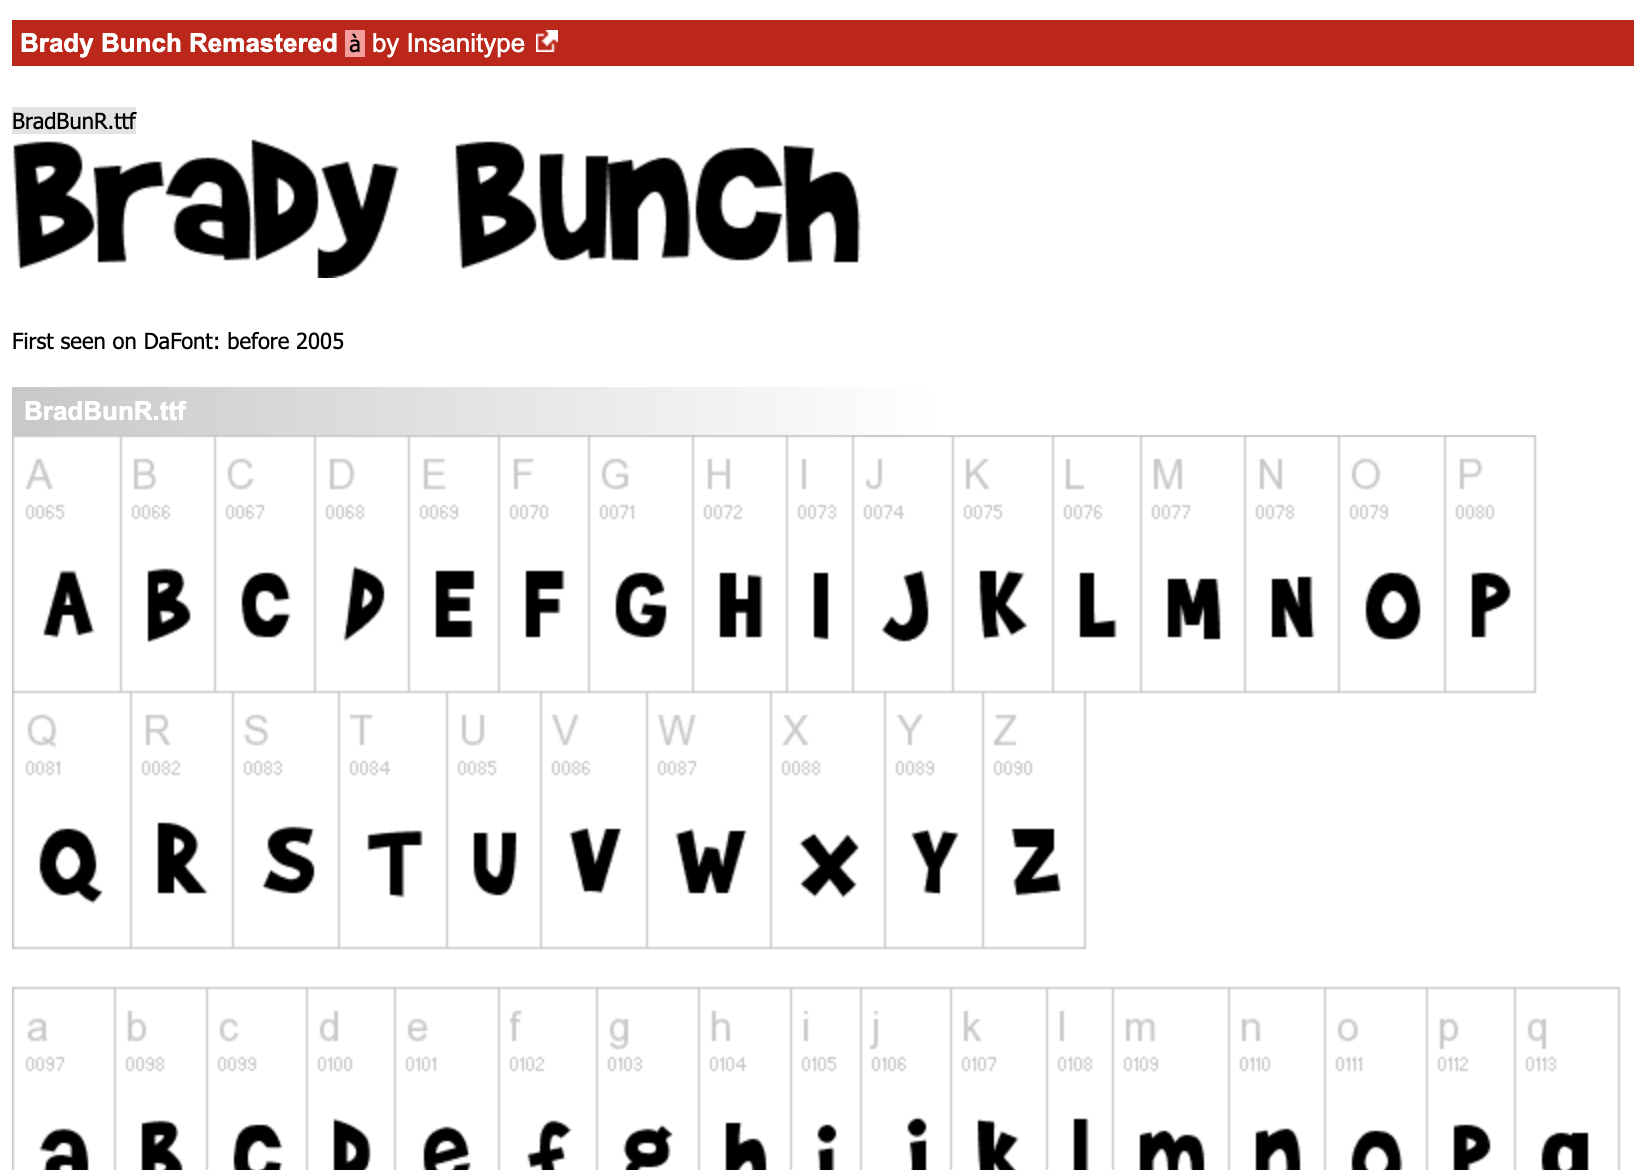
We wanted a nice font for our game. The right choice really helps set a mode. I choose a font called Brady Bunch Remastered that’s free for non-commercial use. I found it here https://www.dafont.com/brady-bunch.font
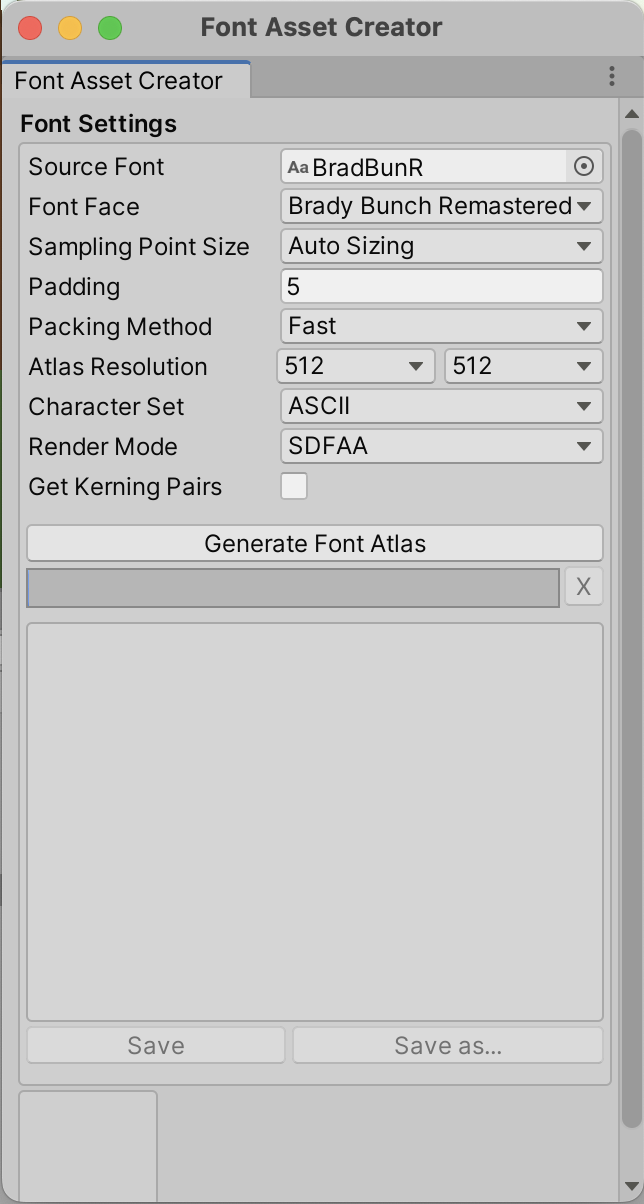
In Unity we saved this file to a new folder called Fonts. We then needed to set it up so that Text Mesh Pro could use it. Under the Window | TextMeshPro we used the Font Asset Creator to build a “font atlas” from the BradBunR.ttf font file.
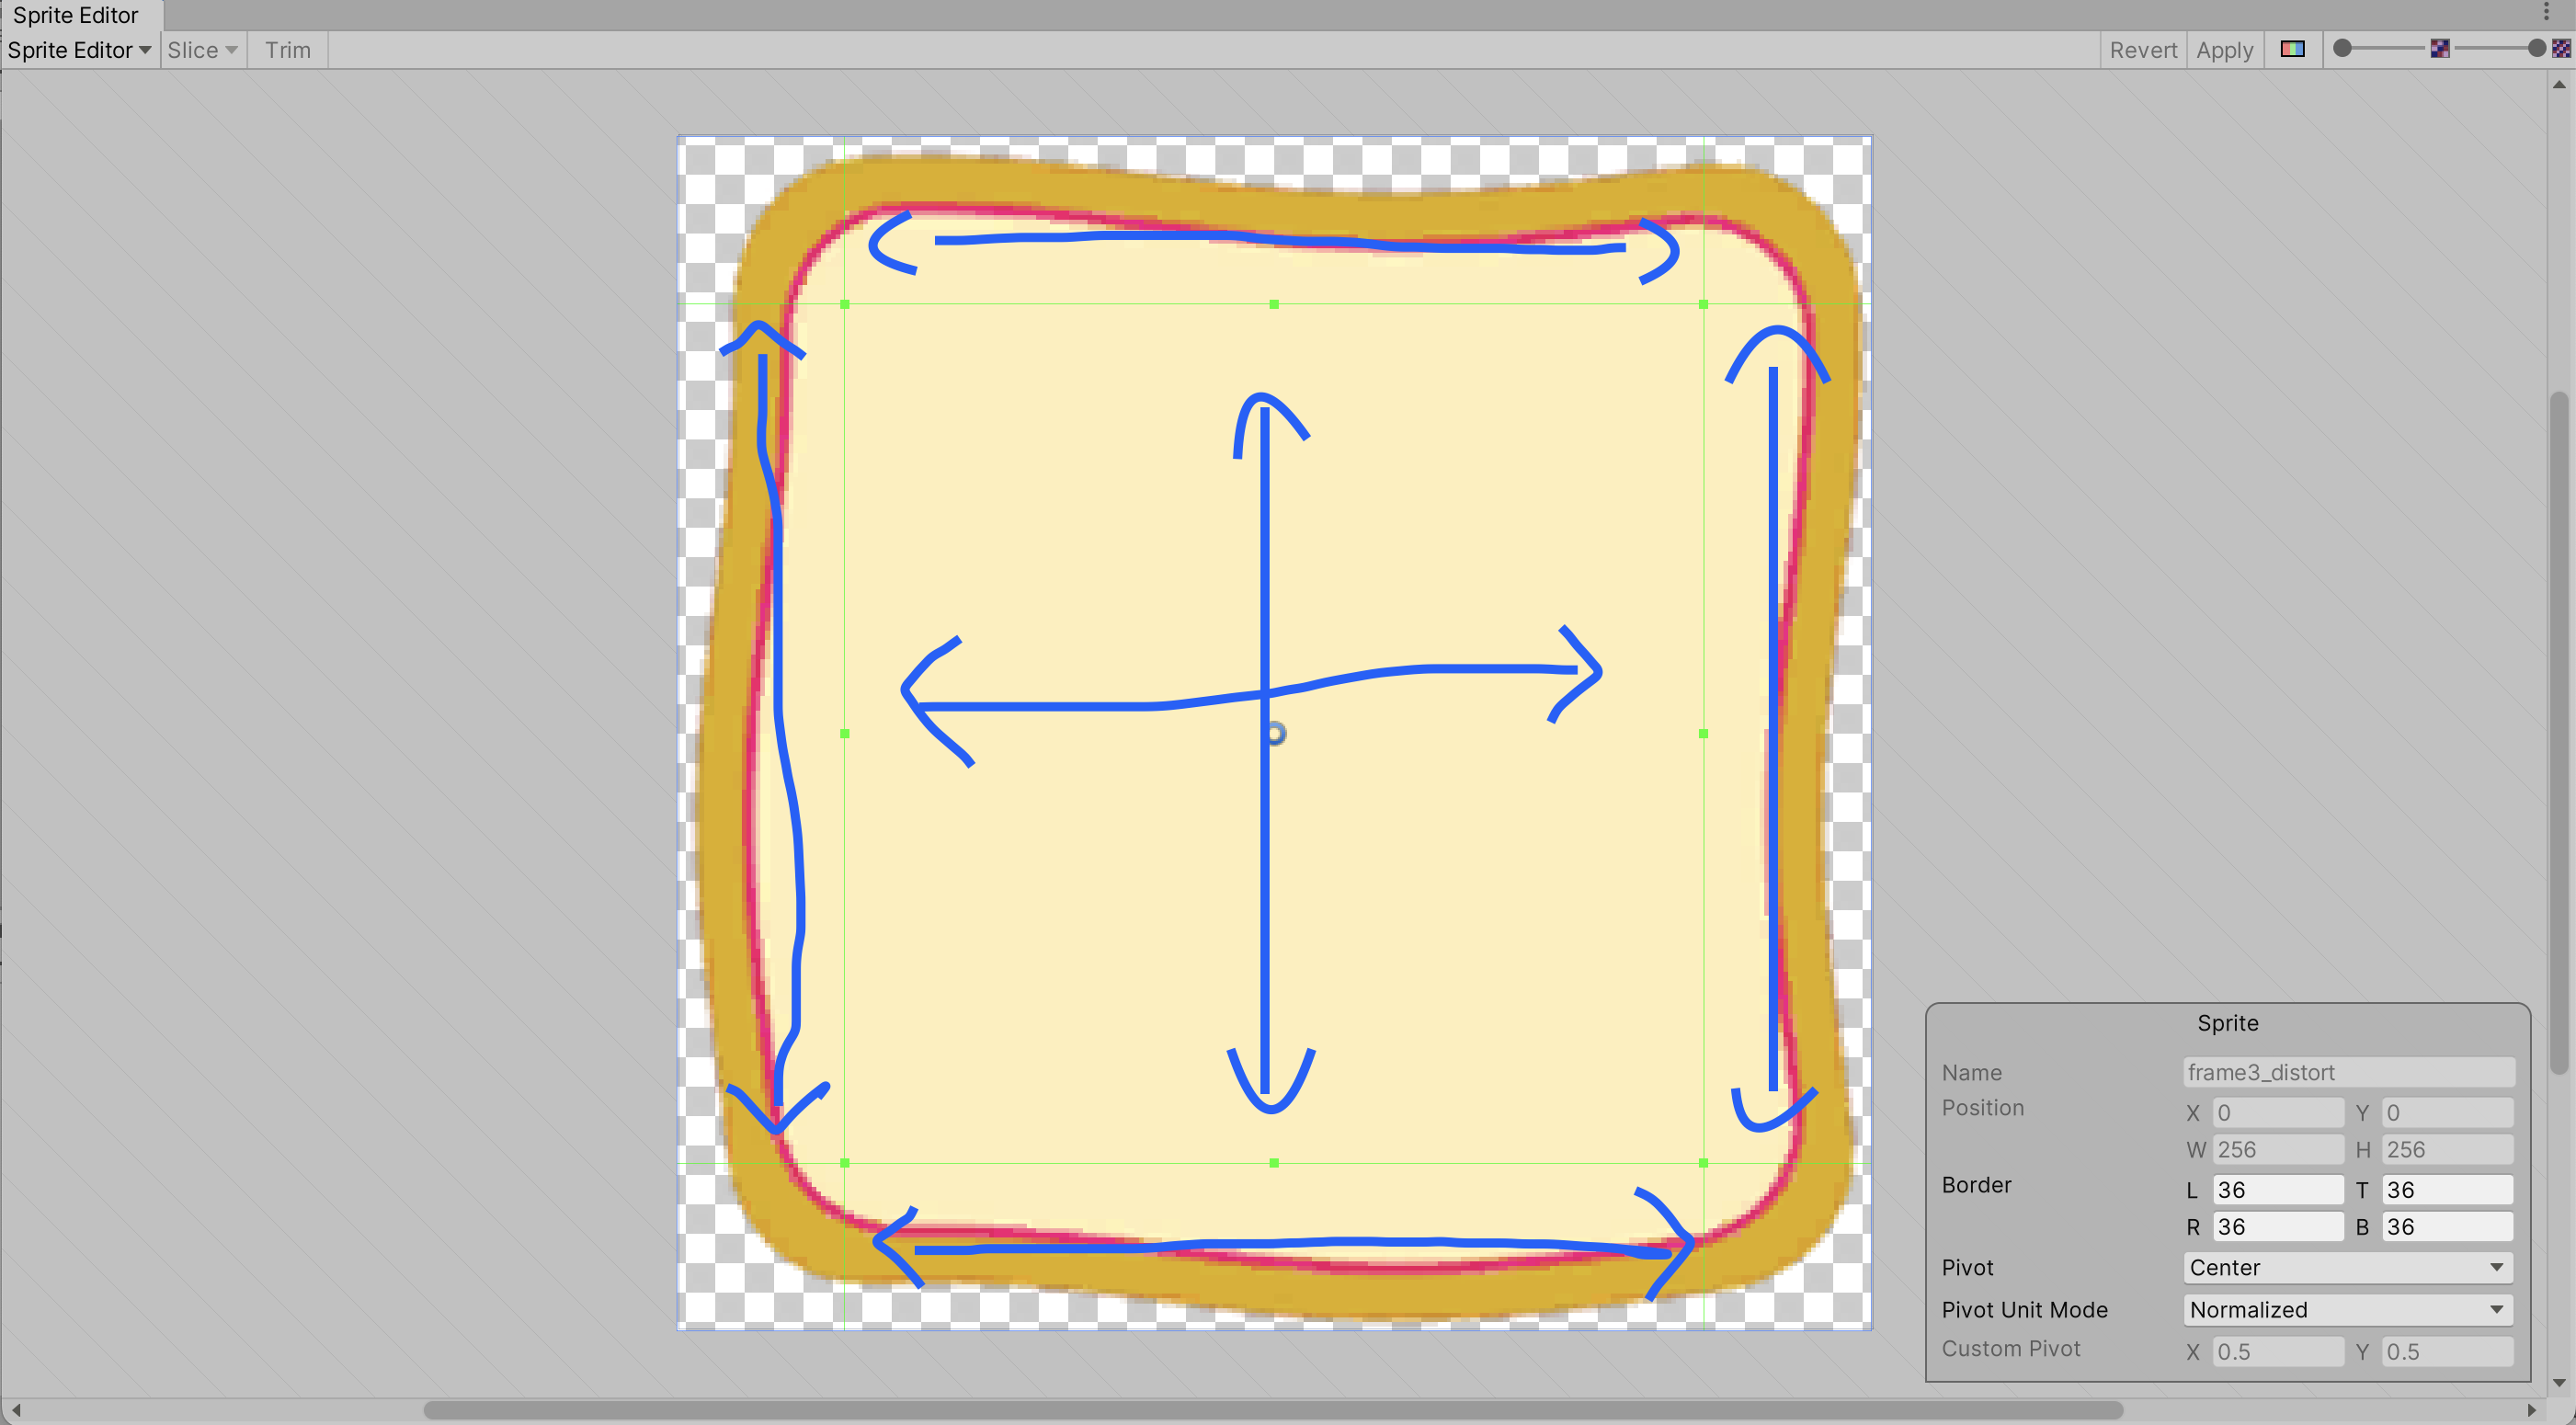
The standard UI background in Unity is very plain and boring. I created an image to give our UI elements more character.

We imported this into Unity to our Sprites folder. We then needed to set a few things to allow Unity to use it in a UI. In the Inspector we changed the “Texture Type” to “Sprite (2D and UI)” and “Mesh Type” to “Full Rect”. We then hit the “Apply” button near the bottom of the Inspector to apply these changes.
Unity allows you to set borders on our sprites so that when they’re scaled, the corners don’t change, but the pieces in between stretch instead. This preserves the appearance when the sprite is used as the background to differently sized elements. To specify this we need to first add the 2D Sprite package to Unity and then use the “Sprite Editor” button in the Inspector to open it. We specified 36 for all borders. The hand-drawn blue arrows show how the different regions will stretch when used:
We developed a prefab to use when we find a gem. It’s intended to be spawned inside a child of the main camera that places it just in front of the player.
The prefab contains a Canvas. Canvases usually overlay the game screen, but they can be worldspace canvases, that actually exist as objects inside the scene. As Canvases are always huge, we needed to specify a very small scale to bring it down to something that makes sense.
We create a script GemFoundMessage.cs and attach it to the root of our prefab. It’s used to take information about gem was found and use that to update text on the Canvas and to spawn in a copy of the gem (which we can animate).
using System.Collections;
using System.Collections.Generic;
using UnityEngine;
using TMPro;

public class GemFoundMessage : MonoBehaviour
{
    public TMP_Text Text;
    public Transform GemHolder;

    public void SetGemDefinition(GemDefinition gd)
    {
        string message = string.Format("You found a {0} spirit gem!",
                                       gd.name);
        Text.text = message;

        Instantiate(gd.Prefab,
                    Vector3.zero,
                    gd.Prefab.transform.rotation,
                    GemHolder);
    }
}
To animate in Unity, we first open the Animation window from the Window | Animation menu. It works well if docked at the bottom of the screen where the Console usually is.
We then select the object that we want to animate, and press the Create button in the Animation window.
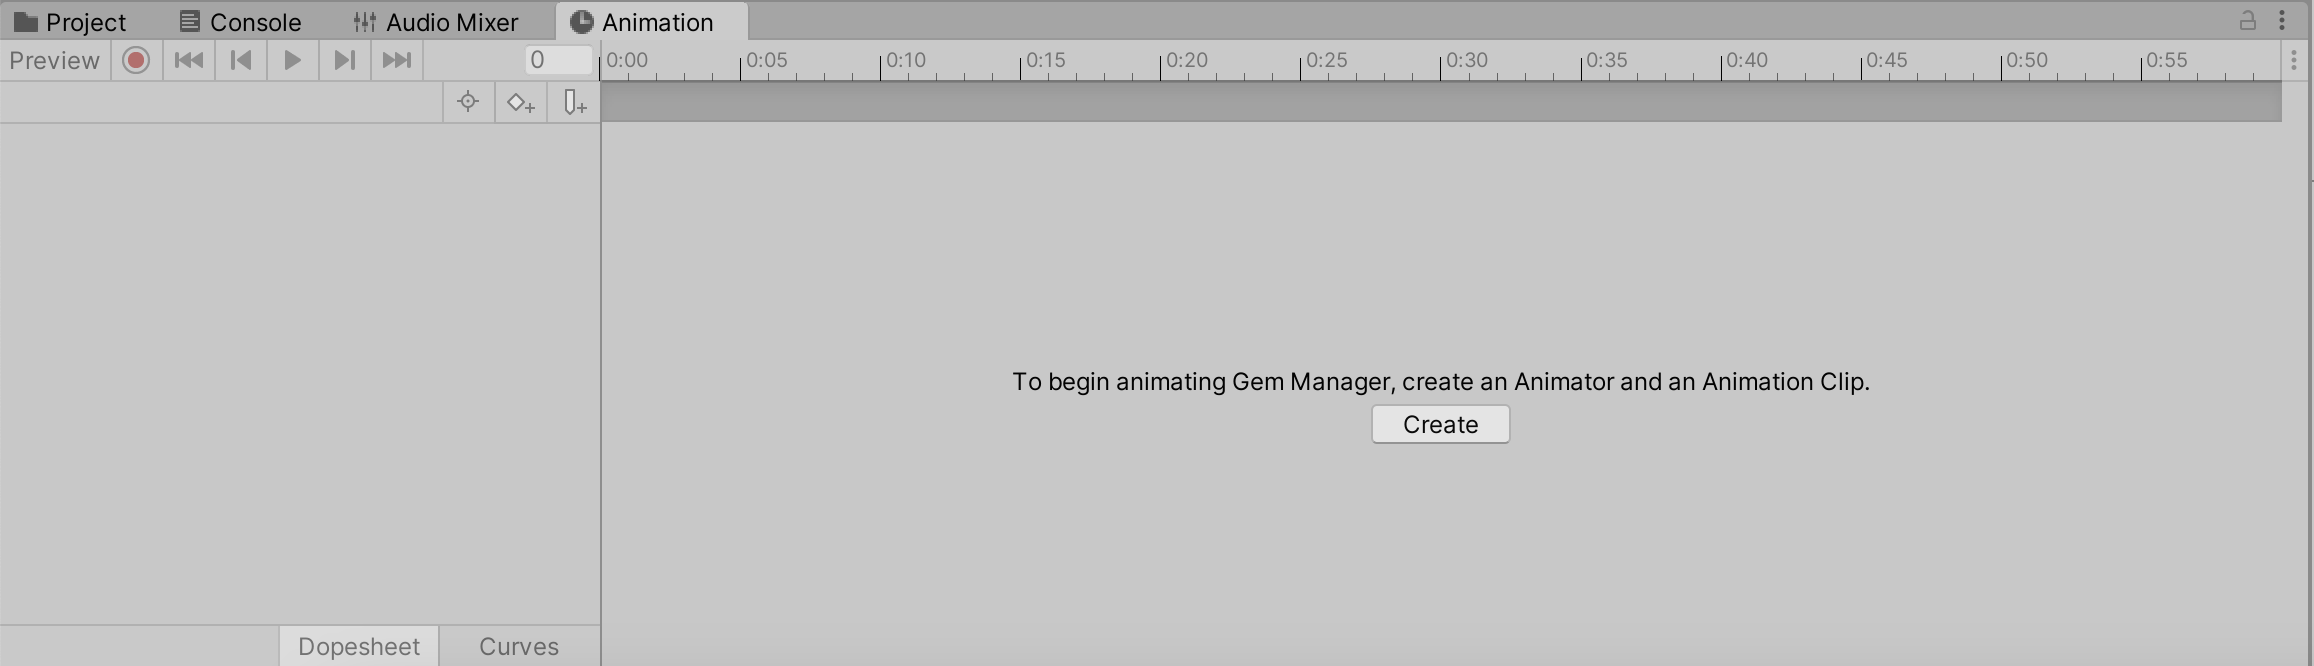
This makes an Animation Clip and Animator Controller in our project and attaches an Animator component to our GameObject.
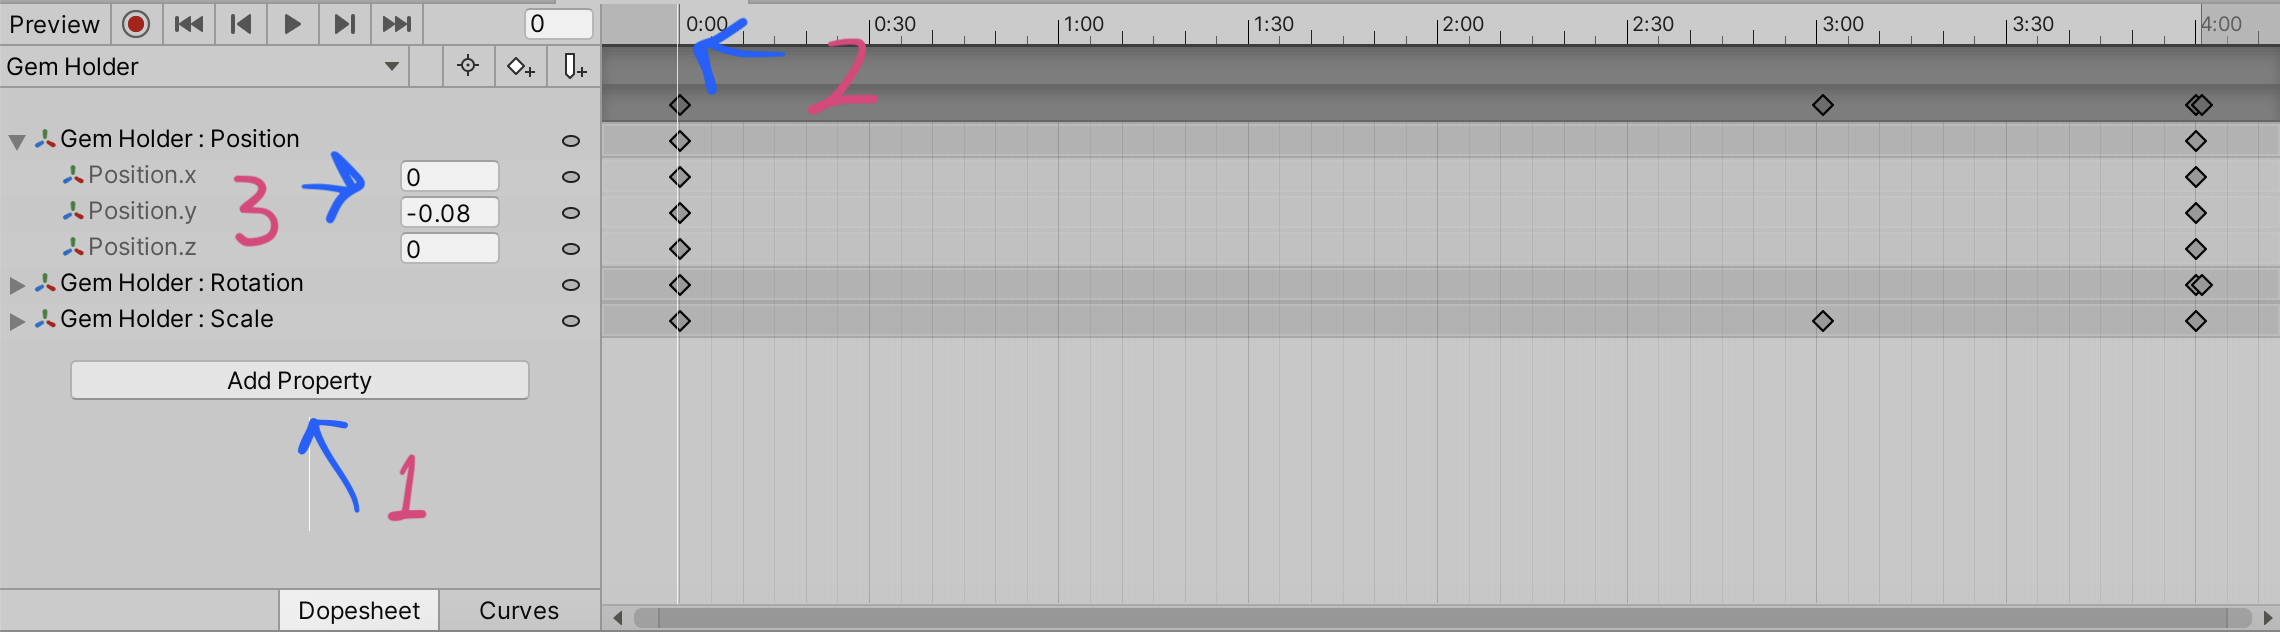
With our object selected, we press the “Add Property” (1) button to select the properties we want to animate, we then click in the timeline (2) to select the time at which we want to specify the property value and finally we edit the property value at that time (3).
The code for this week’s project is on our GitHub, as always.
This week we continued with our tank model.
We created a set of wheels from a cylinder which we then scaled, duplicated and used inset and extrude to provide a little detail on each wheel.
We then created a bezier curve to define the shape of the track across then wheels. Bezier curves are an easy way to defined a smooth shape. They have a number of points through which the curve passes. Each point has a pair of handles. The rotation of these handles defines the angle at which the curve passes through the point. The distance between the handles defines how tightly the curve bends as it approaches the point.
Here are the video instructions for this week:
The updated tank model can be found here.
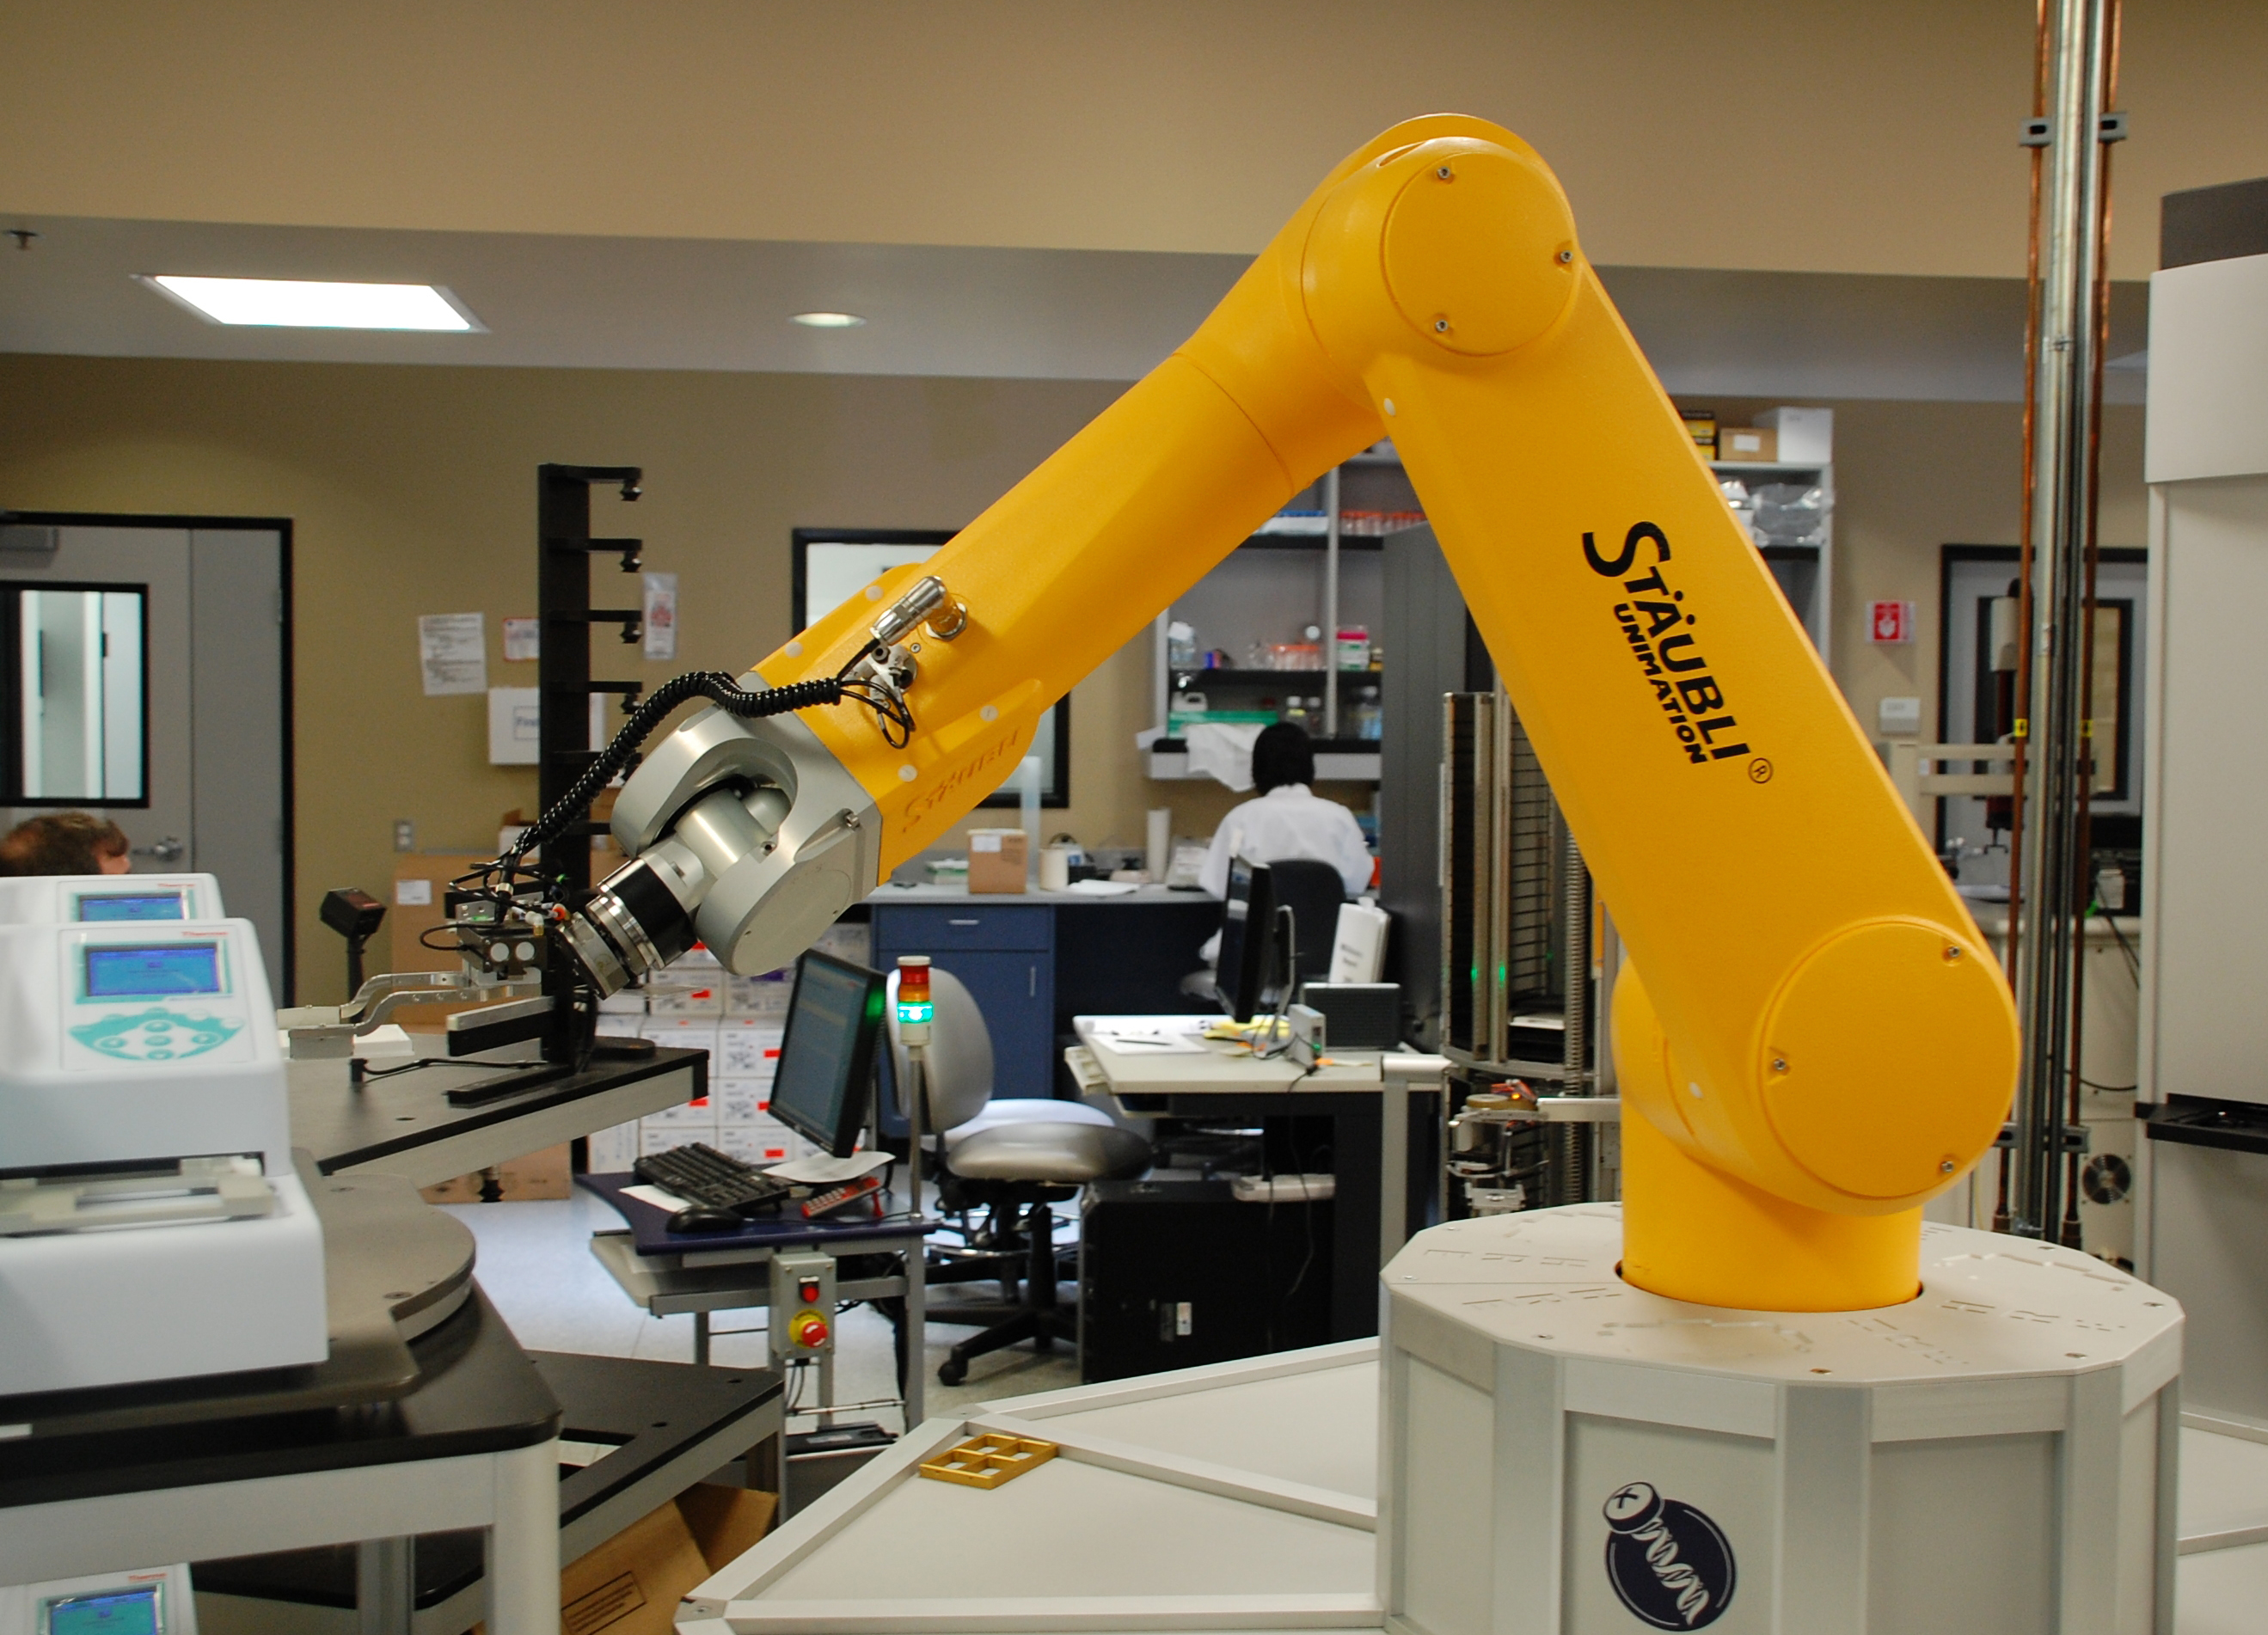
This week we looked at a representation of a robot arm. The body of our robot is allowed to slide horizontally and the arm can pivot at the shoulder (where the upper arm attaches to the body) and at the elbow (where the lower arm attaches to the upper arm).
Transformations
An important point about this project was to show how transformations add up together. Transformations include translations (moving in straight line), rotations (turning about a pivot point) and scaling (changing size). We’ve used translations and rotations for our robot.
In P5, the origin, or place where the x and y coordinates are both zero is at the upper left-hand corner of the screen. The x coordinate gets bigger as we move right and the y coordinate gets bigger as we move down.
When we translate, we move the origin to somewhere else. This is handy for a few reasons but if we are performing rotations. All rotations happen around the origin, wherever that happens to be at the time.
This diagram shows all the transformations we use for our robot:
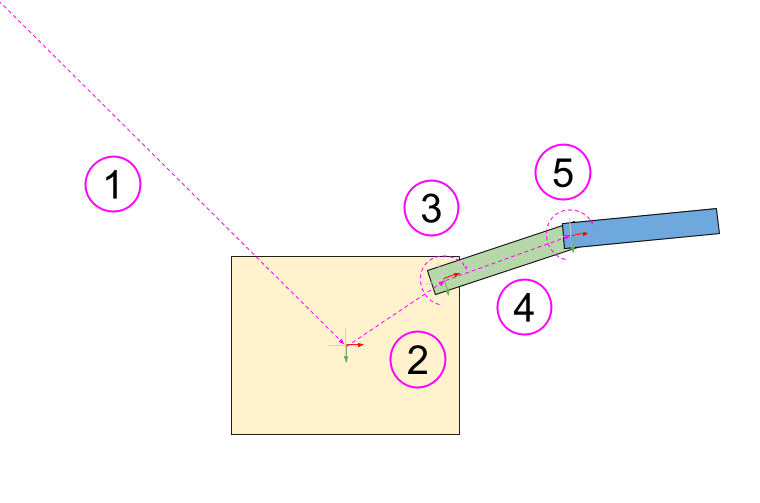
Because these transformations stack up on top of each other, this is what each part experiences:
The body is only affected by one, but the lower arm is affected by all five.
Movement
To move the robot, we set up three variables:
We created a function called handleInput() called from the draw() function (which is called every frame). In that we used the keyIsDown() function from P5 to check for keys being held down. We made the left/right arrow keys move the body horizontally, the up/down arrow keys rotate at the shoulder and the Z/X keys to rotate at the elbow.
Source Code
As always, the code can be downloaded from our GitHub repository.
What are we going to learn this week:
I will hopefully demonstrate how differnt types of waves behave.
I will admit, that I am not an expert here and will probably be unable to answer any of your questions, but you see that’s where you come in and start thinking about these things yourself.
A Pratical Demonstration.
What’s in the Box?
I will bring the Box and we can take a look inside, I might even have two boxes, you never know.
Thinking.
Hmmmmm….
Coding.
Remember the Gravity simulation we did, well we can do the same with Waves.
We will build a few Transmitters and a Receiver which can be “tuned” in to the different transmissions. In fact this would be an ideal Application to do using the Networking in Scratch. Does anyone remember that from last year?
Lets see how we get on, we might set this up with one person as the Transmitter and one person as the Receiver.
I have some of the coding done to Transmit a Wave, but will need help in building a transmitter and obviously something to broadcast as well 🙂
Ok, I know Iam supposed to put up the code before the day, but better late than never.
Here is the code for the Transmitter of the radio Waves. Careful with the SIN code has there are a few nested calculations there.

And here is the code for the Reciever.

 This week’s challenge is to build a 2-player networked Pong game.
This challenge made use of the networking ideas that we covered when writing a network Chat program and previously when we learned about networking.
The big ideas behind this challenge were:
Here are the presentation slides from the day, in PDF format: CDA-S2-Challenge14-NetworkPong.pdf
If you would like me to send you these slides in PowerPoint format, feel free to get in touch on Twitter or via the comments!
