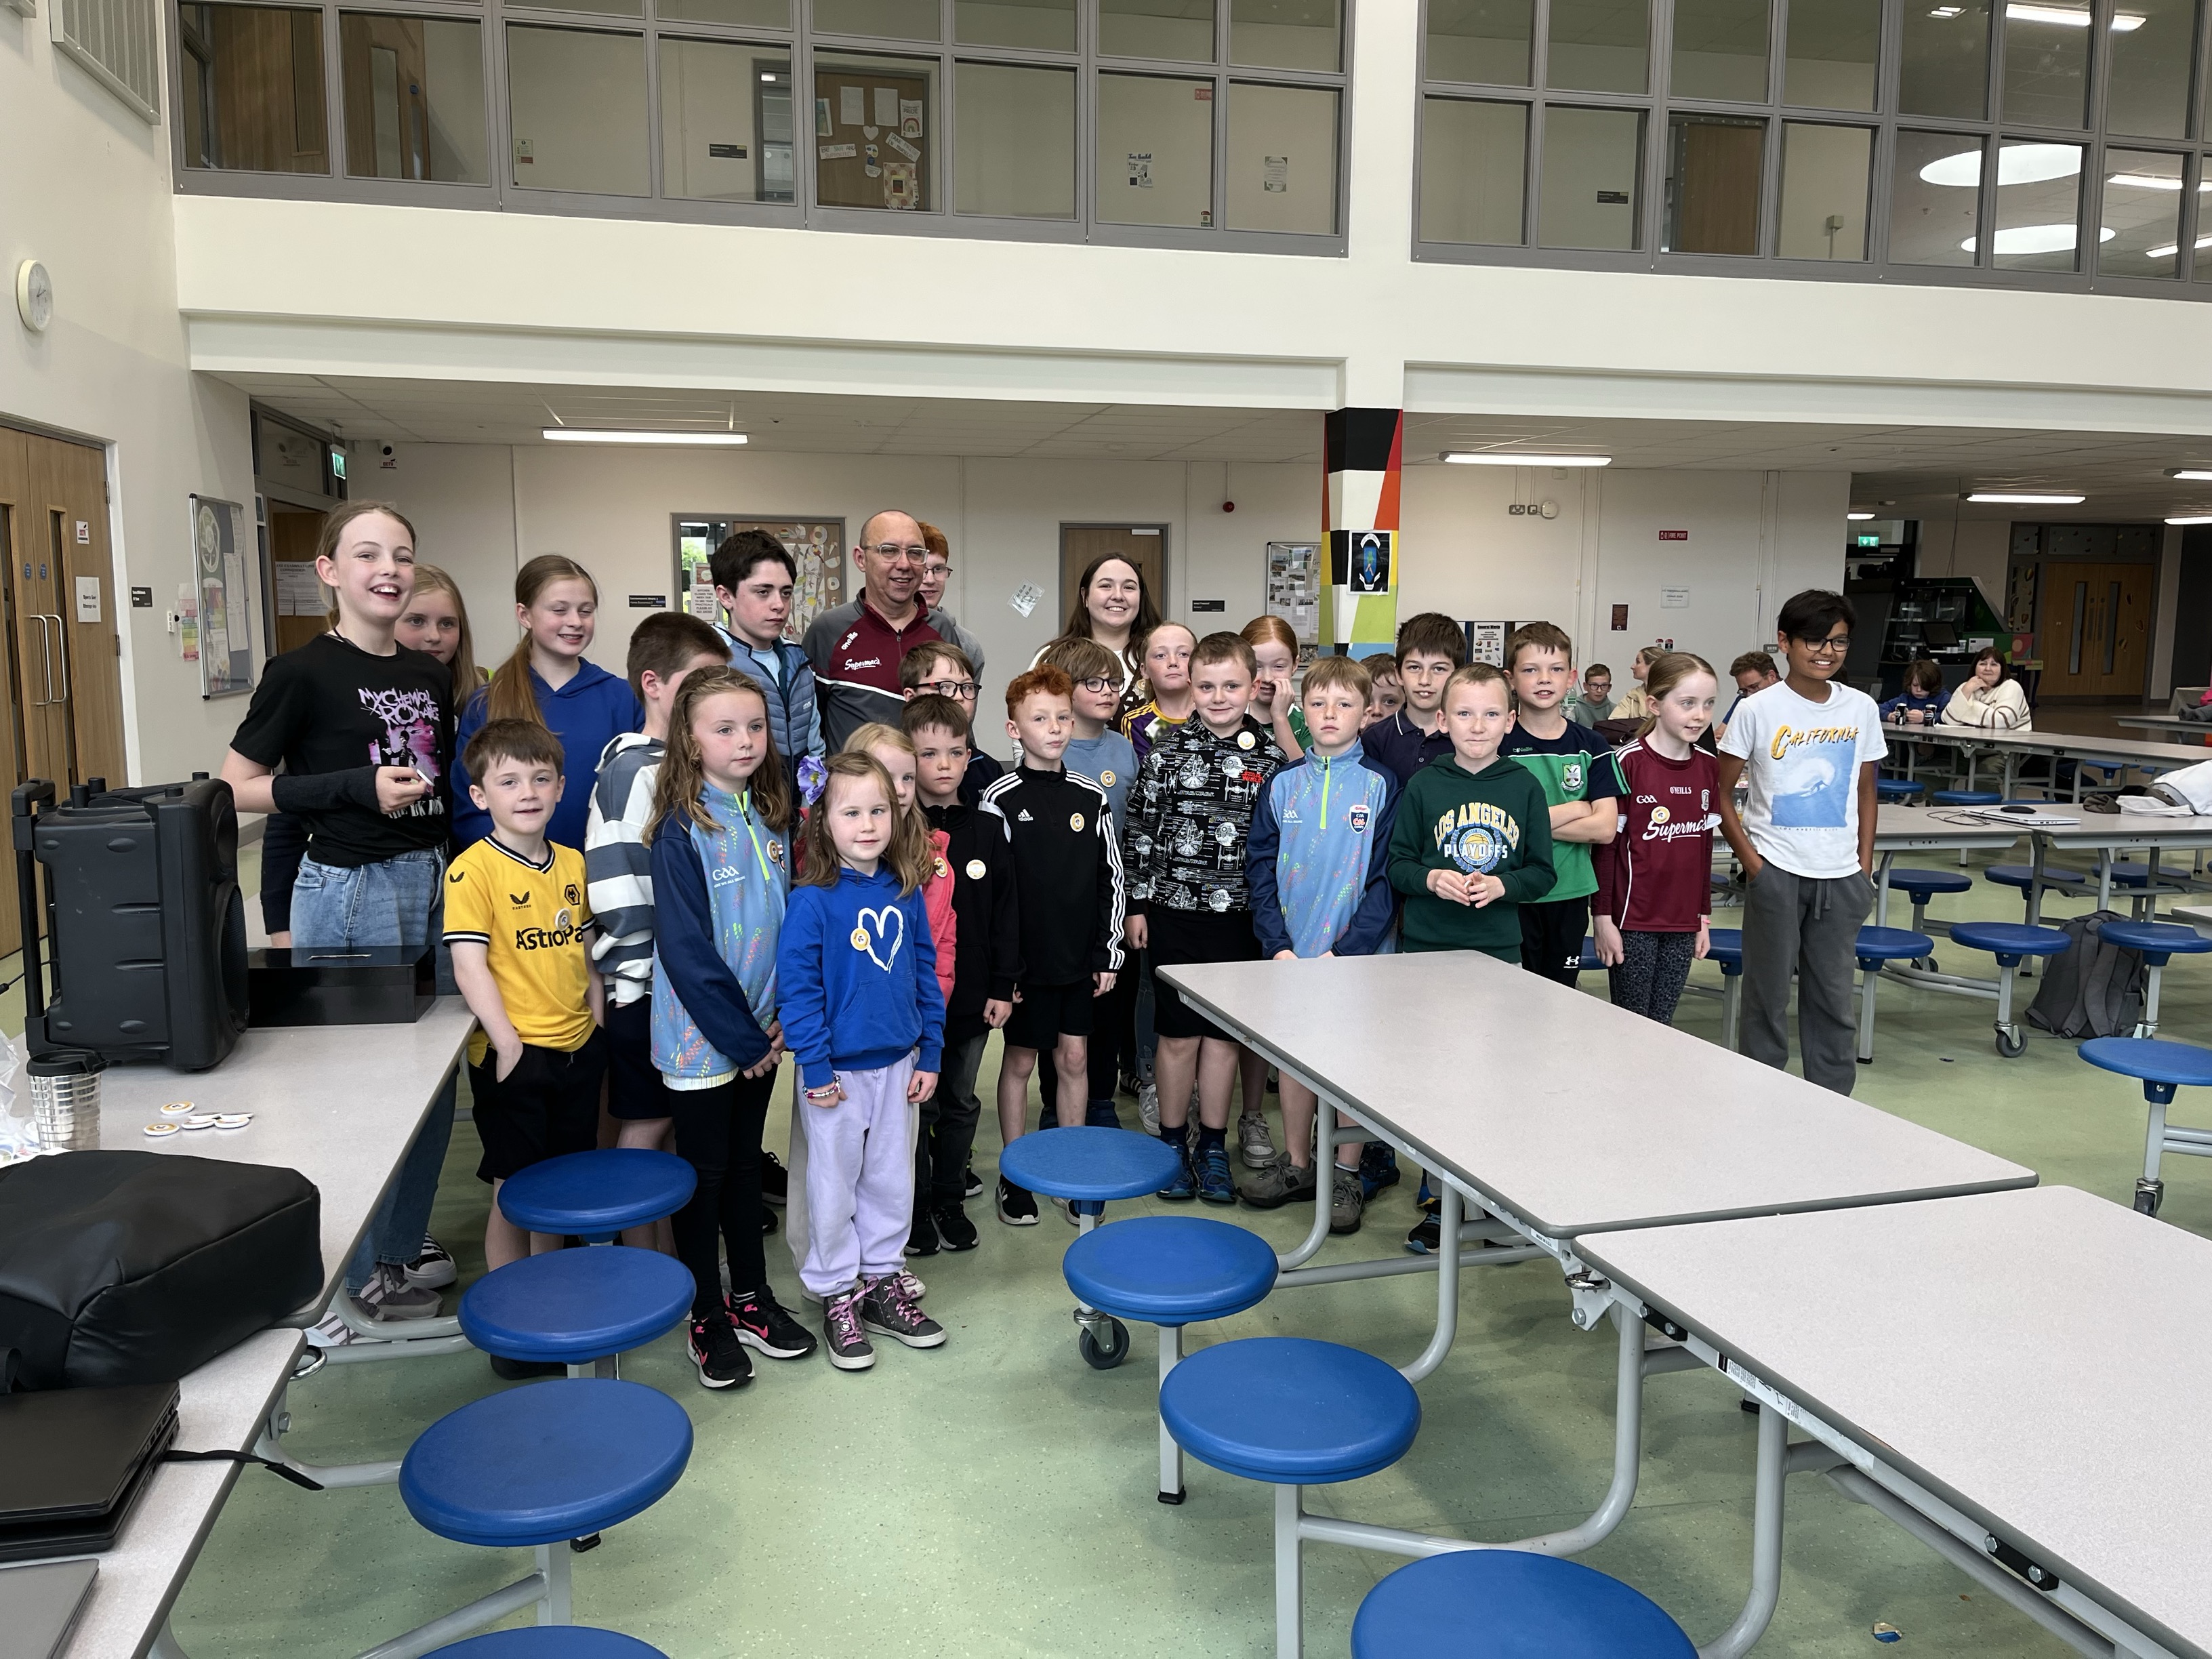
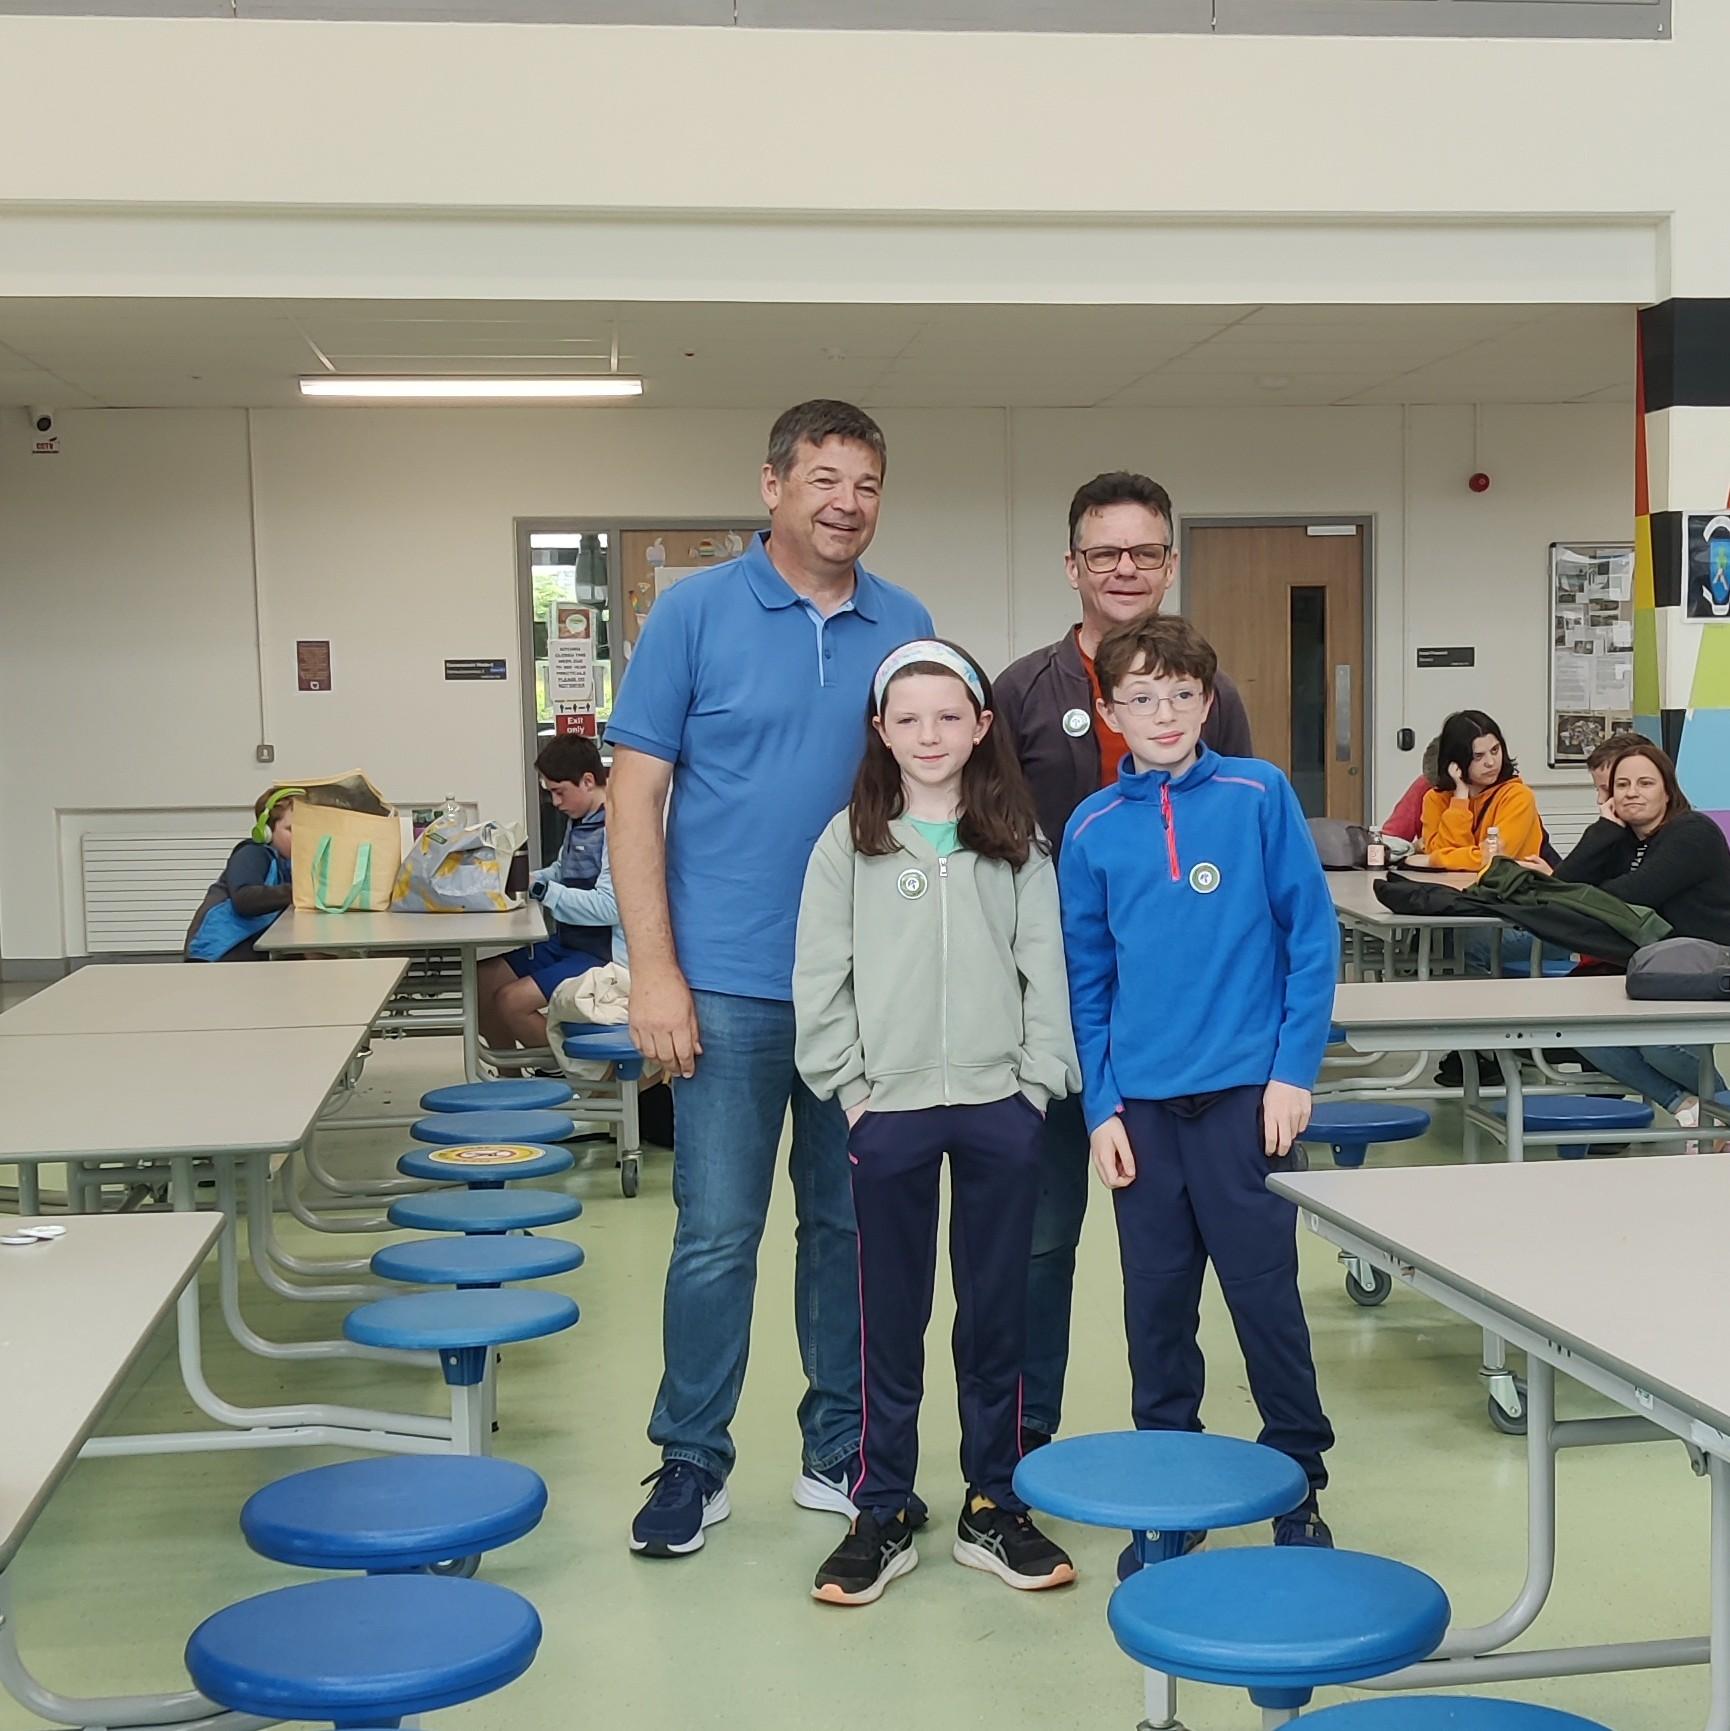
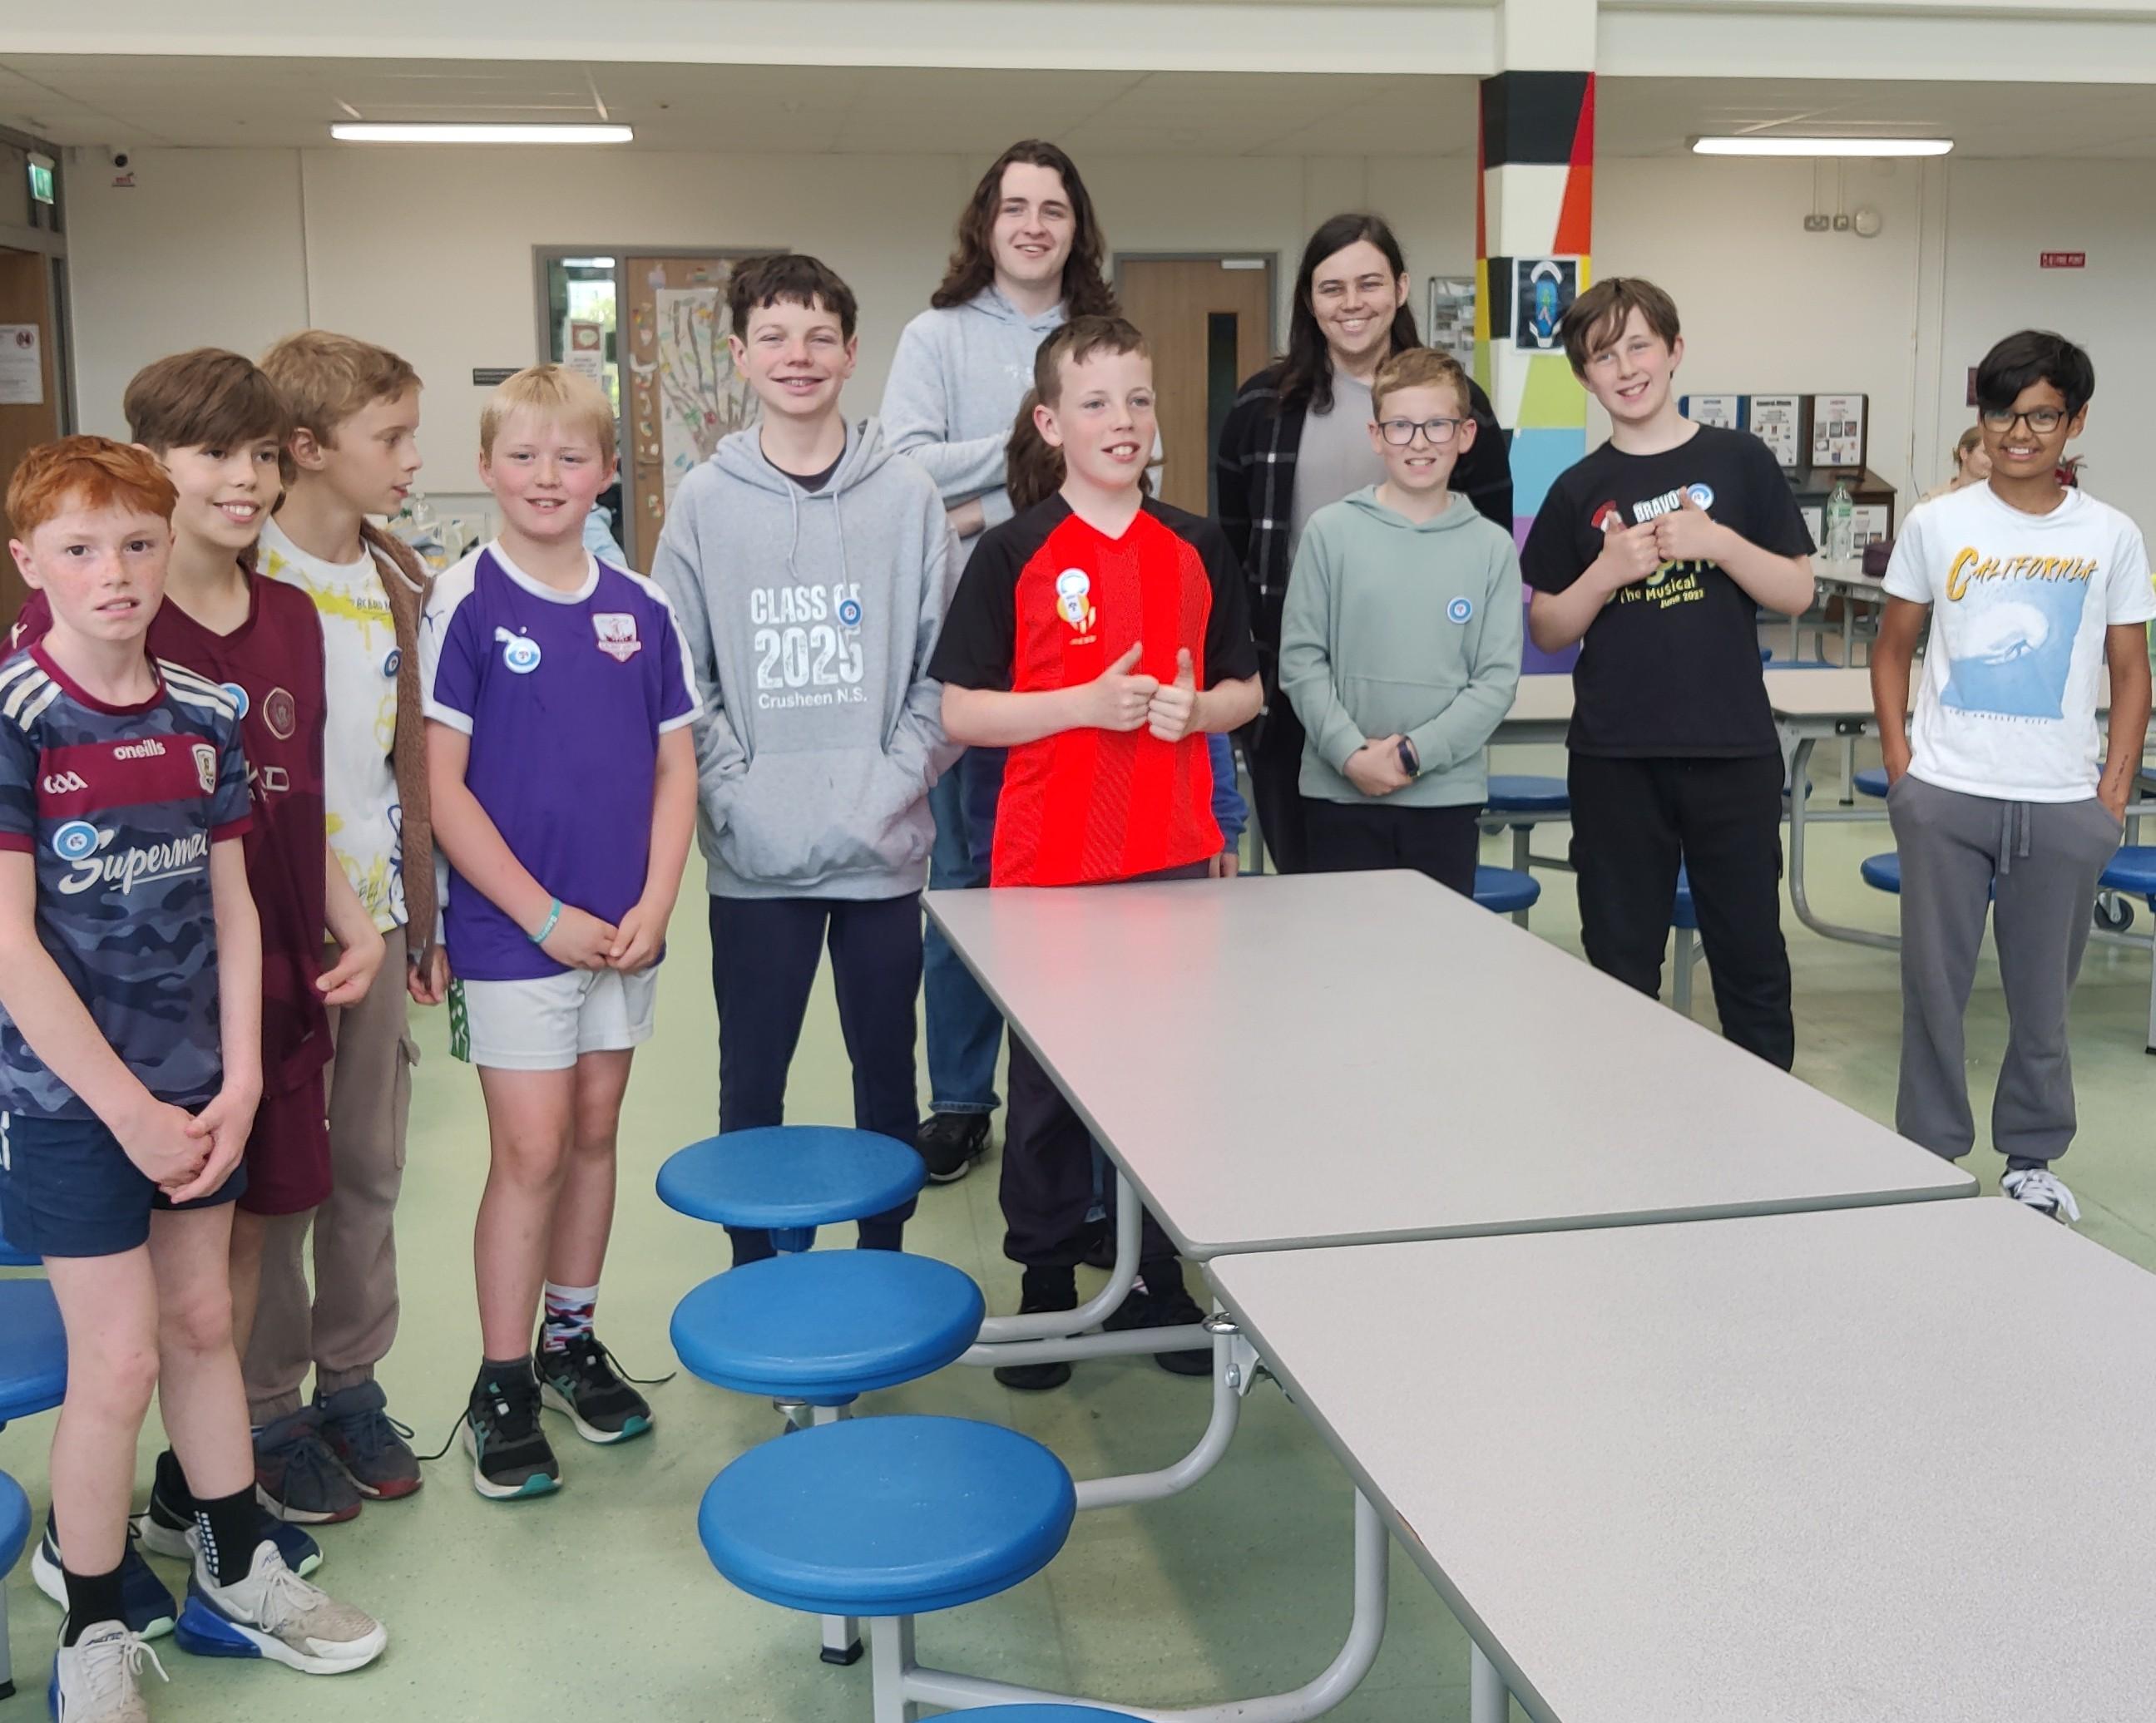
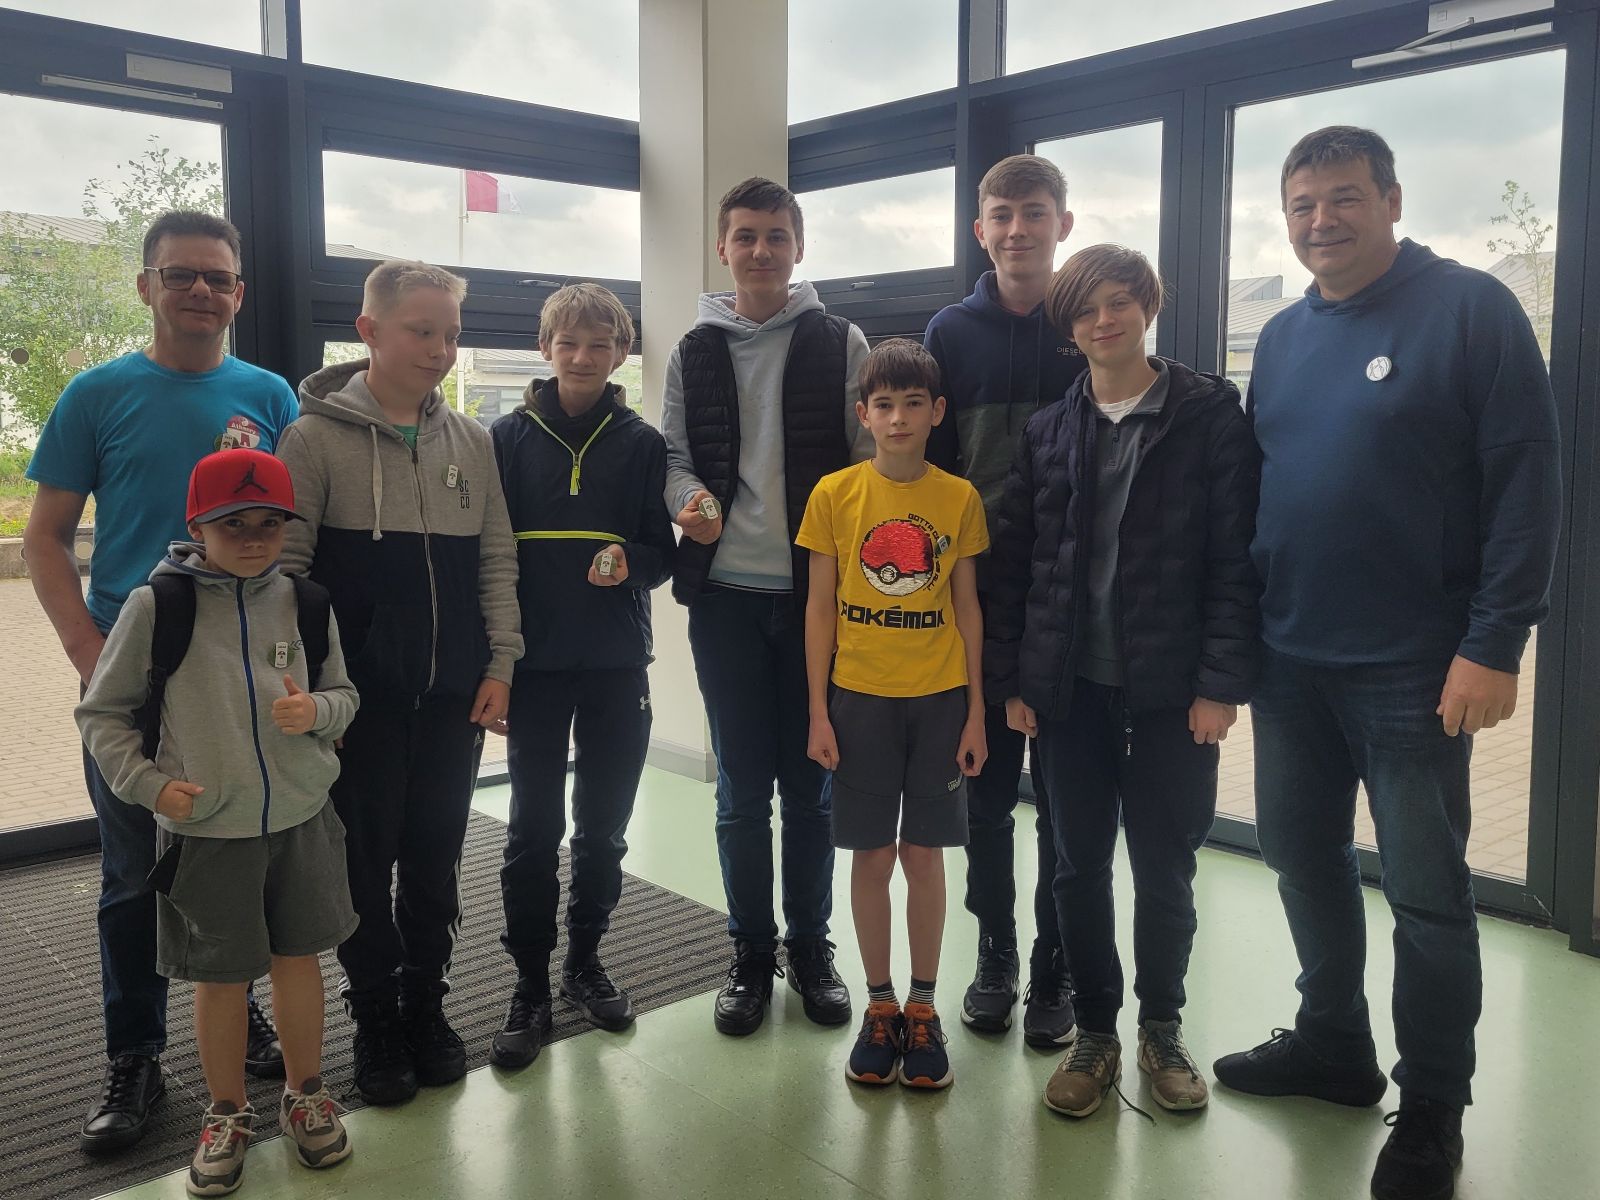
We had a great end-of-year party today. It’s our favourite tradition and a great way to celebrate our year’s achievements.
We demoed what each group had been working on, awarded badges and had a fun quiz. Then we feasted. Everyone’s favourite part is the food. Supermac’s & Papa John’s Athenry did a super job there, as they always do!
We invited donations today. We don’t like to do that too often, but everyone was incredibly generous. We received enough to completely cover the cost of the party and the badges with a little left over. Our most sincere thank you!
I’d like to acknowledge and thank others who have helped us this year. The acting-principle and staff of Clarin College ensure we have a venue, The University of Galway’s School of Computer Science provided us with much-needed financial grant. Medlife kindly donated two laptops which we can use in our laptop loaner program.
Finally, thank you to the hard-working and dedicated volunteer mentors who turn up week after week and keep this incredible organisation going.
We will be returning in the autumn. Dates will be announced in late-Aug/early-Sept, once we know them.
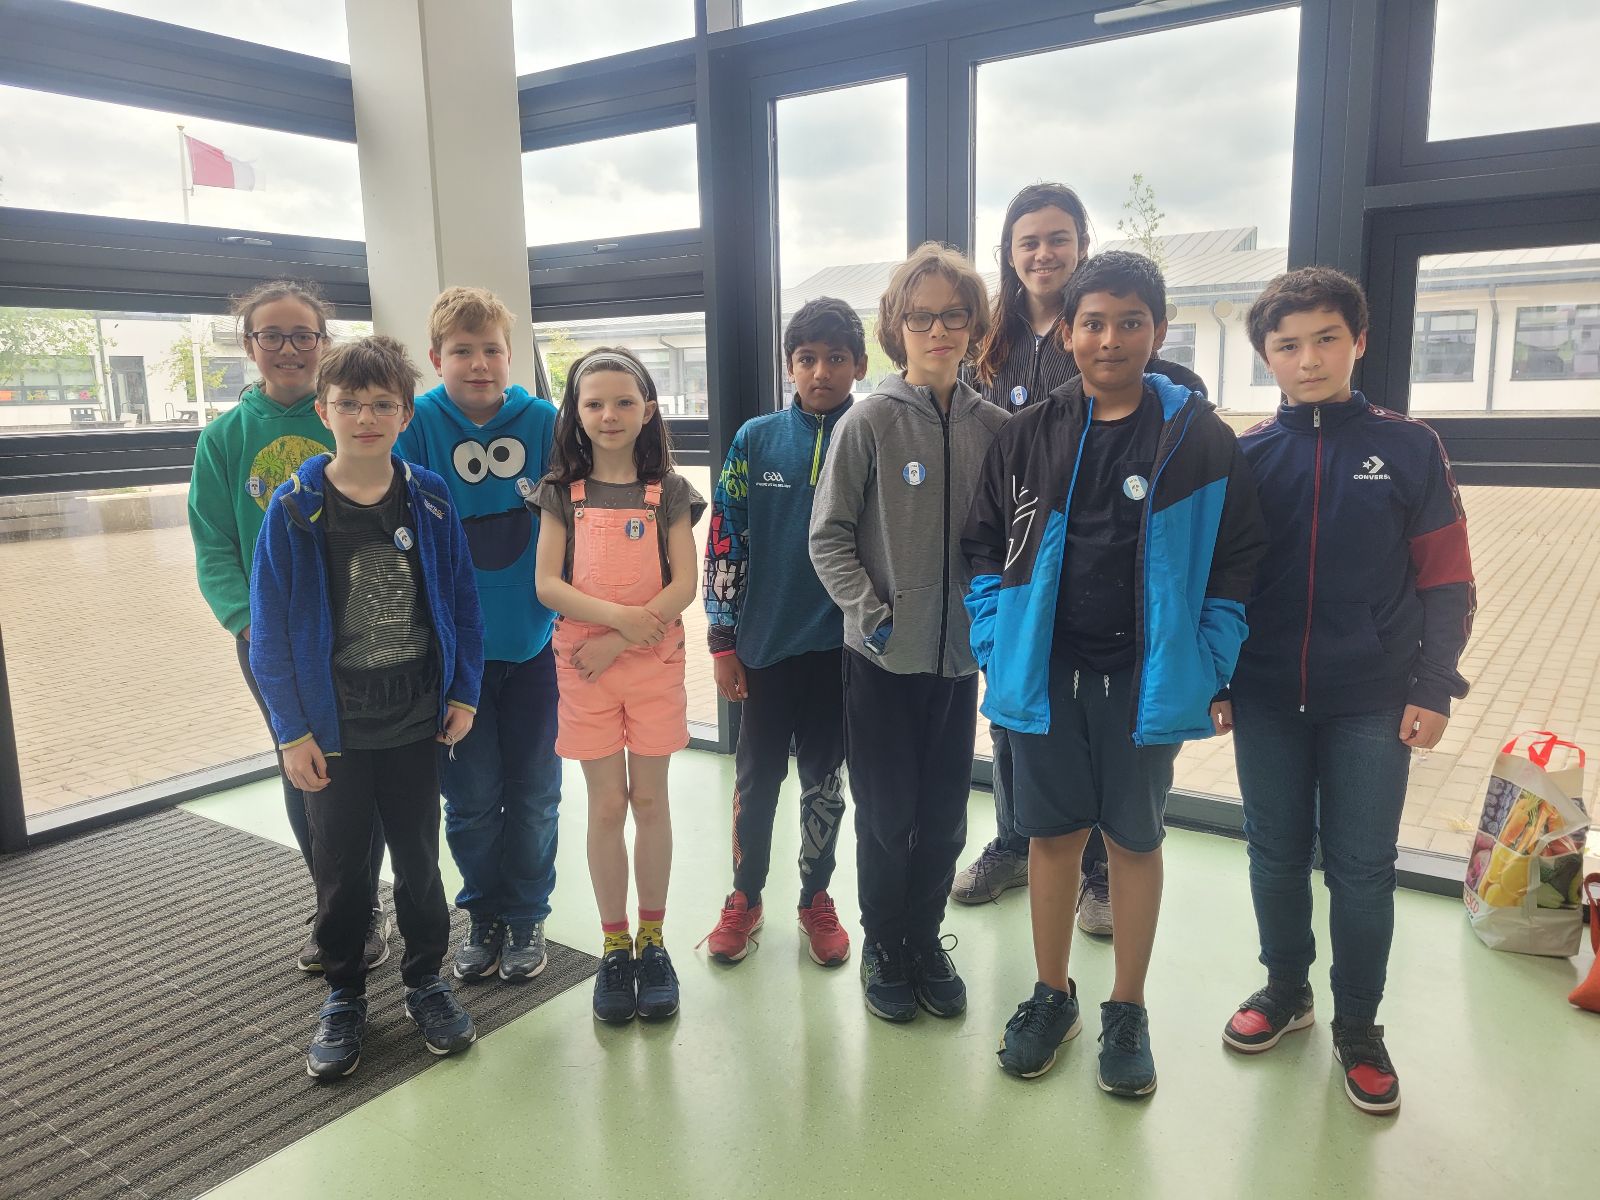
Hi folks, here are some photos from our end-of-year party today and a photo of some ninjas, some mentors and some Tesco members of staff at Tesco Athenry marking the end of our Community Fund collection period. Thanks to Tesco Ireland and to everyone who dropped a blue token in the box for us!
Programming and Spirals This week we combined 2 Scratch Projects: Introduction We did a lot of jumping around, from one project to the other, as we had to make changes to both projects to get everything working. Once everything was … Continue reading →
The Snake project has changed a little bit from Saturday. I had to add another Sprite to get the “touching colour” code to work. So now there are 3 Sprites that move around.
The one that you move around with the Arrow keys.
One that follows 0.2 seconds behind, this one now draws the tail and is not touching the first one.
This one follows 2 seconds behind and erases the tail.
I also changed the first Sprite to Move “2” steps not one, this speeds it up a little. I have uploaded the completed project to the AthenryAdvancers account on http://www.scratch.mit.edu so you can take a look and have a go.
My challenge to you is to beat my high score of 1200
Magnify Updates
I have uploaded a Gravity project with one single Sprite to the AthenryAdvancers account on http://www.scratch.mit.edu.
You can use this Template project to create your own Magnify project, think of an idea and draw out the Sprites you will need on a bit of paper, give the Sprites Names on this bit of paper, it doesn’t have to be a masterpiece, any rough old picture will do.
Then you need to get one Image for each of your Sprites, save them all to the same Folder on your Computer.
Once you have your diagram and all your images you can download a copy of the Magnify Project and save it to the same folder as all the images.
The steps (process) to follow to use this Project are:
Rename the StartSprite to the Level 1 Sprite in your diagram
Update the Variables, for this one you only need to update the MyName variable
Change the Costume by uploading your image for this Sprite, delete the original costume
And then to add More Levels and Sprites use these steps:
Copy the Level 1 Sprite
Update the new Sprites name
Update the new Sprites variables, the MyParent needs to match the MyName of the Sprite from the level above
Update the MyX and MyY variables to where you want this Sprite to appear on the screen, you may have to test a few different places to get it right
Change the Costume by uploading your image for this Sprite, delete the original costume
For the final week we are going to convert the Christmas Card into a Christmas Game.
We will be starting with the Christmas Card that we made last week, if you weren’t there or want to start with the same one that I will be using, have a look at the bottom of this document, I have added instructions on how to get it.
The Plan for this week.
We will be adding some additional Sprites. We will be using Scratch Sprites rather than drawing our own to save time.
A sprite for Santa’s sleigh
This will move backwards and forward across the top of the screen
A sprite for the Presents
This will fall from Santa’s sleigh to the bottom of the screen, not directly down though.
This sprite will have many costumes.
As sprite for you
You will be able to move Left and Right across the bottom of the screen to try and catch the falling presents.
The Sleigh Sprite
Scratch does not have a sleigh sprite, so I used the reindeer.
He needs to start on the top left of the screen and move all the way to the top right of the screen and then turn around and go back to the top left, he will just keep doing this.
The code might look something like this:
The Present Sprite
We might have to draw this one.
The present Sprite will start from wherever the Sleigh Sprite is glide down to a random place at the bottom of the Screen, you can make the Present a random size as well to make it more interesting.
The is a Scratch block to put one Sprite in the same place as another Sprite So the code to move down the screen will look something like this:
There will also be code to count the number of presents caught. So, if the Present Sprite touches you, it will count as being caught, so you can increase your score.
When the present is caught you can change to a random costume to display the unwrapped present.
I’ll let you figure out this code as a little challenge (I haven’t done it yet 😊 )
You Sprite
This is the one that catches the presents. I used the Scratch cat, finally.
Not much code for this one, he just needs to move left or right using the left or right keys on the keyboard. So, something like this:
A nice background with Snow, Christmas Trees, a house.
We might use different Sprites for the Trees.
Flashing lights on the House and the Tree.
Falling snow.
Snow building up on the ground.
An animated Snowman.
Snowflakes
To make it even more interesting, we are going to make the snowflakes different sizes and fall at different rates depending on how big they are.
We will use the clone functionality to make the snowflakes.
Each clone will pick a random size and will glide to the bottom of the screen, how fast if glides will be related to how big or small it is.
The snowflake is going to be quite hard to draw as it will be a small white dot on a white background, so we will be careful.
The building up on the ground part, is quite easy, we just pick a random Y value to stop at, as long as it is close to the bottom of the screen we should be ok.
Flashing Lights or Tree Sprites
Again, these might be quite difficult to draw as we have to draw them over the background and get them to be over the Trees?
If we draw the complete Tree in the Sprite I think it is going to be a lot easier.
I know Windows has a Calculator, but we are going to build our own. This will give you an idea of how real Calculators actually work.
The Calculator should be able to:
1. Add, Subtract, Multiply and Divide 2 numbers.
2. Be able to work with decimal points (2.5 for example).
3. Display the sum and the result on the screen.
4. Have a “clear” button to reset everything ready for the next calculation.
Let’s look at the steps that you need for a calculation
1. Clear the variables.
2. Click on the numbers for the first number.
3. Click on the operator you want to use.
4. Click on the numbers for the second number.
5. Click on the equals button.
6. Display the result.
Hint: When you click on the Operator, this indicates we have got the first number and need to start storing the second number. See variable 6.
It sounds like there is a lot to do, but if we are smart with the way we work, there is a lot of code that is very similar and we can copy and paste it and then modify it slightly.
You will need 6 variables (for all Sprites) to share:
1. The first number in the calculation (NumberOne), not visible.
2. The second number in the calcualtion (NumberTwo), not visible.
3. The complete sum (Question), visible.
4. The operator (+,-,x,/) for the calculation (Operator), not visible.
5. The result of the calculation (Result), visible.
6. A variable to indicate what number we are working with (SecondNumber). not visible.
Hint: When you press clear, all the variables should be set to blank, except the SecondNumber which should be 0
You will need 17 Sprites, don’t panic! Remember copy and paste is your friend:
11 Number Sprites 0,1,2,3,4,5,6,7,8,9 and the decimal point.
4 Operator Sprite +,-,x and /.
1 Equals (=) Sprite.
1 Clear Sprite.
Scratch code blocks that will be used:
Operators, we will use the join operator a lot as well as the +,-,x and /.
If Else block with variable 6 to decide what number to update.
set variable blocks – lots of these!
Hint:
Start by creating the variables.
Start with just 4 Sprites, 1, +, clear and Equals
Once you can get 1 + 1 working, the rest is quite easy.
The answer is 2 (not 11) by the way, just in case.
Coding Tips:
Here is some of the code that we will be using:
This is the code when you click on a number Sprite, this example is for the number 1, can you see what needs to change if this was the number 2 sprite?
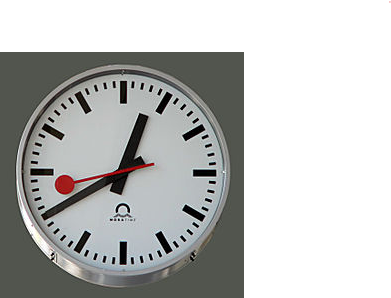
This is not just an ordinary clock though, we are going to build a clock that works in the same way as the Railway clocks works in Switzerland.
These clocks work in the following way:
The Clock waits for a signal from the master clock
When it gets the signal, it moves the minute hand on by one minute (and the hour hand if necessary)
then the second hand moves round once in about 58 seconds
It then waits for the signal again from the master clock.
This means that all the clocks on all the Stations are synchronised exactly.
In Computer speak this is called Event Driven Programming, where the code simply waits for an Event before doing anything.
So what’s the plan?
We need 4 Sprites
For the Clock Face
For the Hour Hand
For the Minute Hand
For the Second Hand
You can create them however you want but this is what the Swiss railway clocks look like and I will try and create something similar.
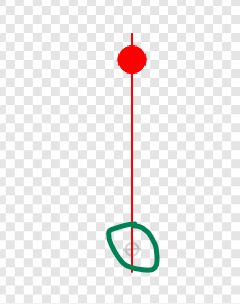
Remember one thing, when creating the Sprites make sure they are centred correctly.
So, the clock face should be perfectly centred and then the hands should be centred near one end something like this, I have highlighted where the centre is, with the green circle.
The code
Remember this will be event driven, so we will be using Broadcasts a lot. We will also have to calculate how far to move each hand, this means we will be using the number 360 a lot as that is one complete circle.
So just to let you know how far each hand should move:
The Second hand will move 360 degrees for each event.
The Minute hand will move 6 degrees for each event (360/60 minutes)
The Hour hand will move 0.5 degree for each event (360/60 minutes/ 12 hours)
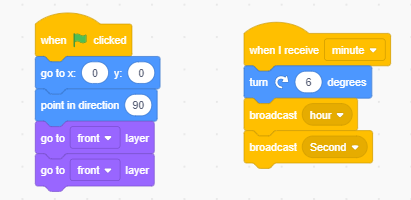
The first event will be broadcast from the Stage:
The Minute hand will receive this broadcast and move 6 degrees it will then broadcast another 2 events, one to the Hour hand and one to the second hand so they can move.
This is the code for the Minute hand which should be enough to work out the rest of the code as well.
The extra code above is to make sure the Minute hand starts in the correct position.
And one final thing which might be a little tricky, but I’ll leave it as a challenge for you, the Second hand should only take 58 seconds to go all the way around.
Luckily Scratch comes with a Piano Sprite, which we used and expanded it to fill the width of the screen.
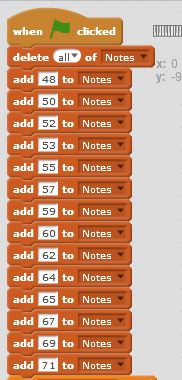
Next step was to create the list of all the notes, there are 14 keys on the Piano so we need at least 14 notes in our list.
We found out what notes are possible by using one of the Sound blocks and looking at what was possible
This gave us our list of possible notes:
Now on to the code…
We needed to work out what key on the Piano had been clicked, and convert it to a number between 1 and 14 so we could play the correct note from the list.
This required some tricky calculations, to convert the Mouses “X” position to a positive integer between 1 and 14.
First we added a number to make X always positive
Second we divided that by the size of a note.
And finally we rounded it up, using the ceiling function.
This ended up with the following code and a couple of Variables to store the “Extra” number to make X positive and the size of a note:
Once we had the positive integer we could use it to select the correct note to play from the list:
We did start some of the Buttons, and we will complete them next week. Notes for the buttons will be included then.
Buttons
In order to make the Piano a bit more usable we added 3 Buttons:
Record
Stop
Play
All three Buttons had two costumes, we used the second costume to change the colour of the Button, this made it easy to see if you had clicked the button or not.
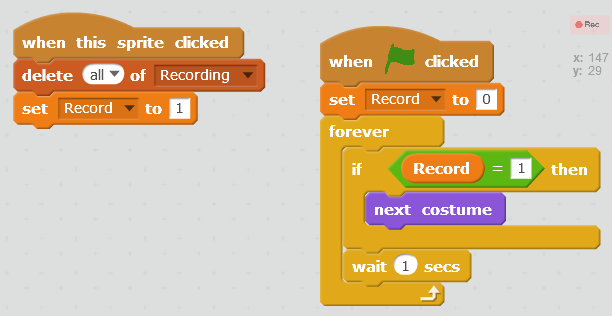
The Record button, simply set a Data Flag to indicate to the Piano code that it should “record” the notes being played in a List variable.
It also flashed while recording was “on”, this is the code for the Record Button:
We also had to add some additional code to the Piano to make sure the notes were recorded:
The Stop button was quite simple, we just set the Data Flag back to 0, and changed the costume for a short while to make it clear that the button had been pressed.
The Play button was a little more complex as it need to read all the items in the List and play the correct notes. It also flashed while playing. This is the code from the Play button:
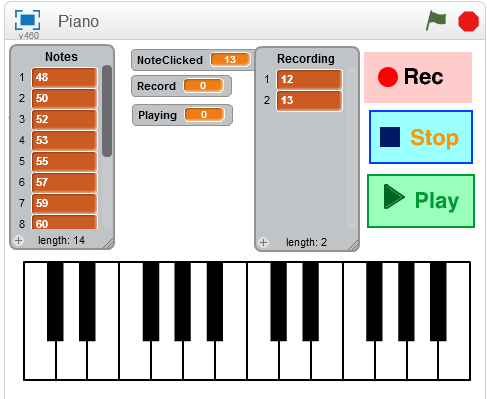
The Final project looked something like this, you can get a copy from the Scratch Web Site, see the Notes below.
Notes:
Note: My version of the project has been uploaded to https://scratch.mit.edu you can Sign in using the following details: