Unity – Tanks Tutorial Part 1

Update: This post has been updated with a link to download the project. See the bottom of the post.

Screen Shot 2016-02-29 at 00.17.14

This week we started work on the Unity Tanks tutorial. This is a single-keyboard, two-player, tank game where users can complete in a number rounds against each other.

We began with downloading the tutorial assets from the Unity Assets Store. This tutorial comes with many lovely assets including 3d models and audio clips.

The assets, as downloaded, contained a “Completed” folder. We deleted this first, as it has a second copy of many of the scripts and assets in the project and had the potential to create confusion.

We created a new scene and deleted the default directional light as we wouldn’t be needing it. Then we added the provide “LevelArt” prefab. This prefab contains the entire playing area and also contains a directional light. We discussed the different types of lighting that we can have in a game: ambient, directional, point, and spotlight. The image below shows the same scene lit in each of these four ways, respectively.

lighting

We then set our camera to be orthographic. We described the difference between orthographic and perspective cameras. With perspective cameras, the space the camera sees in front of it is shaped like a pyramid and things that are further away look smaller (as in real life). With an orthographic camera, the space the camera sees in front of it is box-shaped and things do not get smaller the further away they get. For some game types, the less realistic orthographic camera is a good stylistic choice. We also removed the standard skybox and just changed the background to a solid colour, again a good stylistic choice for this game.

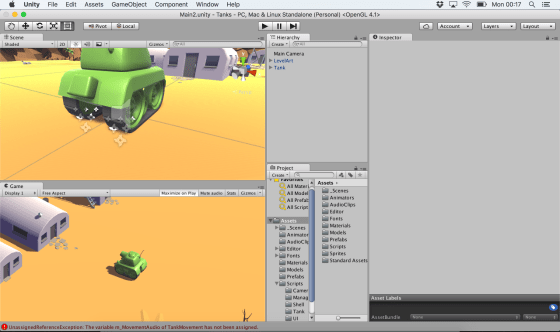
We then started to build our tank. The 3d model was pre-supplied, so we added it to the hierarchy. We then added a rigidbody, a box collider and two audio sources for the playback of sounds. We were able to add constraints on the rigidbody to prevent the tank from ever moving vertically, or from rolling or pitching. Applying these constraints both prevents unwanted movements and makes the physics engine’s job much easier.

Screen Shot 2016-02-29 at 01.02.07

Finally, we added two dust trail particle effects to the tracks of the tank. These were also pre-supplied as assets for the project.

We had just started to look at tank movement and that’s where we’ll pick it up again next week. The project can be downloaded here.

Remember that you should now be starting to plan and work on your own projects for the end of the year. Best of luck and we’re here to help in any way we can!

Beginners Scratch – Guessing Game

This week we decided to give everyone a little breather after the marathon that was last week!! The Guessing Game covers a lot of the same ideas as the Maths Game and reinforces the use of decisions and variables.

For this game we need: 1 sprite (to tell the player what to do and if their guess is correct or not), 2 backdrops and 2 variables (THE NUMBER and GUESS). The SPRITE holds most of our scripting.

FIRST: Scripting in the SPRITE, pick a random number and store it in the variable: THE NUMBER. Tell the player (use SAY block) that you are thinking of a number between 1 and 30….

CDA-S5-Challenge_11-Guessing Game-set random number

SECOND: ASK (yes, use the ASK block!) what the player’s GUESS is and store their guess in the Variable GUESS. !!!!NOTE: when you use the ASK command, the user input (their guess) is always stored in the variable ANSWER, until you reassign it to your own variable GUESS with the SET command in DATA)!!!

CDA-S5-Challenge_11-Guessing Game-ask for guess

THIRD: TEST whether the GUESS is TOO HIGH, TOO LOW or CORRECT using the IF decision block and OPERATORS: >(greater than), <(less than) or =(equal to).Also, TELL the player (use the SAY command) if they are TOO HIGH, TOO LOW or CORRECT.

CDA-S5-Challenge_11-Guessing Game-test guess

FOURTH: LOOP IT!! Use a REPEAT 5 times to give your player 5 chances to get the guess right. Check your work!! Go through each of the possibilities one time to be sure you get the correct response. What if they get it WRONG 5 times?? Tell them what the number was!

CDA-S5-Challenge_11-final script with loop

Use your own imagination to add new sprites that react to a broadcast you could send out after they guess the right answer or wrong answer. Get your backdrop to change after they guess correctly. (Hint: BROADCAST correct before STOP ALL and have the backdrop SWITCH costume when it RECEIVES the BROADCAST)CDA-S5-Challenge_11-Guessing Game-more to do

My copy of this game is up on http://scratch.mit.edu. Search for the cdathenry1516 coder name and check it out! Here is a copy of the notes: CDA-S5-Challenge_11-GuessNumbers.

We are taking a break for the next few weeks for mid-winter break! We will be back on February 27th! Happy Coding!

Julie


Unity – Creating Objects at Run-Time

This week, once we made the final finishing touches to Amazing Racer, we took at look at a small project which introduced a number of new concepts, which are very useful when building games:

  • Creating objects at run-time
  • Creating a coroutine
  • Using random values
  • Using array parameters to specify multiple values

To create object at run-time, we saw the Instantiate method. This method is provided with a reference to an existing game object or prefab and it will create a new copy of it in the scene. Optionally, a new position and a new rotation can be specified for the duplicated object. The Unity documentation has more information on Instantiate.

A coroutine is a special kind of method. It is a method that can do some work, relinquish control temporarily to the game engine for a period, and then continue from where it left off. It has the special return type of IEnumerator. By calling yield return it can relinquish control. By calling yield return new WaitForSeconds(n) it can relinquish control for a specific period of time. To start a coroutine, we use the StartCoroutine method. You can read the Unity documentation for more information on coroutines.

We saw how Random.Range(min, max) can be used to give a random value between a maximum and minimum. This randomness can add interest and naturalism to our scene. The Unity manual reference for the Random class is here. You will see that there are many other ways to get random values, apart from the Range method.

Finally, we saw how a parameter can be an array. We used an array to specify multiple game objects which could be created by our source object. In the source our property objectsToSpawn is an array, as indicated by the square brackets [].

SourceControlProperties

In the inspector panel, we can see Objects To Spawn which offers a size that can be set, in this case we’ve entered 3, and as many boxes as the array is large.

SourceControlInspectorPanel

The Coroutine Test project is available here.

Our completed Amazing Racer project is available here.

Finally, I was asked to provide the completed Roll-A-Ball project too. That’s here.

All these projects are compatible with Unity V5.3.2f1.

We look forward to seeing you in two weeks! Remember to work on your game ideas over the break!


PiDojo- Making Our Own Robot Functions

Last week we used GPIO Zero’s inbuilt functions to control our robots. These functions allowed us to move or turn our robot using time to control the amount of movement, this week we made our own functions which allow us to control our robot using distance and degrees. A version of the code we used is available here and check out my slides here Robot Functions.

ModderDojo – Updated Scriptcraft Server

5 Feb 2016: I have compiled the latest version of Spigot (Version 1.8.8, 22 Jan 2016), which is a high-performancse server based on CraftBukkit, and added in the latest version of Scriptcraft (Version 3.1.12, 30 Dec 2015).

You can download it here: https://www.dropbox.com/s/9eg5e5j8j1ubr6w/2016-02-Spigot.zip?dl=0

The version of CanaryMod+Scriptcraft that we were running for the past couple of months was very unreliable, so hopefully this will be better!

PiDojo- Controlling A Robot From The Keyboard Using Pygame

We had another enjoyable session this week, we especially enjoyed the drone demo by Chris Tierney.

We began our ownsession by looking at using input from our keyboard with Pygame to control our robot. We then returned to last week’s challenge, programming our robot to follow a defined path. We continued to have issues with the robots going off in arcs rather than straight line so we started to build corrections into the code. We will continue with this next week and we will learn to use functions to tell our robots what distance we want them to travel or the angle we want them to turn instead of using times to control them.

Here are my notes from today pygame robot and our code is available here

For more on Pygame there’s a very good tutorial here

Scratch Beginners – Challenge 10 – Maths Game

Wow! We had an exceptional day at Coder Dojo on Saturday! We did a huge amount of work developing a maths game in Beginner’s Scratch. My finished project is on the SCRATCH.MIT.EDU website under the user: CDATHENRY1516. Check it out and upload your final version!CDA-S5-Challenge_10-Maths game-how to

  1. the player picks a level of difficulty and the computer chooses 2 random numbers to add (subtract or multiply- whichever you choose!) together and show the numbers to the player. Fr this we needed 2 SPRITES and 4 VARIABLES called SCORE, LEVEL, NUMBER1 and NUMBER2 as well as 2 BACKDROPS. CDA-S5-Challenge_10-Maths game-ask questions1CDA-S5-Challenge_10-Maths game-ask questions
  2. The player then has to enter an answer to the equation and the computer tells them whether they are wrong or right. CDA-S5-Challenge_10-Maths game-decisions alternative end
  3. We repeated the ask/answer questions 5 or 10 times. Can you figure out where the REPEAT loop fits?
  4. We also had a second sprite who reacted positively to correct answers BROADCAST and negatively to wrong answers BROADCAST. You can use whatever sprites you like and change their look whatever way you like. One coder added a puppy as their second and had him bark whenever an answer was correct. CDA-S5-Challenge_10-Maths game-sprite 2
  5. After all the questions were asked we had the 1st Sprite SAY – Game Over! and BROADCAST Game over so that the backdrop changed and music played. There are two ways to change the backdrop- see below!CDA-S5-Challenge_10-Maths game-alt backdrop CDA-S5-Challenge_10-Maths game-backdropCan you improve our game??! Can you figure out how to subtract or multiply instead of add? Can you get the computer to add three numbers together or give the user 3 level options like: easy, medium or hard? The notes for the Maths Game are here: CDA-S5-Challenge_10-MathsGame-simple addition. Happy Coding! Julie