
Having done tagger.js, I thought “wouldn’t it be nice not to have to specify the design by hand?”
I started thinking about how cool it would be to have a way to take an image file and use that to define the design that tagger.js was going to spray.
The first thing that I determined was that, as far as I can see, there isn’t any built-in support for the various image formats (GIF, JPEG, PNG, etc.) in ScriptCraft. OK, so what then? Well, web browsers are great at handling images in all kinds of different formats. The HTML5 canvas element is good for playing around with bitmaps and on top of all that, JavaScript is supported for the coding part!
So, with very little previous experience and plenty of Googling, I decided to make a web page which would allow the user to enter a file’s name, press a few buttons and a ScriptCraft script would appear, as if by magic. Development was pretty smooth, baring one significant road-bump which I’ll describe. I’m not going to go into details about how the HTML file was made, but it should be clear enough if you want to read it. I will however describe the process of colour mapping.
HTML5 and a Tale of Tainted Canvases
Say what? An odd problem I quickly hit was that I couldn’t just specify an image file from just anywhere (using HTTP:). In fact, even worse, when I directly loaded my HTML page in my browser (using FILE:), I couldn’t even load up an image file which was in the same directory as the HTML page.
More Googling followed. Turns out that the browser was trying to protect me from “cross-origin data”, which is a security risk. Luckily there was an easy solution. I downloaded a small web server application and used that to serve my HTML page, which eliminated the issue. The web-server I chose was Mongoose, because it’s a single application, light and fast, but you can use another web-server if you prefer.
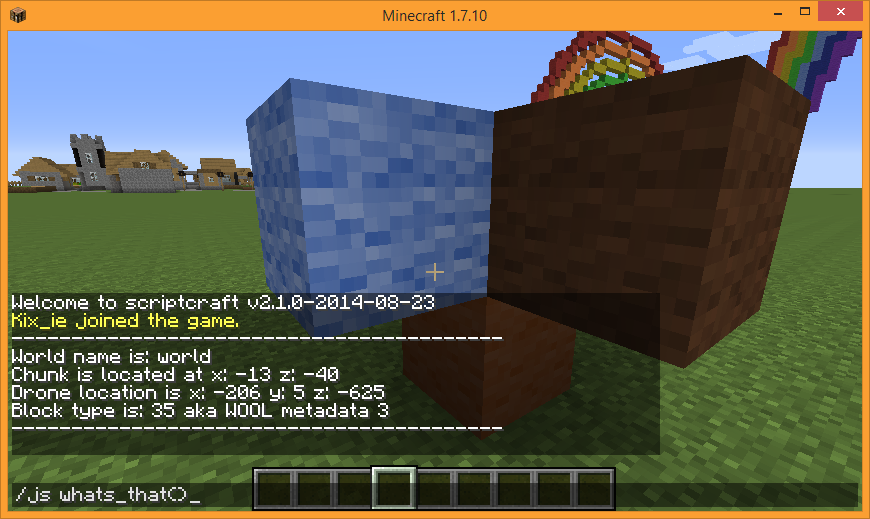
Testing in Chrome
I used Google Chrome as my browser for developing and testing this webpage. Chrome has a JavaScript console, which greatly simplifies debugging scripts. It can be found from the menu to the right of the address bar, at More Tools > JavaScript Console. Among other features, It allows you to set breakpoints and watch the value of variables as the script executes. It will also show you errors in your code, where it finds them.
Colour Mapping
The most important part of this script is mapping the colour of each pixel in the original image to an equivalent block in MineCraft. For this example, I have restricted myself to the 16 wool colours. So, for every pixel in the original image, I have to choose the MineCraft wool block that’s the closest in colour.

MineCraft Wool Palette
The colours we are going to match against are above. If you’re curious, here’s how I generated this MineCraft palette, I laid all 16 MineCraft wool blocks in order, from white to black, and then took a screenshot. This screenshot was, of course, influenced by the lighting in MineCraft at the time I took the screenshot and each block had the wool texture applied to (i.e. they weren’t just one flat colour). I did some further image manipulation to improve the palette. I applied a strong blur effect to downplay the effect of the texture and then I used my image editors Histogram Stretch functionality to make sure that the whitest and blackest colours were pushed towards true white and true black. Finally I sampled one point on each block and that became my representative colour.
These colours, in RGB format, became an array in the JavaScript inside my webpage:
var paletteRGB = [[255, 255, 255],
                  [222, 146, 79],
                  [177, 98, 186],
                  [115, 152, 197],
                  [178, 185, 60],
                  [76, 179, 67],
                  [213, 151, 159],
                  [51, 51, 51],
                  [164, 180, 170],
                  [44, 109, 122],
                  [116, 68, 167],
                  [30, 50, 113],
                  [59, 43, 14],
                  [35, 62, 15],
                  [132, 53, 40],
                  [0, 0, 0]];
RGB (Red/Green/Blue) is a common way to represent colour. Its three numerical values, each of which can range between 0 and 255, represent the relative strengths of the Red, Green and Blue channels. We can think of this as a co-ordinate system, with the R, G and B values as axes.
The image above shows what this looks like. Pure white is on the corner nearest to us. The opposite corner, which we can’t see, is pure black. Colours aren’t just on the surface of this cube either, If we were to cut through it at any plane, we would see all the colours on the inside as well.
Therefore, the difference between two colours can be thought of as the distance between two points in RGB space. It’s Pythagoras’ Theorem again, as we saw in the rainbowk.js project, but in 3D. All we have to do is take the colour of each pixel in the input image, calculate how far is is from each MineCraft wool colour and pick the wool colour which is the closest in distance; that will be the most similar.
Easy right? Well, almost. Turns out, our eyes don’t quite work that way. We’re not as sensitive to changes in some colours as we are in others. We’re most sensitive to changes in shades of blue, and least sensitive to changes in shades of green. If asked to pick by eye, we might make a different choice for the “closest” colour than then one given by mathematics alone. Luckily, scientists have worked out factors which account for this. If you look in the final script you’ll see that there are factors which are used to weight (make more important) the difference in some colours than others. You don’t need to understand how these numbers were arrived at, just understand why they are there.
// It's Pythagoras' theorem again, but weighted.
function weightedDistanceSquaredRgb(r0, g0, b0, r1, g1, b1)
{
  // These weights are used to convert RGB -> YUV and are useful here
  // to enhance the perceived closeness of two colours
  var weightR = 0.299;
  var weightG = 0.587;
  var weightB = 0.114;

  // Distance between two points in space: sqrt(x^2 + y^2 + z^2)
  return distanceSquared(r0 * weightR, g0 * weightG, b0 * weightB,
                         r1 * weightR, g1 * weightG, b1 * weightB);
}
By the way, notice that we’re returning the distance squared here. It’s a common programming shortcut if we’re just checking for the nearest thing. If something has the closest distance, it will also have the smallest distance squared. Doing the square root calculation isn’t worth it – so we don’t.
Downloading and Running
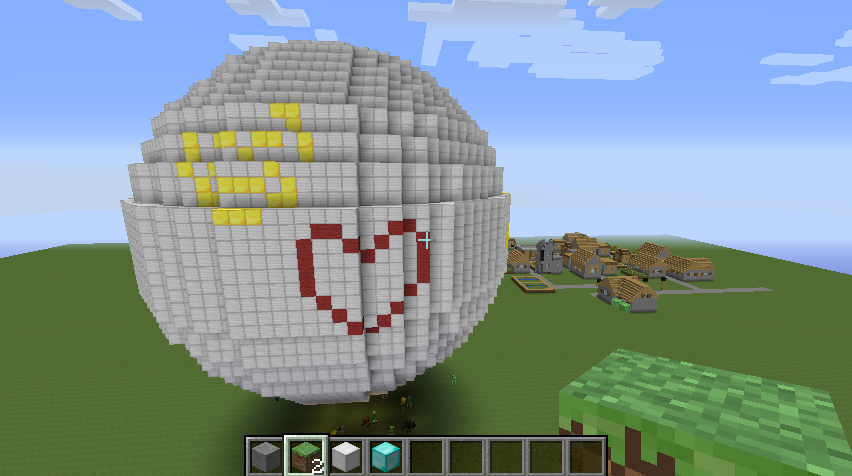
The ZIP file containing this HTML file (image_process.html) and a few sample images can be downloaded from here. Remember, you’ll have to use a web-server to view this webpage and have it be able to process the images. Feel free to try your own images, just copy them into the same directory as the HTML file first, and remember to keep them small as every pixel becomes a MineCraft block. My sample images are all around 40px wide.
What’s Next?
Next week we’ll extend this little application to add optional transparency to the output and merge it with tagger.js so our image is sprayed onto the environment.


