Tips for CoderDojo Athenry Online Sessions

Using Teams

We are using Microsoft Teams. Each week, we will post links on the CoderDojo Athenry website and Facebook. Here is are the links for 21 November: Information and Links for week 2 | CoderDojo Athenry

When you are using Teams, please keep your microphone off unless you need to ask a question. You can have your webcam on or off, whichever you prefer.

Here are the main buttons you might need:

Two Screens

It is much easier to follow the session if you have two screens, one for the Teams window and one for your own code. Here are two ways to do this:

  1. If your laptop has a HDMI port, you could connect it to a TV with a HDMI cable, or you could connect a spare computer monitor if you have one. Then press Windows and P, and select Extend. Then you can have different windows in each screen.
  2. You could use your laptop for your own code, and connect to the Teams session with a separate phone or tablet.

Asking Questions

As well as the main mentor leading the Teams session, we have other mentors who can answer your questions at any time.

Either: press the Chat button and type your question

Or: press the Raise Hand button and wait for the mentor

If Chat Does Not Work

If you get an error when you try to press the Chat button, it might be because you are logged into a work or school Teams account that has chat restrictions. If so, here is a solution:

  • Press Leave to leave the CoderDojo session
  • Sign out of Teams – click on your picture in the top right corner to open a menu, and Sign Out is at the bottom of the menu
  • Click on the link to join the CoderDojo session again, and this time join as a guest without logging into your school/work account.

Hackers – Programming in Python

CoderDojo-Hackers-IntroToPython

As we plan our AI robot to play Connect-4, we have decided that Python would be a good programming language for the job, as it is widely used for many of the tasks we will need to do:

  • Computer vision
  • Artificial intelligence
  • Hardware control

Therefore, we spent time this week brushing up on Python. Following the same approach that we had used previously to move from Scratch to C, we looked at how we would move from programming in Scratch to Python.

Here is the full set of notes (PDF): CoderDojo-Hackers-IntroToPython

Kevin then spent time explaining how to write a basic Python program to read an image from a webcam. Here is the code:


# We are using OpenCV
import cv2

# Capture webcam image
camera=cv2.VideoCapture(0)
val, img = camera.read()

# Display the image
cv2.imshow("Window display", img)

# Stop using the camera
camera.release

Brainstorming a new Hackers project – an AI robot to play Connect-4

conn4

The Goal

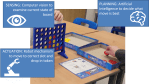
In this session, we started planning how we will build an intelligent robot that can play the game of Connect-4. Our aim is that it will be like playing against a human, with a physical Connect-4 set, not just a computer game. This is the plan we had come up with during our brainstorming the previous week, so this week we started to figure out how we can achieve this.

This will be a challenging project that the whole group will work on together. It will require lots of teamwork, collaboration, and learning.

C4-MainPlans

The Major Components

We spent time thinking about the major components that our system will need, and planning the major tasks for these components on the whiteboard. They will include:

  1. A robot mechanism to play a move, which will involve moving to one of the positions 1-7 at the top of the board and dropping in a token, then reloading for the next time.
  2.  A camera to view the board and analyse what it sees, to figure out which spaces have a red token, which have a yellow token, which are free, and whether anyone has won (4 in a row) or has a promising state (one or more 3-in-a-row).
  3. An AI decision-making system (see below)
  4. A software version of the game that we will find online and modify so that our AI can play it, so that we can work on the AI before the physical robot is ready.

For each component, we identified some major tasks and people volunteered to work on 2 major components each.

We also agreed that Python is a good programming language for the task, so we will have to brush up on Python next.

C4-AI

The Artificial Intelligence

The group spent some time playing rounds of Connect-4 against each other, in order to get us thinking about how we would design a computer strategy to play the game. Then we returned to the whiteboard, where people gave their ideas about the main strategies to be followed – these are on the right side of the whiteboard.

Some of the strategy ideas people proposed:

  • Work towards 4 in a row (obvious but important!)
  • recognise states with the potential for 4 in a row
  • have multiple paths to win
  • try to block your opponent.

This made me think of a general AI algorithm for playing 2-person games, called the Minimax Algorithm. This is based on constructing a game tree of all possible future moves, by yourself and by your opponent, for a number of steps into the future (called the lookahead or depth limit). Then, we evaluate all possible future game states using a utility function (also called fitness function): this will return a low value (e.g. -20) if we lose, a high value (20) if we win, or some other intermediate score if the game is not over, such as a count of the number of 3-in-a-rows we have, minus the count of our opponent’s (this will definitely be between 20 and -20). We will then pick the move that should lead to us a state with as high a utility as possible. Also, if we assume our opponent is rational, they will pick the move that will give us as low a utility as possible, so we can use the game tree to predict what their best possible move is, and be prepared for them! Each time they take a move, we can re-calculate the game tree to plan a new best move.

We then looked at the strategy ideas people had proposed, and saw how they are achieved by the Minimax algorithm, even though it’s a general algorithm, not just for Connect-4!

There are some good videos and tutorials about the minimax algorithm on line. Here are two that I liked:


Hackers – Components of a Desktop PC and a Raspberry Pi

pc+pi

At CoderDojo Athenry, the Hackers spent some time examining the components of a desktop PC and a Raspberry Pi 3+ and a Raspberry Pi Zero.

Even though the Pis are much smaller than a desktop PC, they are functionally equivalent – as we saw, you can plug the Pi into the keyboard, mouse and screen of the desktop PC and use it like one.

We identified the major components of a desktop PC, and saw where each of them appear on the Raspberry Pi also:

  • CPU – the central processing unit that does all calculations and processing. All data in a PC gets represented as numbers, so all data processing ends up as calculations.
  • GPU – a dedicated processing unit just for graphics, that specialises in multiplying and adding matrices (pixels on a screen are represented as a matrix). Not all PCs have one, but they are important for high-performance graphics.
  • RAM – the short-term memory of the computer, used by the CPU to store data.
  • Hard Drive – this might be a hard disk drive or a solid-state drive. This is for long-term storage. It holds much more than RAM and the data remains when the PC is powered off, but it is much slower for the CPU to get data from the hard drive than from RAM.
  • DVD Drive – not all PCs have this. DVDs or CDs allow permanent storage that can be removed. Some are read-only and some allow reading and writing.
  • Motherboard – the circuit board on which everything else is mounted.
  • Power Supply – this is built into a desktop PC. For a Pi, this is a 5-volt supply such as a phone charger.
  • Networking – ethernet for wired networks and/or wifi for wireless networks.
  • Controller chips and connection ports (such USB and HDMI) for peripherals.
  • Case – Pis don’t always have these.

We noted that the Pi has a single chip that has its CPU, a basic GPU and up to 1GB of RAM all stacked in layers on top of each other. While its CPU is lower power than a standard PC CPU, it benefits from having a really short distance that data has to travel from RAM to CPU. CPUs run so fast that having electrons travel a few centimetres is a significant delay!

PCs and the Pi also have connections for peripherals, which is anything that can be connected to it, using USB, Bluetooth, HDMI, or other connection types:

  • Keyboard and mouse
  • Screen

The Raspberry Pi Zero has micro-USB and micro-HDMI connectors to keep everything as small as possible, and it has wifi only, no ethernet port (though it is possible to get a micro-USB to ethernet adapter).

A couple of members of the group have built their own desktop PCs, which is an impressive feat!

Hackers – Soldering LED Circuits

At Hackers this week, we learned how to solder. Group members stripped wires and then soldered them together, and they made LED circuits by soldering them onto stripboard, and tested them with Arduino programs.

As we discussed, it is important to build your circuits temporarily with a breadboard (where you just push the wires in, and can easily move them) before moving onto soldering them on to stripboard. Stripboard (also called Veroboard) has holes every 2.5mm in a grid, and has copper strips on one side connecting the holes in one direction. You mount the component (such as an LED on the side with no copper, and solder its pins to the copper strip. Then, you can solder a pin of a different component somewhere else along the same copper strip, and current can flow through the copper strip.

There are plenty of videos on YouTube  to demonstrate soldering technique. Here is one by Emer Cahill of GMIT:

Hackers – Getting started with Python programming on Arduino

circuit2

In the past two weeks in the Hackers group at CoderDojo Athenry, we have started Python programming on the Raspberry Pi.

The Pi is about the same size as the Arduino that we used earlier, and the Pi Zero is about the size of the Arduino Nano, and both Pi and Arduino have input/output pins for physical computing. However, they have significant differences.

Unlike the Arduino which is a microcontroller (which means it is designed to run a single program that was uploaded onto it), the Raspberry Pi has a full computer operating system, so it is more like a PC to use. It can be programmed in many languages, but Python is a popular choice as it is clear to read and there are lots of libraries to make tasks easier. Because it’s a full computer, you can write and run your programs all on the Pi, without connecting it to a laptop.

The first step in programming is to figure out how to do loops, variables and decisions, as these are fundamental. Here is our first Python program to try out these:

# Python comments start with #

age = 14 # a variable holding an int
name = "Michael" # variable holding a string

# Output
print ("My name is", name, "and my age is ", age)

# Loop
for x in range (1, 5):
    print ("This is line ", x)

# Decision
if (age  17):
    print("Adult")
else:
    print("Teenager")

Next we moved on to using the GPIOZero libraries for controlling lights and buttons. We will continue to explore this in the coming weeks.

The documentation is here: https://gpiozero.readthedocs.io/en/stable/


Hackers – Distance Sensor

Some of our Hackers have projects of their own that they are working on, to possibly submit to BT Young Scientists or elsewhere. Last Saturday, those people were focused on working on their own project, with occasional help from peers or mentors where needed.

Those who were not working on their own projects extended last week’s Arduino project to add an ultrasonic distance sensor, replacing the variable resistor that they used last week.

Ultrasonic distance sensors are interesting: like sonar in a submarine or how bats navigate, they send out a short sound pulse (ultrasonic – too high for humans to hear) and then see how long it takes for an echo to come back. Since the speed of sound in air is known, we can calculate the distance to the nearest object based on the time for the round trip.

Here is a good tutorial on how it works: https://howtomechatronics.com/tutorials/arduino/ultrasonic-sensor-hc-sr04/

Above is a circuit designed by mentor Kevin for an ultrasonic distance sensor and a buzzer, to work like a car parking sensor that beeps faster as you get closer to an obstacle.

Below is Kevin’s Arduino program to control the distance sensor and print out the distance. Some people in the group modified this to use buzzers, others turned on 1, 2 or 3 LEDs depending on distance. #

const int triggerPin = 12;
const int echoPin = 10;

// The speed of sound in air at standard temperature and pressure is 343m/s.
// The range of the sensor is 4m.  It takes 2*4/343 seconds for an ultrasonic
// pulse to travel that far and back.
// We'll use that as a timeout later.  There's no point in waiting any longer
// than the time it takes to read an object at the maximum range of the sensor.
unsigned long echo_timeout = 2*4000000/343;

void setup() {
 Serial.begin(9600);
 pinMode(triggerPin, OUTPUT);
 pinMode(echoPin, INPUT);
 pinMode(LED_BUILTIN, OUTPUT);
}

void loop() {
  unsigned long duration;
  float distance;

  // Begin by resetting the distance sensor 
  digitalWrite(triggerPin, LOW);
  delayMicroseconds(2);
  // Write out a short pulse for 10 microseconds
  digitalWrite(triggerPin, HIGH);
  delayMicroseconds(10);
  digitalWrite(triggerPin, LOW);
  
  // pulseIn will wait for the input on echoPin to go HIGH.  Then it will
  // time how long it takes to go LOW.
  // The duration in microseconds is returned.
  // We'll wait, at most, echo_timeout microseconds for a pulse. 
  duration = pulseIn(echoPin, HIGH, echo_timeout);
  Serial.print("duration = ");
  Serial.print(duration);
  Serial.print(" microseconds;  ");
  
  // Convert duration to distance. Note decimal point here, needed to get floating point calculation.
  distance = duration * 343.0 / 1000 / 2;
  Serial.print("distance = ");
  Serial.print(distance);
  Serial.println(" mm");
}