Advanced Scratch – Week 7 – A fancy Piano

What are we going to learn this week:

Modularistion – How to make your code simpler and easier to look after.

Sequential Processing – review

Databases – storing static data to use later in the day.

Remember the Piano last week, where we ended up with the same code repeated again and again, all that copying, yeaagh!!!

Well this week we are going to have a look at doing the same thing but a little smarter.

This is the code that we ended up with last week, where everything was the same apart from the Mouses X position that we were checking.

Well we are going to look at making this a lot smarter.

Let’s imagine if we could get the notes on the Keyboard to got from 1 to 15 instead of 48 to 72, that should then make things a lot simpler. In order to do this we need to do a little number crunching, don’t worry if you don’t understand all of what follows.

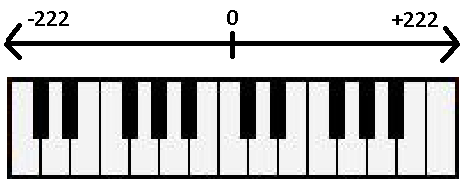
My Piano Keyboard goes from X = -222 to x = +222 it would be easier if it went from 0 – to 444?

We can sort this out easily enough, we just make our own variable to store the Mouse X value, and add 222 to it, like this:

So our Keyboard is now 444 units wide and there are 15 keys on it, that means that each key takes up (444 / 15 ) 29.6 units.

If we divide the MouseX value by 29.6, we get the number of the Key that has been pressed (ranging from 0 to 14). For example if the User clicks on the third note, this would have an X value of around -150, we add 222 to that, which gives us 72, we then divide 72 by 29.6 which gives us 2.43, if we just take the number before the decimal point, this gives us 2, which is the third key 0,1,2. And to make it three we just add one.

Now to get just the number to the left of the decimal point is not as simple as rounding, as we always want to round DOWN. So the simplest way to do it in Scratch is to just treat as some text and find out where the “.” is. If it is in the third character then we take tw characters, otherwise we just take one. Fortunately we know that there will only be a maximum of two numbers on the left. And finally we add the one at the end so we end up with this…

Now this has got us a number from 1 to 15, how do we translate that into the correct Note to play?

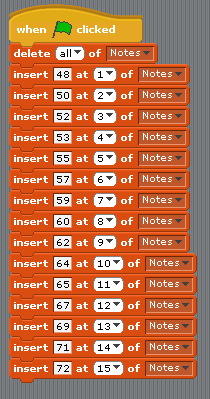
We need a Database of all the possible Notes that can be played. We will store this information in a List, and fill it full of data when you click on the Green Flag.

The Notes go from 48 through to 72, with a few missing inbetween. What we want to do is have the Notes numbered from 1 to 15. This will make it easier to figure out what note to play when the user clicks on the keyboard.

We fill the list as like this…

So how does this all help us get rid of the big long repeated code block that we had before?

Well, instead of looking to see where the mouse is ourselves we just ask the code that does all the Maths to figure it out for use. We can use a Broadcast and Wait for this, so we have one “if mouse down” which asks the other code what Note should be played.

If you take out the Record and Playback code, this is everything you need…


Beginners Scratch – Challenge 6 – Story-Telling and Scrolling Backgrounds!

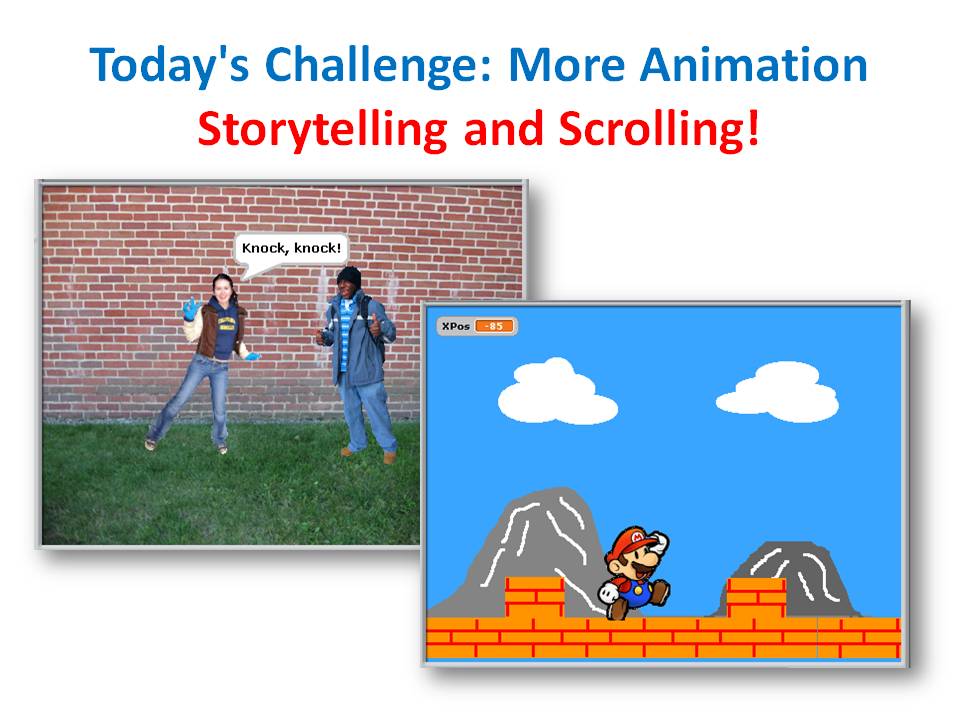
This week, our challenge is to work on Animation projects. We are looking at two project ideas: telling stories and scrolling backgrounds.

To tell a story, we have two sprites with speech and pauses carefully timed so that they have a conversation with each other. I just did a simple knock-knock joke, but you could do more.

After, we worked on how to make a scrolling background, a bit like the scrolling demo example that is supplied with Scratch. We figured out how to create the appearance of left/right movement by moving a sprite representing the ground in the opposite direction. We also found out how to make distant background objects, like mountains, move more slowly (called the parallax effect).

Coding concepts that we discussed included:

  1. Speech bubbles and sound
  2. Timing sprites
  3. Loops

Here are the notes from the day (PDF): CDA-S2-Challenge06-StoriesAndScrolling.pdf

Here is my Knock-Knock animation: http://scratch.mit.edu/projects/cdathenry/2899125

And here is my Scrolling Background with Mario: http://scratch.mit.edu/projects/cdathenry/2531497

If you would like us to send you the PowerPoint slides of my notes, get in touch via twitter or by leaving a comment.

Advanced Scratch – Week 6 – Lets Build a Piano


What are we going to learn this week, well it might take two weeks to get this completed.

Lists – How to put stuff in.

Lists – How to get stuff out.

Record – How to record things that happen, we might use a list for this 🙂

Playback – How to replay things that have happened, we might use a list for this 🙂

Mouse – where is it on the Screen, we use this to determine which Piano key has been pressed.

Lists

So what is a List, well they are like variables, you get to them from the same screen, but there are just a lot of them joined together. You would normally use them for similar types of things, like a Shopping list for example, where you put different items of food:

Chocolate, Crisps, Biscuits, Tea, Coffee.

We are going to use a list to store all the different Piano Keys that have been clicked. We can then use the same list to Play the Notes back again.

We also get to use the Button Building Block to add some buttons, one for Record and one for Play etc.

So what do we need for out Piano, well, we need a keyboard for a Start, we only need 16 notes (2 octaves) and we can either draw it ourselves or borrow one from somewhere.

Something like this would be good

Then we need to play the right note depending upon where the user has clicked.

There is one piece of easy code that just needs to be repeated over and over again with slightly different numbers. Here is a sample of what is needed and then you just need to repeat it with the different numbers for the location (mouse X / Y position) of the different keys.


Playback Time – so how do we play back what we recorded, well I just imported my Go Button Sprite to start the Playback and added the following code to run when I recieve the Broadcast from the Go Button… Remember how we did this before.

I needed to create another variable as well to keep track of which Note in the List we should be playing.

And finally, there is some initialisation code that keeps things nice and tidy when you click the Green Flag. But you could import another Button and use that to reset the Notes List, which would be much nicer. And don’t forget we already have the Button as a Sprite, so this should be easy to add in.

The go to x,y code I found to be quite useful as when you Click on the Piano Keys it can move the Keyboard around a little. But again, remember this will only happen in “Design” mode, when you switch to Presentation Mode, you won’t see this problem.


Beginners Scratch – Challenge 5 – A Better GhostBuster Game!

This week, our lead mentor was Declan Fox, who did a great job.

The challenge was to enhance our GhostBuster game from out last challenge.  The game involves PacMan character, controlled by the mouse, who has to catch ghosts that move at random.

This week, we added levels that make it go faster and change the colour of the background, and we added animations (PacMan chomping, ghosts blinking & sticking out their tongues), and background music.

Coding concepts that we discussed included:

  1. Loops
  2. Animation
  3. Broadcasting to communicate between sprites

Here are the notes from the day (PDF): CDA-S2-Challenge05-BetterGhostCatcher.pdf

This is my version of the updated game: http://scratch.mit.edu/projects/cdathenry/2485407

If you would like us to send you the PowerPoint slides of my notes, get in touch via twitter or by leaving a comment.

Advanced Scratch – Week 5 – Code Recycling and parallel processing

What are we going to learn this week.

  • Buzzer Game – Using old code and a little new code we can build a game.
  • Code recycling – How to re-use code that you have already written.
  • Parrallel vs Sequential Processing – sounds worse than it is 🙂

Buzzer Game

Navigate through the Maze to earn More Money, the more you get the Harder the game becomes.

Most of the code for this game you have already written, cool… But there is some  new code that you will need.

So, lets do the New code first…

We need a coin, or something that you can move with the mouse and that will BUZZ and Shake when it touches a particular colour.

This is my Coin here…

I have one costume for normal and one costume fo buzzing!

We now need to set up some code so that you can move it with the mouse, this is similar code to the button code we did, and I found a better way of doing it!

What you want to happen is if the mouse is on the Coin you can Click to grab it and it will move wherever the mouse moves until you let go of the mouse.

We also want it to Buzz! when it touches a particluar colour, to test this I just drew some lines on the Stage and used the Dropper tool to select the right colour.

SEQUENTIAL PROCESSING – This is my Buzz code, I just move it around a little and make a noise. Notice on the Broadcast that it is a Broadcast and Wait, this allows the Buzz code to work correctly.


And the code that allows you to click and drag the coin around the Screen goes something like this…

Advanced Tip 1. To test this piece of code, you will need to run your program in full screen mode, otherwise Scratch is in “design” mode and moves the Sprite anyway.

The Maze.

CODE RECYCLING PART 1. Remember last week whne you did the Truchet Patterns, they were pretty maze like, weren’t they. Well all we need to do is import the Truchet Sprite, maybe play around with it a little bit and you will have your maze.

What I changed in my Truchet Pattern, was the size of the initial square, I made it bigger, and also I didn’t stamp along the top line or the bottom line so the coin has somewhere to aim for.

The other thing that you might have to change is if you have used curved lines, you might want to change them for straight lines, otherwise the gaps between them can be very close. Alternatively you can make your coin very small.

So once I had adjusted my pattern, I ended up getting something like this.

CODE RECYCLING PART 2. Remember the Button we did, well let’s bring that into the Game as well so we can use it to Start everything off

Now you need to connect everything together. This is where the fun Starts…. 🙂


Beginners Scratch – Challenge 4 – Create a GhostBuster Game!

This week, our lead mentor was Martha Madden, who blogs at kidswithskills.wordpress.com.

The challenge was to develop a game with a PacMan character, controlled by the mouse, who has to catch ghosts that move at random.

Coding concepts that we discussed included:

  1. Design of programs
  2. Loops
  3. Decisions
  4. Using the Paint Editor in Scratch

Here are the notes from the day (PDF): CDA-S2-Challenge04-GhostCatcher.pdf

If you would like us to send you the PowerPoint slides of my notes, get in touch via twitter or by leaving a comment.


Advanced Scratch – Week 4 – Truchet Tiling.

We were supposed to do this last week, but we had so much fun with the Spirals that we didn’t have enough time.

What we are going to learn this week.

  • Recap on Saving Images created in Scratch to Picture files on your Computer.
  • Drawing an accurate image – this is important for Truchet Tiling.
  • Recap on Exporting Sprites.
  • Truchet Tiling – these are cool…:)

Recap on Saving Images.

First you need to run you Scratch Project in Full Screen mode.Then you press the Print Screen button, this should be on the top right of your keyboard somewhere 🙂 Nothing appears to happen when you press that button, but in the background the screen has been saved to your clipboard (same as copy and past).
Then, from the Start menu, go to Accesories and Paint, when Paint is open you cna just Paste in your picture. You will have to edit it a little as you will have the full screen in there!

Sorry, that was for the Windows Users, I’m not sure what it is on a Mac 😦

Truchet Tiling.

These are designs based on work done by Sébastien Truchet

From Wikipeadia:

“One particular pattern that he studied involved square tiles split by a diagonal line into two triangles, decorated in contrasting colors. By placing these tiles in different orientations with respect to each other, as part of a square tiling, Truchet observed that many different patterns could be formed.”
We can do them quite easily in Scratch, there are just a coule of key things that need to be done correctly.

Drawing an accurate image.

Start a new Scratch Project, delete the poor Cat as he is fed up being in every project and draw your own Sprite.

The key here is that your Sprite must obey the following rules:

  1. It must be perfectly Square.
  2. Any Lines that you draw must touch the edge of the Square at the exact Centre.

I did this in a few stages.

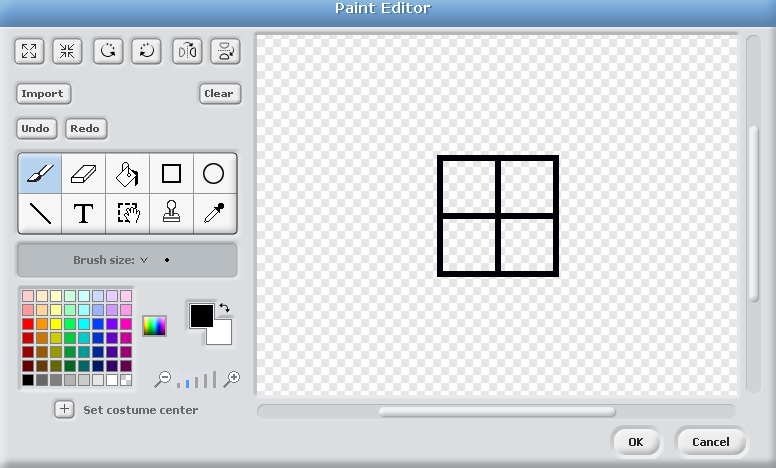
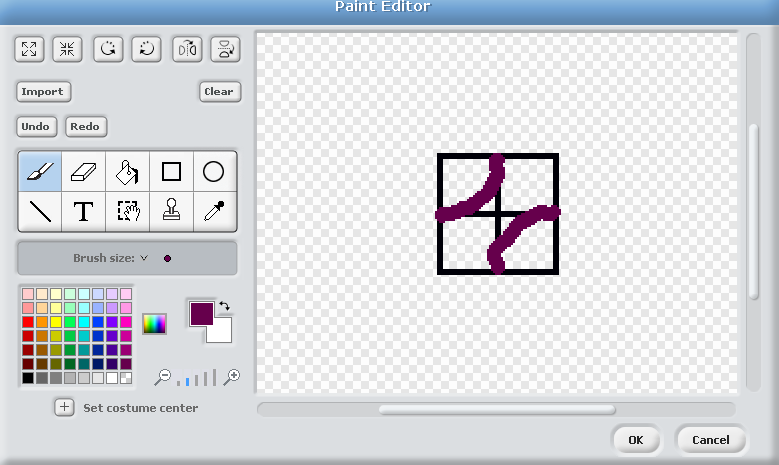
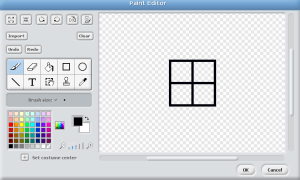
First draw a Square, in black, with a Vertical Line and a Horizontal Line, it should look something like this, don’t make it too big please.
Advanced Tip 1 -If you hold down the shift key when drawing the square in the Paint Editor, Scratch will force it to be a Square, you wont have to guess. This also applies to circles, if you hold the shift key down they will be perfectly round.

Advanced Tip 2 – If you draw a small square using tip 1, you an then use the stamp tool to make it into four perfect squares.

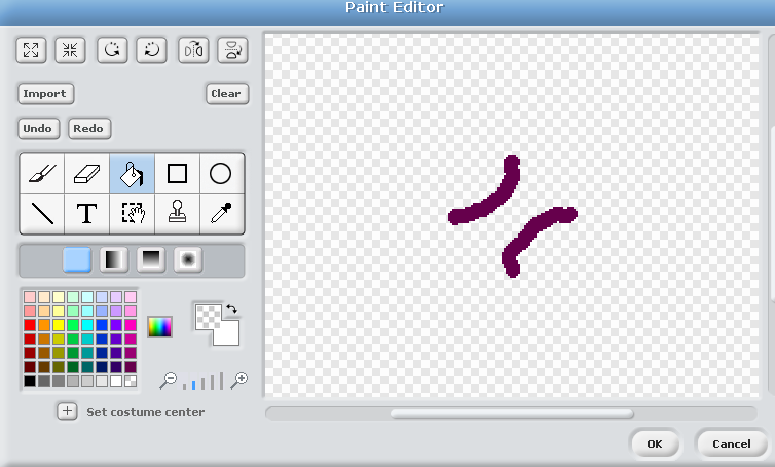
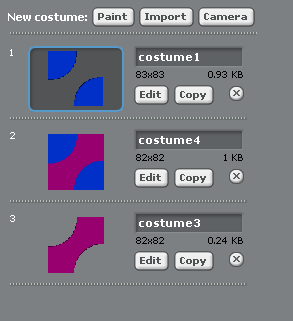
Now you can draw your own lines from the centre of each side, these don’t need to be accurate as long as they go to the centre of each side, in fact the more wibbly they are the better, then rub out the black lines, either use the rubber or the fill tool. So you will go through this…
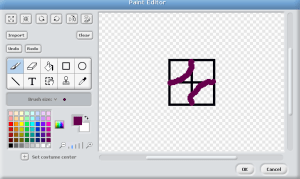
To the final image which should look like this…
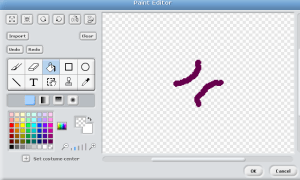
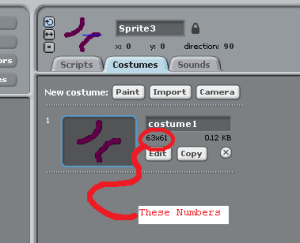
Now when you are back in your Scratch Project you will need to make a note of how big your Sprite is as you will need this information later…
And finally we can get to some coding. Basically you are going to go to the Top Left of the Screen STAMP your sprite, move it along the the right, so it is next to the first STAMPING, turn it round by 90,180 or 270 degrees and STAMP it again.You keep repeating this until you get to the far right of the screen, you then start another line and repeat until the Screen is full.

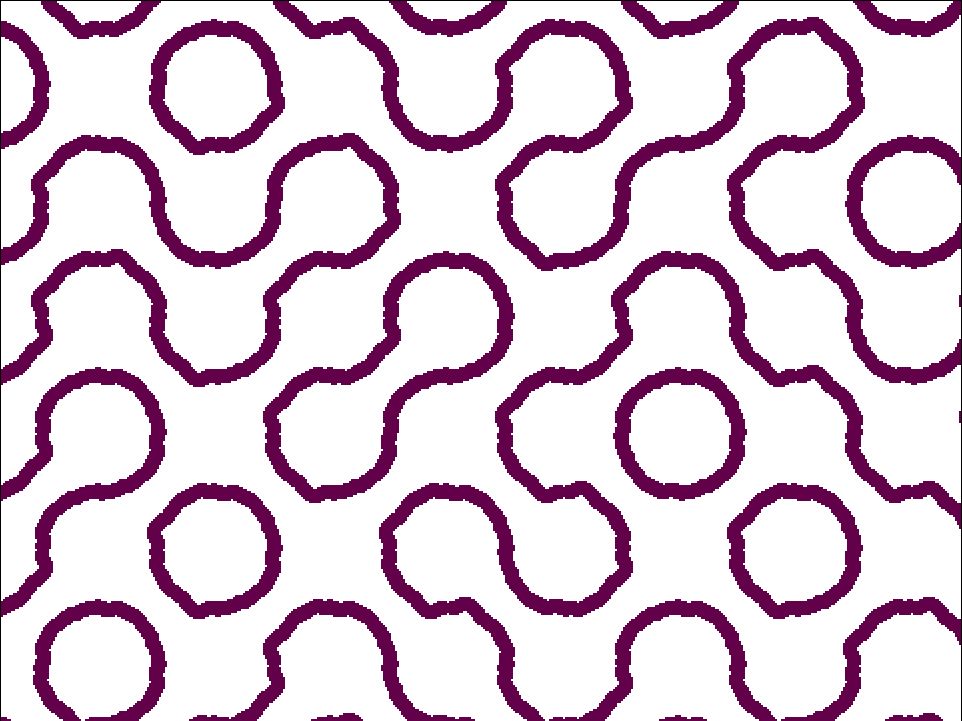
This means that your one little Sprite that looks pretty boring…
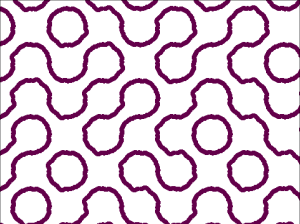
Can make a random picture which is quite interesting and could be used as a Maze in a game for example.

The Code you will need.

Remember, the screen is 480 wide by 360 tall, and you should have the dimensions of your Sprite from earlier as well.

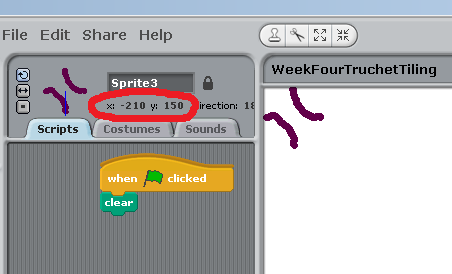
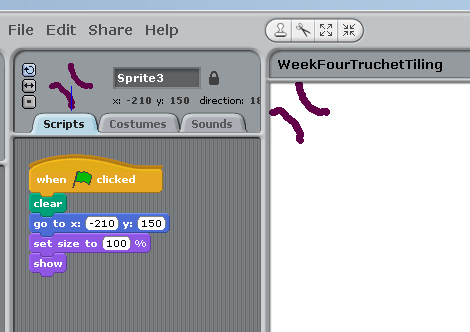
If you drag your Sprite to the Top Left of the Screen you can see what your Starting X and Y coordinates should be…
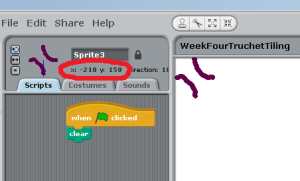
You can then put these numbers into your code, which should give you somethign like this…
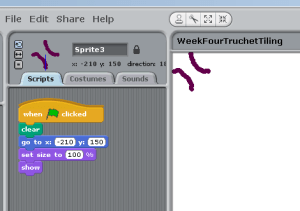
Next, you need to work out how many times you can STAMP this Sprite across the screen and down the screen.

480 / Size of your Sprite – This will give you the number of times you can go across – we can call this number – columns

360 / Size of your Sprite – This will give you the number of Rows you will be able to make across the screen – we can call this number – rows

Advanced Tip 3 – These numbers are not critical you may want to round up, or even add one to whatever you get to make sure the screen is completely filled.

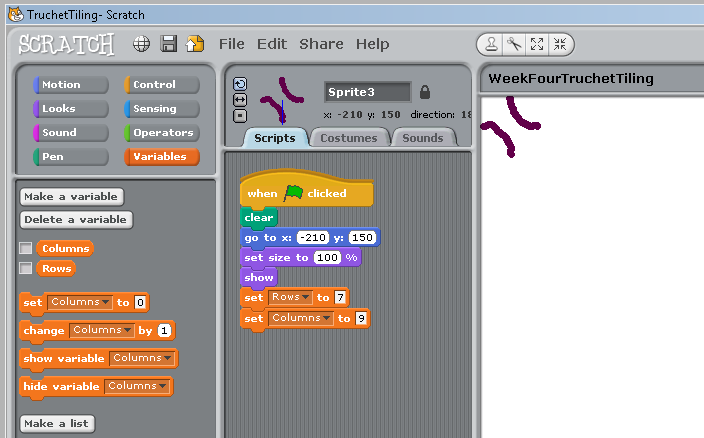
So make a couple of variables, rows and columns and put them into your script as well, somethign like this…
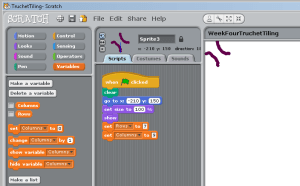
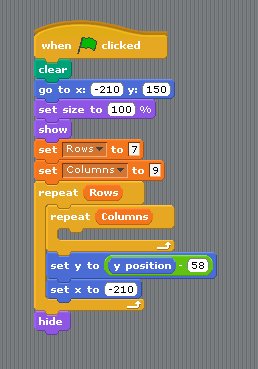
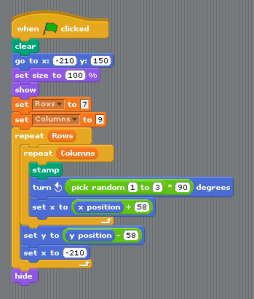
We now need a two loops (repeat blocks) one inside the other, I did the columns inside the rows, if you do this it will make it easier. For each column we need to STAMP the Sprite and for each Row we need to go back to the left of the screen and down one row.

We know where the left is, in my case it is -210, and we know that the Sprite is roughly 60 high, so we need to drop down 60 or so as well. I found that to make sure teh edges joined up nicely that it was better to overlap by a couple of Pixels, that is why I used 58 as the number of Pixels to drop down.

Like this…
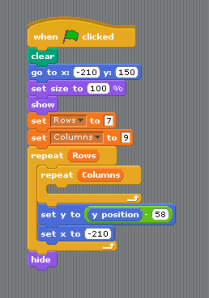
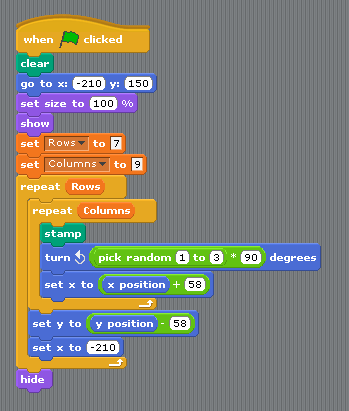
Finally you need to STAMP your Sprite and turn it round ready for the next STAMP. You will need to use a random number here, so it will turn 90, 180 or 270 degrees. So a random number between 1 and 3  multiplied by 90. Once you have the Sprite turned you will also need to move it along so it will STAMP next to the last STAMP. Again this is where you use the size of your Sprite that you noted down earlier, and once again, you might need to reduce it by a little bit in order to get the lines joining up nicely.
Once you have this working, you can change your Sprite to somehting different, as long as you stick with the two golden rules above you should still get interesting patterns, here are some ot the other ones that I have done.

This Sprite…
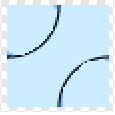
Makes this Maze…
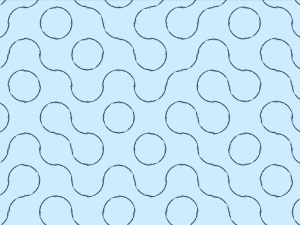
Remeber, the trick with this is to get your little Sprite nice and accurate, everything else will then just fall into place.

Try colouring in either the centre or the two corners, see what patterns that can make. Something like these:
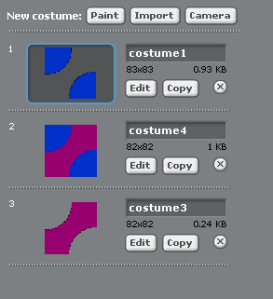
Advanced Tip 4 – Don’t forget to Export this Sprite and keep it with your Button Sprite you Exported last week. We are going to use these building blocks later on to build a Game.

Beginners Scratch – Challenge 3 – Have Fun With Animation

This week, the lead mentor was Eamonn Hannon, who did a great job.

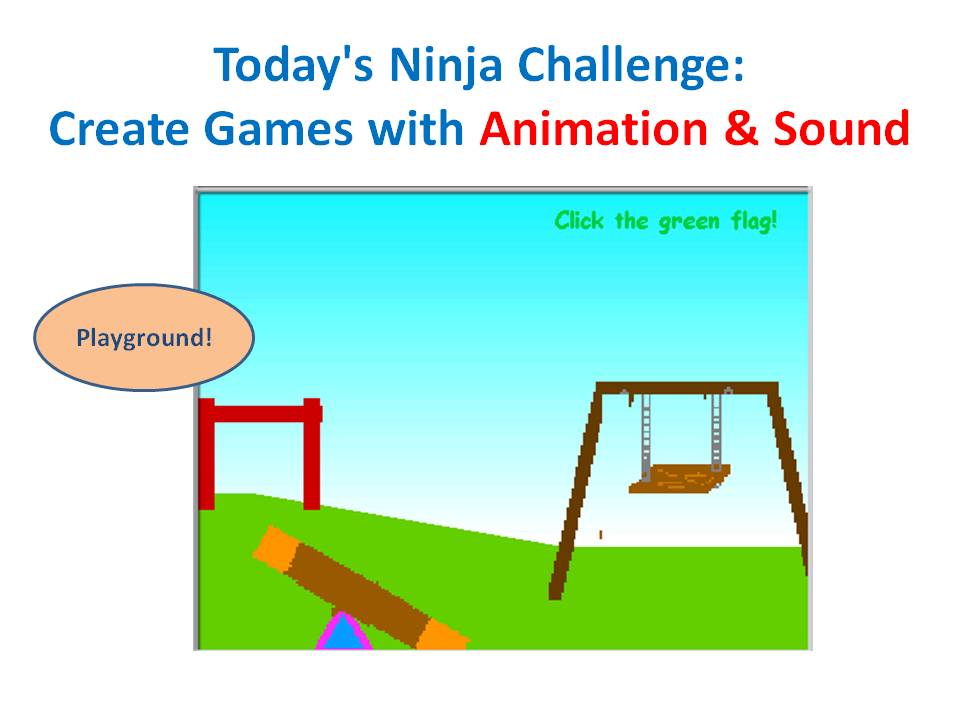
The challenge this week was to work on animation projects. The basis for this week’s challenge were examples in Scratch Example Animations folder: Playground and Fun with Animation.

Coding concepts that we discussed included:

  1. Animation
  2. Loops
  3. Creativity, planning and drawing

Here are the notes from the day (PDF): CDA-S2-Challenge03-Animation.pdf

If you would like us to send you the PowerPoint slides of my notes, get in touch via twitter or by leaving a comment.

Advanced Scratch – Week 3 – More Crazy Images.

We are going to be in a seperate room this Satruday, next to the main room. This will give us a chance to complete what we started last week and go on to some more Art, using the Stamp Tool.

What we are going to learn this week…

  • Stamping!
  • Random Numbers
  • Truchet Tiling – these are cool…:)
  • Saving Images created in Scratch to Picture files on your Computer.

I have updated the Week 2 page with all Code from my Project to create the Spirals.

Stamping.

This is when you get really angry… Or in Scratch it’s when you copy the Sprite to the Background.

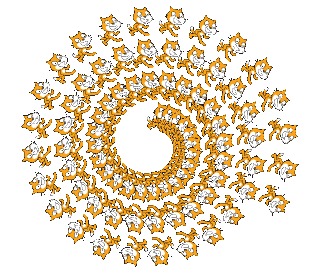
Here is a simple example, using the cat and some spiraling code…

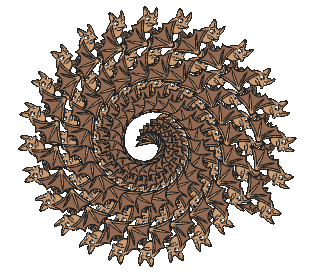
And the same code with a Bat…

And here is the code that makes the pictures above. Can you spot anything that might be better as a variable or a Slider?

Random Numbers.

We are going to use a random number in the Truchet pattern that we are going to draw, this will make the pattern generated different every time.

Truchet Tiling.
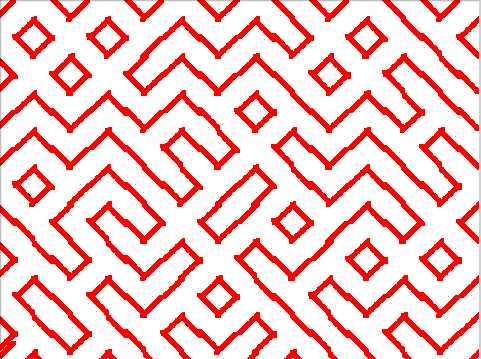
From Wikipeadia:

“One particular pattern that he studied involved square tiles split by a diagonal line into two triangles, decorated in contrasting colors. By placing these tiles in different orientations with respect to each other, as part of a square tiling, Truchet observed that many different patterns could be formed.”

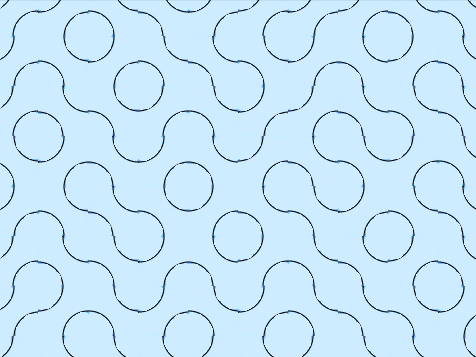
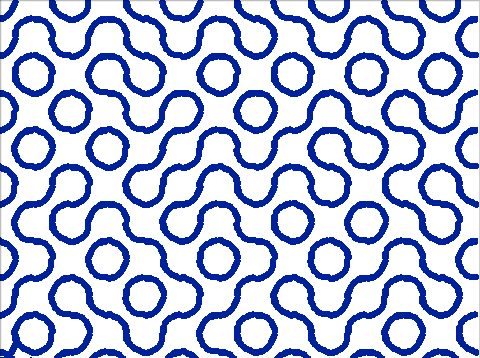
And here are a couple of samples of what they end up looking like…

Saving Images created in Scratch to Picture files on your Computer.

Beginners Scratch – Challenge 2 – Guess Numbers

Today’s challenge: write a number guessing game!

In doing this, these are the big ideas you will learn about:

  1. Input and output: entering numbers and displaying them
  2. Using variables
  3. Comparing values and making decisions

Here are my notes from the day, in PDF format: CDA-S2-Challenge02-GuessNumbers.pdf.

If you would like me to send you the PowerPoint slides of my notes, get in touch via twitter or by leaving a comment.