Stop Motion Stop Motion is used to make cartoons and animated movies like Wallace & Grommet, you take lots of pictures moving the characters and objects a little bit between each picture. Once you have the pictures you can link … Continue reading
Stop Motion Stop Motion is used to make cartoons and animated movies like Wallace & Grommet, you take lots of pictures moving the characters and objects a little bit between each picture. Once you have the pictures you can link … Continue reading
This week we creating a game where a tiny plane flies over dynamically generated terrain picking up as many boxes as possible. The player scores a point for every box, but that also makes the plane fly faster, making the game more challenging.
Perlin Noise
Normal random-number generators produce values that jump around all over the place. Perlin noise is different. It is also random, but it varies smoothly. This makes it great for mimicking the sort of randomness we see in nature.
1D Perlin Noise Landscape
Our smooth and changing landscape is generated using a one-dimensional Perlin noise value generated by the P5.js function noise(xoff).
We start with a loop that goes across from 0 -> width across the screen. We’re looking to generate a set of [x, y] points that define our shape.
We use these values:
Each call to noise() generates a single value in the range 0-1. We use the P5.js function map() to change this value in the range 0-1 into a value in the range ymin-ymax.
Changing the size of xinc controls how choppy or smooth the landscape is. We tune it to a value that gives approximately two peaks and two valleys across the screen, and looks right for our game.
Moving the Landscape
Moving the landscape is achieved by changing the starting value of xoff (aka. xstart) each time we update the screen. By making it a little larger each time, the effect is that the landscape seems to scroll from right to left.
Other Parts of the Game
The other parts of the game are very standard. We define a simple plane shape (drawn using rect() calls) that can move up or down in response to the arrow keys.
We define “cargo” containers that are randomly generated on the surface of the landscape and move right-to-left at the same speed.
The cargo containers have an active property that is false if they move beyond the left-edge of the screen or get sufficiently close to the plane to be “picked up”.
We added a function to the landscape class (Ground.js) that checks for a given [x, y] location to see if that point us under the ground by checking what the height of the landscape is at that x value. If the plane is below the ground we consider it crashed.
We added a simple scoring mechanism that tracks how many boxes were collected and makes the plane move faster (really – the ground scroll faster) every time a box is collected.
Download
The files for this week can be found on our GitHub repository.

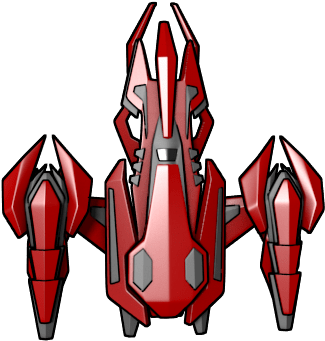
This week we did our last iteration on Shootah and added a Bomb to be dropped by the enemy to try to hit the player.
Bomb Class
We copied the existing Bullet class and called it Bomb instead. The main changes we had to make were:
Manages Bombs
It happened that the code we had already written to manage bullets was already perfect for managing bombs as well.
We used Visual Studio Code’s built-in capability to automatically rename symbols to:
This was enough to have bombs move, draw and be removed when it becomes inactive.
Dropping Bombs
We added a new function to Ememy called shoot(). In that function we generated a random number from one to two hundred. We then dropped a bomb every time that number was less than five (we tuned this small number to get a good rate of bomb drops). This meant that the enemy dropped a bomb at random intervals, to make it impossible for the player to anticipate.
Download
The files for this week can be found on our GitHub repository.
This week we extended our colliders so that we could used them to prevent the player going off the edges of the screen. We used it to show how software design needs to evolve.
Colliders
Our colliders were designed to be connected to an object with three things:
Something to Connect To
We had colliders already attached to our:
but we didn’t have anything to attach to that could represent the side of the screen.
We created a new class called Static() with nothing more than the x, y and hit() that we needed so that we could connect a collider to it (stored in one more property – collider).
Screen Edges
We created a pair of these colliders positioned at the right and left-hand side of the screen. We made sure to add them to our list in check_colliders(). Nothing much happened. Why? Well, first, the Player didn’t have a collider, so we added one, liberally copying code from Enemy, which a minor change to the description argument.
Now we could see the contact occurring between the edge and the player, though nothing was stopping it moving yet.
Unintended Consequences
As often happens with code, this change had unexpected consequences; bullets were not firing properly any more. Why? Because the player now had a collider and the bullets were becoming inactive immediately because they were hitting that. The fix was to modify the Bullet’s hit() function to ignore hitting a collider with the description “player”.
Stopping the Player Moving
We now knew our player was hitting an edge, but another problem became apparent: we didn’t know which edge!
To properly stop the player and stop it moving too far, we really needed to know which side of the player the collider we’d hit was, but that information wasn’t available to us with the current design.
A couple of quick changes were necessary:
With the extra information from the collider, were were able to determine how far the player should be allowed to move to and prevent it going further by setting the x value appropriately.
Download
The files for this week can be found on our GitHub repository.
This week we mainly dealt with building and using a box collider in our game. The box colliders are written in a way such that:
Extents of the Collider
Our collider is a box, of a given width and height, centred on the x and y of the thing it’s connected to:
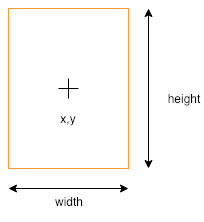
For checking collisions, we need to know the x values of the left and right side of the box and the y values of the top and the bottom of the box.
For convenience, we write a function which returns an object (using curly brackets) with the left, right, top, and bottom values (shortened l, r, t and b respectively) as properties:
extents(){
  return {
    l: this.connected.x - this.width / 2,
    r: this.connected.x + this.width / 2,
    t: this.connected.y - this.height / 2,
    b: this.connected.y + this.height / 2
  };
}
When making an object like this, we set a property value by first writing the property name, followed by a colon (:) and then a space and the value we want it to have. Each property is separated with a comma. The don’t need to be on separate lines, but it makes it easier to read.
Touching Colliders
So how do we know that two colliders are touching? Actually there are four ways in which they definitely can’t be touching:
And if none of these are true, then it must be touching. So actually, we’re going to check that they’re not NOT touching (double negative, used correctly!).
How do we know if something is completely to the left of something else? Look at this diagram:
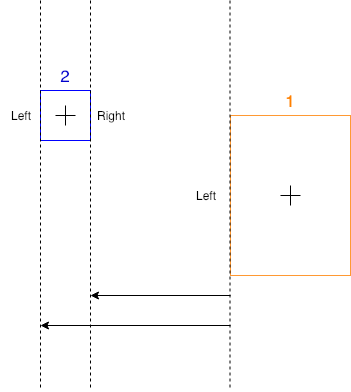
We know that box 2 (in blue) is totally to the left of box 1 (in orange) because we can see it is, but how could get the computer to check it? Remember, left and right are just x values on the screen. Box 2 is left of box 1 because both it’s left and right values are smaller than the left value of box 1.
The checks for the other directions are very similar:
Sending Messages
Each collider has a property disc that describes the thing, or type of thing, that it’s connected to.
All colliders know what they’re connected to, so when we determine two have touched, we call a function called hit() on each of the connected objects, passing it the desc of the other collider. This means, in our game, when our enemy is hit, it can know that it’s been hit by a bullet – or maybe something else – and react appropriately.
Checking Every Collider Against Every Other
In our code, we gather all the active colliders at each frame. We then need to check each one against each every other one. How can we do that?
Consider a list of four items:

To check them all against each other we first need to check 0 against the other three. Simple enough.
We we need to check 1. But we don’t need to check 1 against 0, since we already did that. Nor do we need to check it against itself. We only need to check it against 2 and 3.
If we write out the full sequence, we see that for four items we need three passes to check all combinations:
We can write a pair of loops to do this:
for (let i = 0; i < c.length - 1; i++){
  for (let j = i + 1; j < c.length; j++){
    c[i].touching(c[j]);
  }
}
Note two things about these loops:
Other Stuff
We also did a few other things this week:
Download
The files for this week can be found on our GitHub repository.
This week we continued our Shootah project. We did two main things;
Controlling the Number of Bullets
In Part 2, we made a new bullet every time the user pressed the Up key and put it in the bullets list.
This meant that after a while we could have a lot of bullets, most off the top of the screen, which was even slowing some machines down.
To limit the number of bullets we did four things:
We write a little code that printed out the total number of bullets to verify this was working.
Adding an Enemy
We added a new file called enemy.js and included it in the index.html file.
This file looked a lot like player.js. The main different was the move() function. Our enemy moves constantly left-to-right. When it gets too far off the right-hand side of the screen (checked in move()) we set its x position to be off the left-hand side of the screen instead. This makes it loop around.
TODO
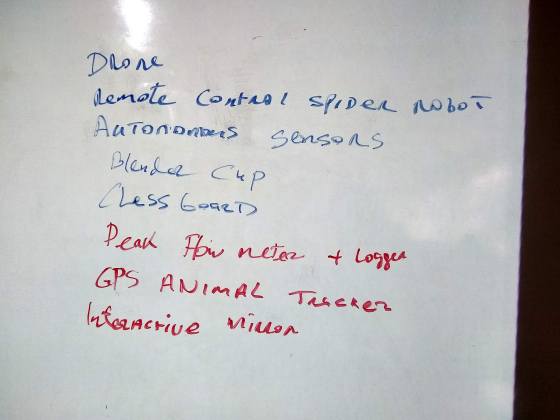
We still have loads to do and we made a list on the day:
We’ve done two and we’ll do some of the others for sure.
Download
The files for this week can be found on our GitHub repository.
Hello again everyone
This week we continued working on our Astro Pi entries and we also looked at FreeCAD and Fritzing which are tools that will help us with building our projects.

FreeCAD, available for download from here, is used for 3D modelling and allows us design very complicated things from simple 3D shapes such as cubes and cylinders. Here are a couple of quick videos to get you started.
Then we looked at Fritzing, download from here, an application for drawing very easy to understand circuits, here’s how to draw a simple circuit using it.
Dave will be leading next Saturday’s session and I will see you again on the ninth of Feb.
Declan, Dave and Alaidh.
Hello again everyone.
This week we started getting our entries ready for the Astro Pi Mission Zero Challenge by looking at whose aboard the International Space Station now and what they’re doing. We followed this up by taking another look at programming the Trinket Astro Pi emulator.
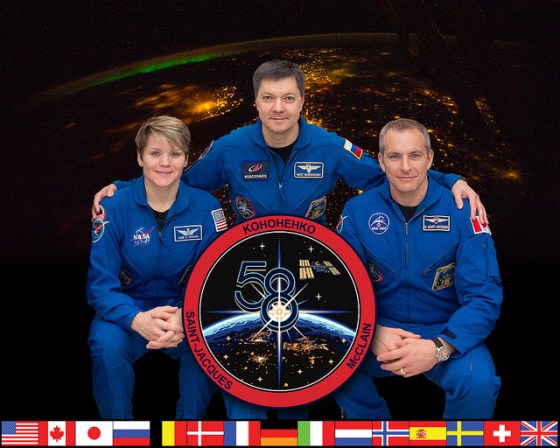
We also had a small brainstorming session to come up with ideas for projects that we will be working on for the rest of the year.
See you all next Saturday.
Declan, Dave and Alaidh.
This week in the Bodgers group we looked at controlling motors and robots withe the Raspberry Pi.
You can find the code for this weeks session here and my notes are here motors and robots
We also talked about ideas for the projects we will be working on for the rest of the year. Tomorrow we will continue to look at robots and we will also do some brain-storming for our projects.
See you then.
Declan, Dave and Alaidh
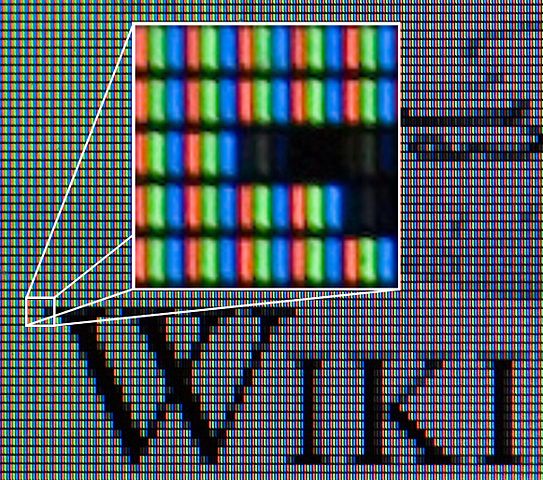
This week we looked at pixels. Your screen is made up of thousands of them; the picture on it is created by setting each one to the correct colour. We may ask P5 for an ellipse(), but ultimately some piece of code is deciding which pixels to change to the currently selected fill() colour (for the centre) and which to set to the currently selected stroke() colour (for the edges).
Working with Pixels in P5
P5 contains two main functions for working with pixels. The first is loadPixels(). By default it reads all the pixels from the canvas and copies the information into a huge array (or list) called pixels[].
If we then make a change to pixels[], all we have to do is call updatePixels() to copy this information back to the canvas again.
Sound easy? It almost is, but the content of pixels[] isn’t immediately obvious.
Structure of the pixels[] Array
The pixel[] array is one long list of numbers. It is arranged such all the information for the first row on the canvas is first, followed by the information for the second and so on until the bottom of the canvas.
For each pixel there are four numbers representing the red (R), green (G), blue (B) and alpha/transparency (A) value of the pixel. By the time the pixel has reached the screen, alpha has no more meaning, so we will ignore it and concentrate on the RGB values.
This diagram represents what we’ve been talking about:
![]()
Getting and Setting a Pixel
To make it easy to get and change the value of a specific pixel we can write two functions:
Both these functions rely on knowing where in pixels[] the data for the pixel at (x, y) is.
We can work out this as:
Knowing this, the functions can be written as:
function getPixel(x, y){
  let loc = 4 * ((y * width) + x);

  return [pixels[loc + 0],
          pixels[loc + 1],
          pixels[loc + 2]];
}

function setPixel(x, y, c){
  let loc = 4 * ((y * width) + x);

  pixels[loc + 0] = c[0];
  pixels[loc + 1] = c[1];
  pixels[loc + 2] = c[2];
}
Download
The files for this week can be found on our GitHub repository.
