This week we finished off the project we started in the taster session. We had a few difficulties with the network but we managed to get our Reaction Game working. We finished the session with the First Annual Coderdojo Athenry Reaction Game Championships. Our code from today is available here and these are my slides from today Reaction Game.
Author Archives: Declan Fox
PiDojo : A taste of the Raspberry Pi
Today we had our second taster session with the Raspberry Pi. We wrote a basic a basic hello world program using Nano which is a simple command line text editor. Then we coded the physical computing version of hello world which is turning a led on and off.
When the Raspberry Pi And Electronics group starts up properly we will revisit this and look at the code in more depth. I will also show you how to set up your own RPi if you have one, remember a Raspberry Pi is not necessary, I will also show you how to connect to a virtual desktop.
Here are my slides from today Taster Session
PiDojo : Ultrasonic Range Sensor with the Raspberry Pi
The HC-SR04 Ultrasonic Module Distance Sensor is a cheap sensor that can be used to measure the distance between itself and an object in front of it by sending an ultrasonic pulse and listening for its echo. It can be connected to many things including the Raspberry Pi.

The HC-SR04 Ultrasonic Distance Sensor
We connected up our sensor and used the following code to take a measurement.
</pre>
#!/usr/bin/python3

import time
import RPi.GPIO as GPIO

GPIO.setmode(GPIO.BCM)

GPIO_TRIGGER = 10
GPIO_ECHO = 9

print ("Ultrasonic Measurement")

GPIO.setup(GPIO_TRIGGER,GPIO.OUT)
GPIO.setup(GPIO_ECHO,GPIO.IN)

GPIO.output(GPIO_TRIGGER,False)

time.sleep(0.5)

GPIO.output(GPIO_TRIGGER,True)
time.sleep(0.001)
GPIO.output(GPIO_TRIGGER,False)
start = time.time()
while GPIO.input(GPIO_ECHO)==0:
 start = time.time()

while GPIO.input(GPIO_ECHO)==1:
 stop = time.time()

elapsed = stop - start

distance = elapsed * 34000

distance = distance / 2

print ('distance = ', distance)

GPIO.cleanup()
We then combined our sensor with our 7-Segment displays from last week.
Here are my slides ultrasonic measurement
PiDojo : 7-Segment Displays on the Raspberry Pi
This weekend we continued to explore the Raspberry Pi’s GPIO pins. We had a look at a Data Sheet for a 7-segment display then we went through the code needed to write the number 8 on one and then the Ninjas had a go at writing their own messages on it.
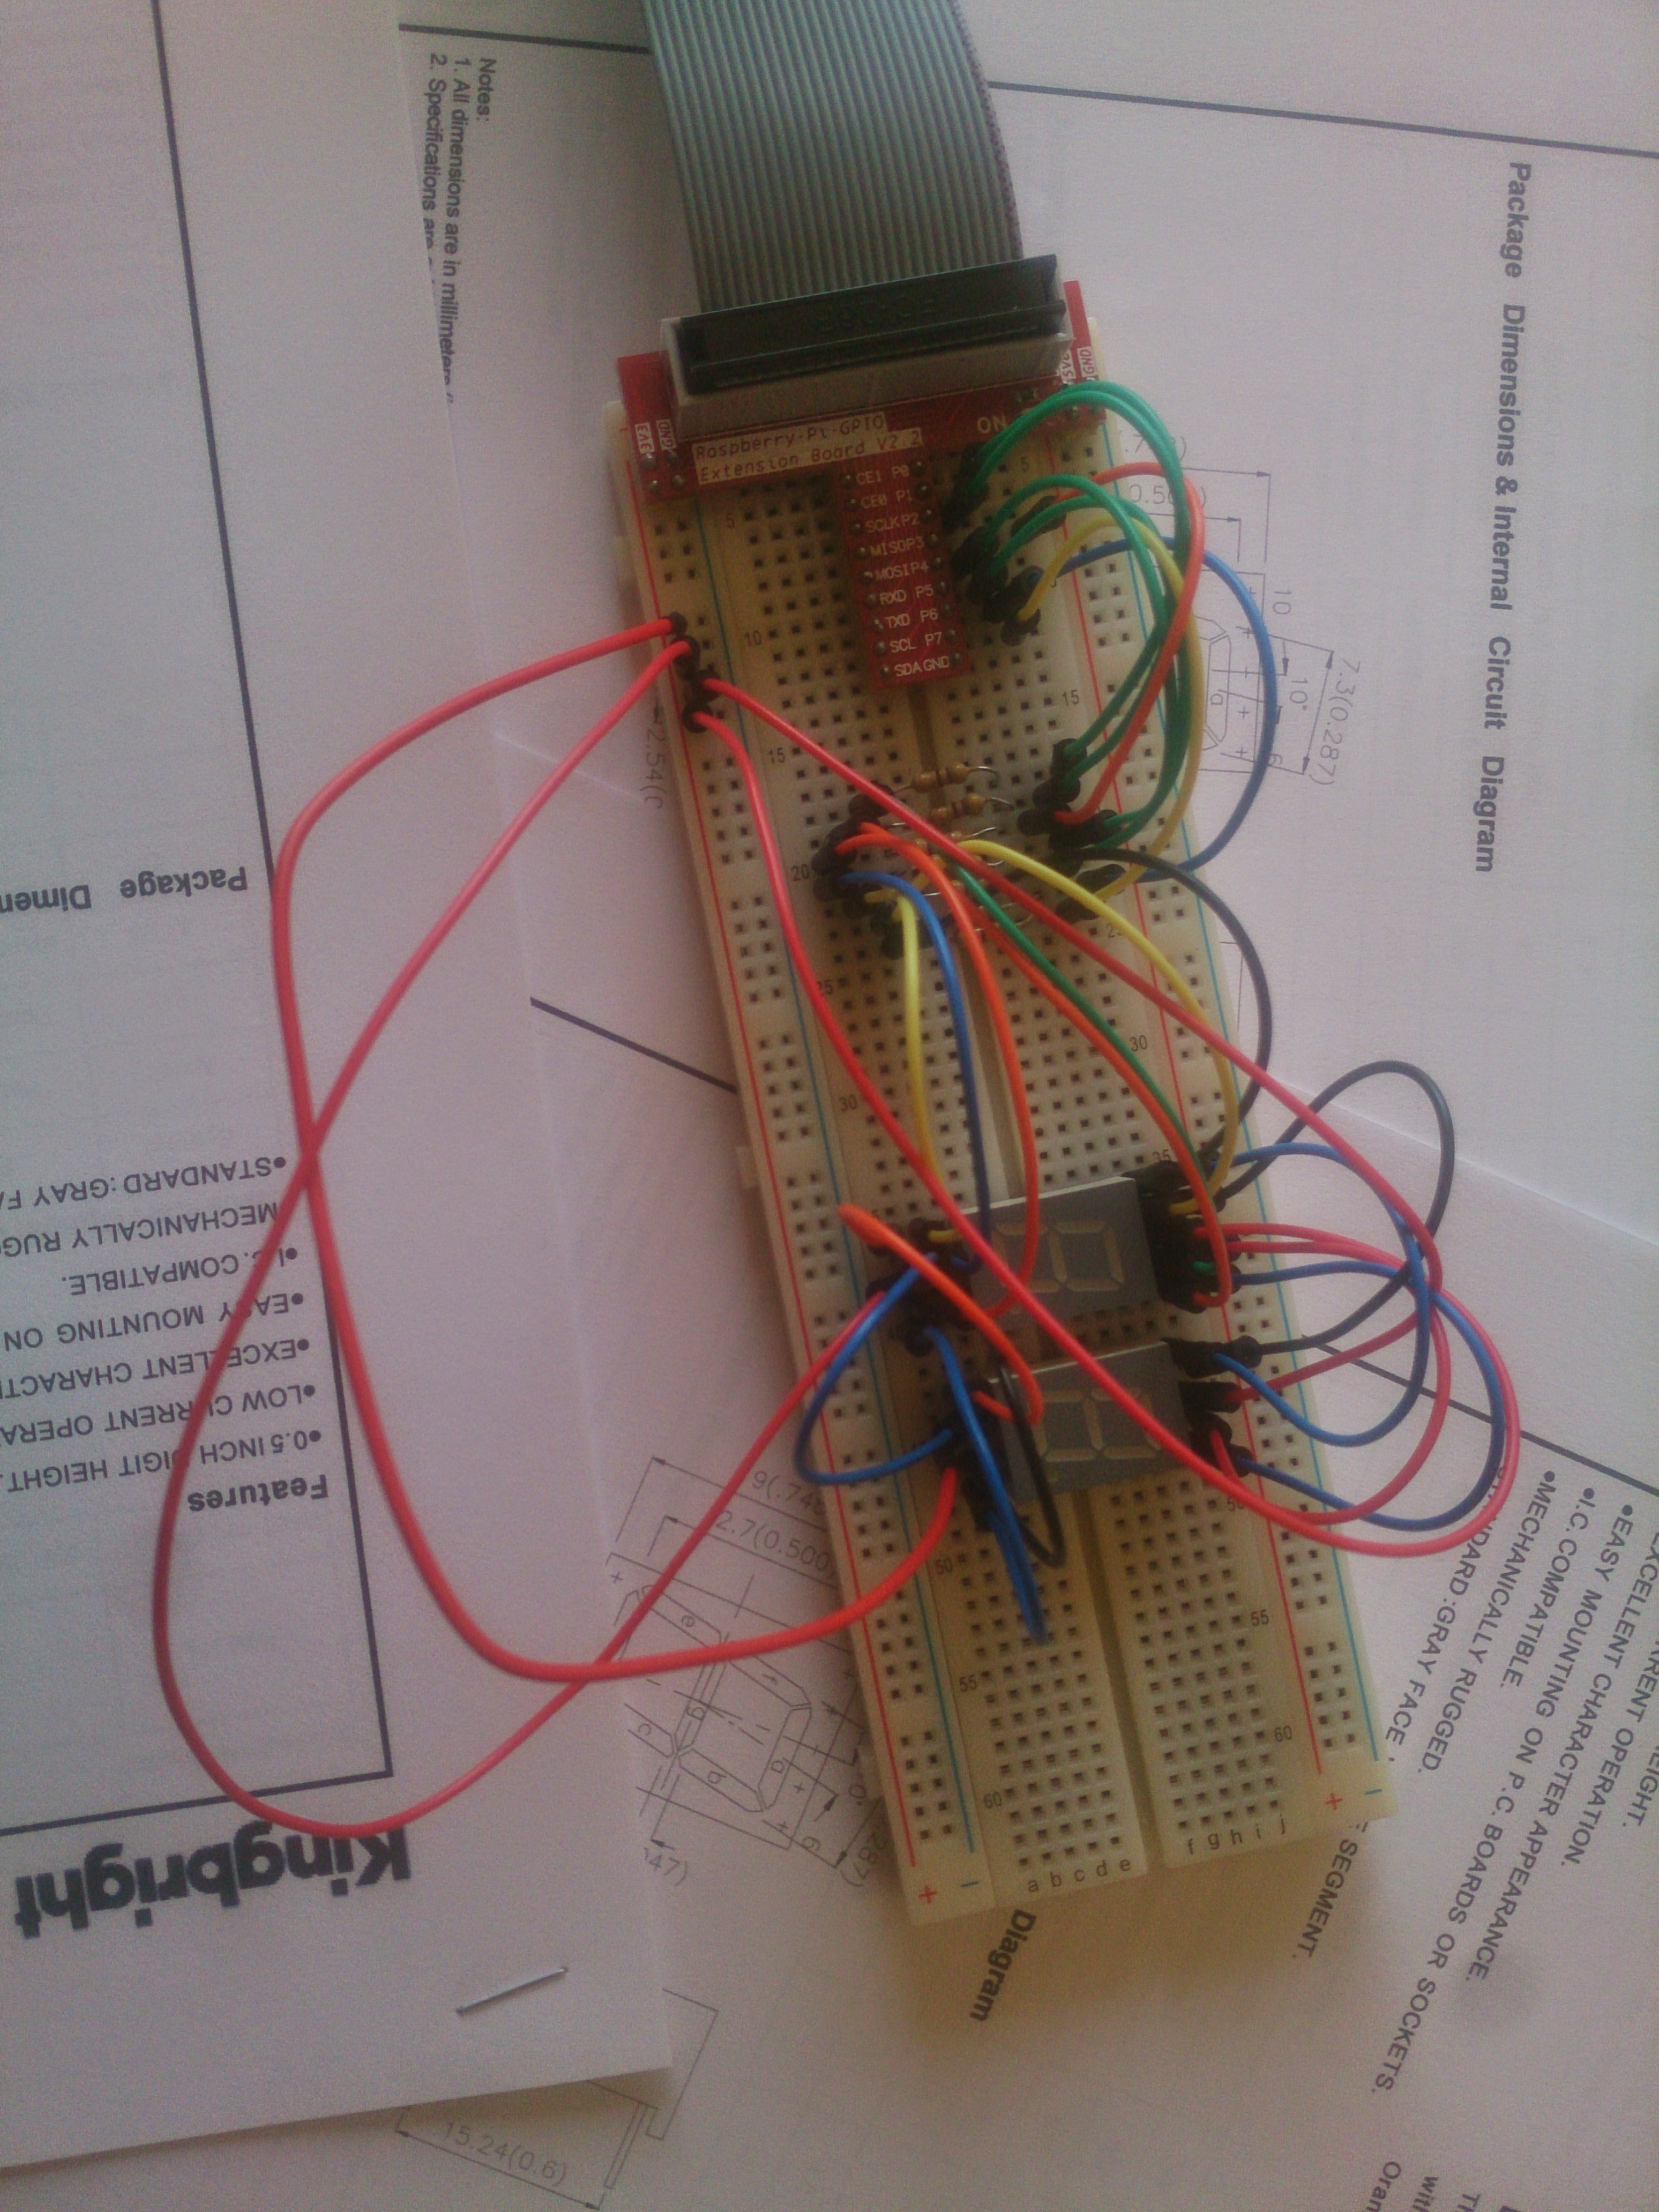
Our 7-Segment display wired up and ready to go.
Afterwards we tested some code for sending data to two 7-Segment displays by flashing each LED on and off for a fraction of a second and we also had a look at the time.strftime() method which is useful when we need the “time of day” in our code.Next week we will do a little more work with clocks and we will start putting together a measuring device which uses the HC-SR04 Ultrasonic Sensor.
These are my slides from today Raspberry Pi 7-segment display
PiDojo : Programming the Raspberry Pi
Over the last couple of sessions we’ve been using Python to write some programs for the Raspberry Pi.
Last week we wrote some easy Hello World type programs and today we finally started to use the Raspberry Pi GPIO pins.
We learned how to set up pins as outputs or inputs and how to use these pins to light up a LED or sound a buzzer and how to read from an input pin.
The group then used what we learned to make a simple traffic light.
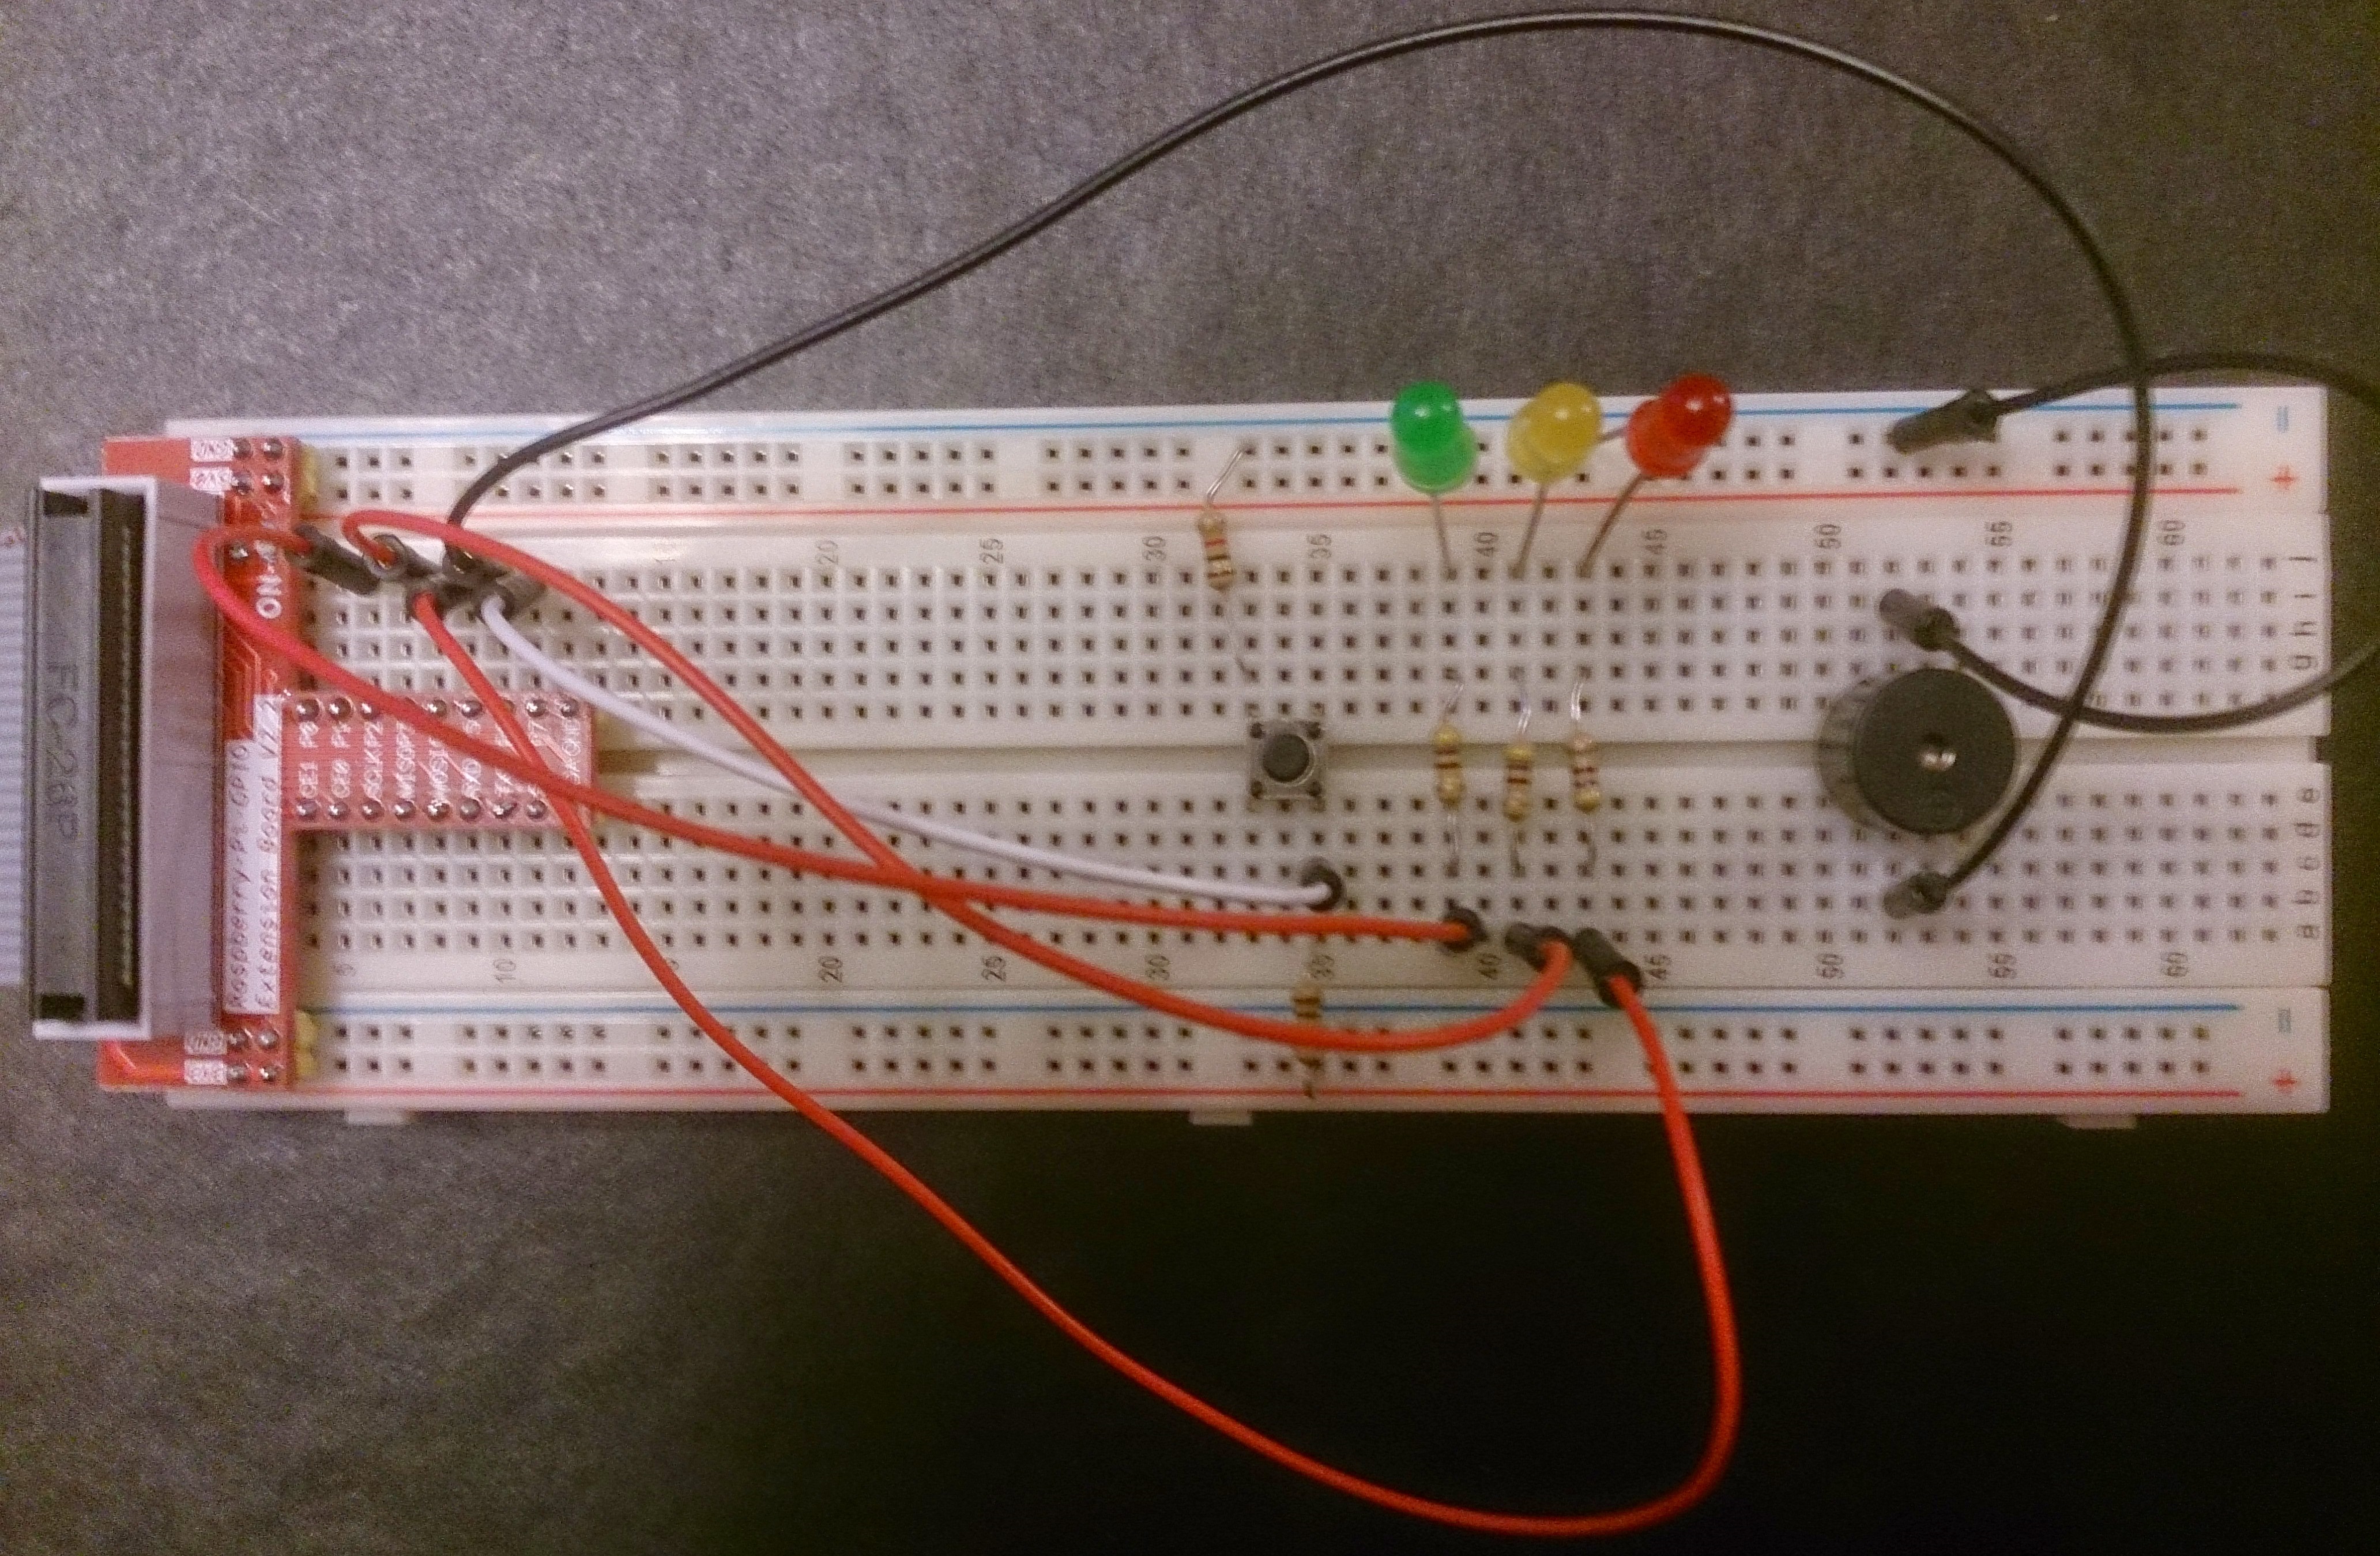
Our breadboard with LEDS, buzzers and a switch
Here are my slides from the last two sessions Raspberry Pi programs
PiDojo : Connecting to the Raspberry Pi from your laptop
As it would be awkward to bring televisions and keyboards and all the other equipment required to operate the Raspberry Pi into CoderDojo we will connect to them from our laptops. We had a go at this today and we made some progress but we had problems with a couple of computers hopefully, I may have found a fix for them.
We were able to connect most of the laptops using Internet Connection Sharing but on the ones we couldn’t connect to, I think creating a Network Bridge might work. Instructions are available here. Here are my slides from today Raspberry Pi Headless Operation.pptx
PiDojo -week 1 : Getting started with the Raspberry Pi
Today we had our first PiDojo session. We had a short demo where we looked at what is possible with the Raspberry Pi.
We then had a search for projects where we saw loads of interesting ideas. We also set up one of our five new RPis.
We will continue working with the Raspberry Pi after the break so anybody who is interested can come along. All you need to bring is your laptop and an idea for a Raspberry Pi project.
Here are my slides from today Raspberry Pi presentation
Python Games – Week 11:More Ping Pong

Ronan’s game
In the Python Games group today we continued working on our ping pong games. We will spend another session on them.
There won’t be any Python Games session next Saturday the 31st of January but we will be back the following Saturday the 07th of February.

Alaidhs game
Python Games – Week 10: Ping Pong game
As we have covered most of the concepts required to make games using Pygame I won’t be doing any more slideshows instead we will spend all of our time writing games from now on. Today we started to make a very simple Ping Pong game and we will spend another session or two finishing it.

Anybody who has missed a few sessions is always welcome back, but now would be a great time to return as we will be explaining everything from the beginning again.
Python Games – Week 9: Moving sprites
Today in the python games group we learned more about moving our sprites. We used the Pygame rotate method to rotate our sprites and we used trigonometry to control our sprites movement. We started working on a ping pong game which we will finish next week. Here is our example code from today and my slides are available here python session_9
