It was a thrill to have such significant games industry figures come to visit us on Saturday. The mentors, dads and dad-mentors were probably the most excited; Wolfenstein 3D, Doom and Quake were probably the most exhilarating games of our generation.
I was unsatisfied with how much benefit people were getting from continuing with the Tanks tutorial and I decided that we’d looked at it enough. Partially because I know some people want to implement shooting for their own projects and partially because one of our guests had invented the entire first-person-shooter genre, I decided to do a project to demonstrate different ways of implementing shooting in a game.
Please excuse the tinny sound; I was using the computers built in microphone.
There are two main ways to handle shooting: ray-casting and physics-based projectiles. We’re going to do both so lets discuss them in turn.
Ray-casting
Ray-casting uses mathematics to determine if a target is in our cross-hairs and, if it is, registers a hit instantly. It’s a good technique to use where the bullet is very fast moving and distances are relatively short. Regardless of action movie tropes, nobody is dodging a fast-moving bullet in real-life!
In Unity the Physics class contains several Raycast methods (documentation here). They all look along a line from a point and return ‘true’ if that line crosses through a Collider. The specific version we’re using can fill in a RaycastHit object with information about what it hit, if it hit anything.
To determine if we hit anything we must:
- Find the position and forward direction of the FPS Camera. This represents where we are and where we’re looking towards.
- Call Physics.Raycast with this information. If it didn’t cross any colliders, then we are finished.
- If it did hit something, then we check to see if that object is a target. We have tagged all target objects in the scene as “Target” so we can easily check this.
- If it is a target, we perform the effect we want. In this case, we push the target away from us with force applied to its RigidBody . In another case, we might want to actually destroy the GameObject instead.
Physics-based projectiles
A physics-based projectile is actually an object in the scene. It has a Collider so that it can detect collisions and a RigidBody so that it is affected by physics.
In many cases of physics-based projectiles, the Collider is simply a trigger and once an collision is detected, an effect, such as reducing the target’s health, is applied to the target.
Our specific physics-based projectile weapon is a cannonball. In this specific case, we actually allow the cannonball to hit the target and the physics engine takes care of the effect (knocking the target away).
The general steps that we need for physics-based projectiles are:
- Find the position and forward direction of the FPS Camera. This represents where we are and where we’re looking towards.
- Instantiate an instance of our projectile prefab. Position it so that it’s slightly in front of us and not intersecting with the FPS Controller’s own Collider.
- Give the projectile some forward velocity.
- Either:
- Have the projectile detect collisions and perform an appropriate effect on the target, or
- Simply allow the physics engine to take care of the impact.
The cannonball prefab has a small script attached to it. It detects collisions. Once the first collision is detected, a coroutine is launched. This coroutine waits for two seconds and then destroys the GameObject. This means that cannonballs have a limited life-span and don’t end up littered all over our level.
Area-effect weapon
We have also implemented an area-effect weapon, namely a grenade. In many ways it is similar to the cannonball but we project it with a more modest velocity.
Once created, however, it’s behaviour is very different. A coroutine is launched as soon as it is created. This coroutine waits for a few seconds to mimic a grenade fuse. It then “explodes”.
To explode, the grenade does the following:
- Plays an explosion sound on it’s own AudioSource.
- Instansiates a particle-effect prefab at the grenade’s location to display an visual explosion effect.
- Disables the grenade’s MeshRender component so that he body of the grenade can’t be seen any more.
- Uses Physics.OverlapSphere (documentation here) to find all Colliders within a given radius of the grenade
- Loops over these Colliders. If the collider is not attached to an active GameObject or if that GameObject is not tagged as a target, we ignore it.
- If it is an active target, we use RigidBody.AddExplosionForce (documentation here) to apply an explosion force, emanating from the grenade’s position, to the target.
Two seconds after the “explosion” the grenade GameObject, now invisible, destroys itself to remove itself from the scene. This short delay gives time for scripts to complete and sounds to finish playing.
Please note that although the grenade wasn’t working correctly on Saturday during our session, it’s fully functional now.
Gun selection
Gun selection is handled using the “[” and “]” keys. In the past we have tended to use Input.GetAxis to detect user input. This is good for where we wish to perform an action continuously as long as a key is held down. It’s not so good where we wish to perform a since action in response to a single keystroke. For that, using Input.GetKeyDown (documentation here) is better and that’s what we do.
The selected weapon is stored using an enum. An enum is a special variable type which can only take one of a number of pre-defined values. Since we have a limited list of weapons, three to be exact, this works well for us.
Putting it all together
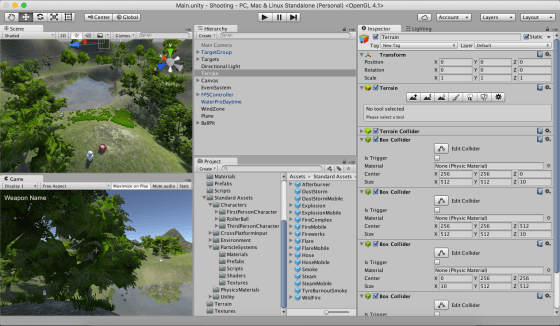
Our level is a simple terrain. It’s been textured and had trees, grass and a wind zone added to it. There is a simple lake. A few target spheres have been positioned around the map and a box containing a number of small targets has been created as a good place to test the grenade in particular.
A standard first person controller prefab has been added to the scene. Our own GunController script has been attached to it as a component. GunController handles all the aiming and firing of the weapons.
Sound effects for the project are all from www.freesound.org with thanks to the original creators. All other third party assets are from the Unity Standard Assets pack.
Downloading the project
The project can be downloaded from DropBox here. Please ensure you have updated to Unity 5.3.4 before opening this project. Be aware, it’s relatively large at 160MB+.
