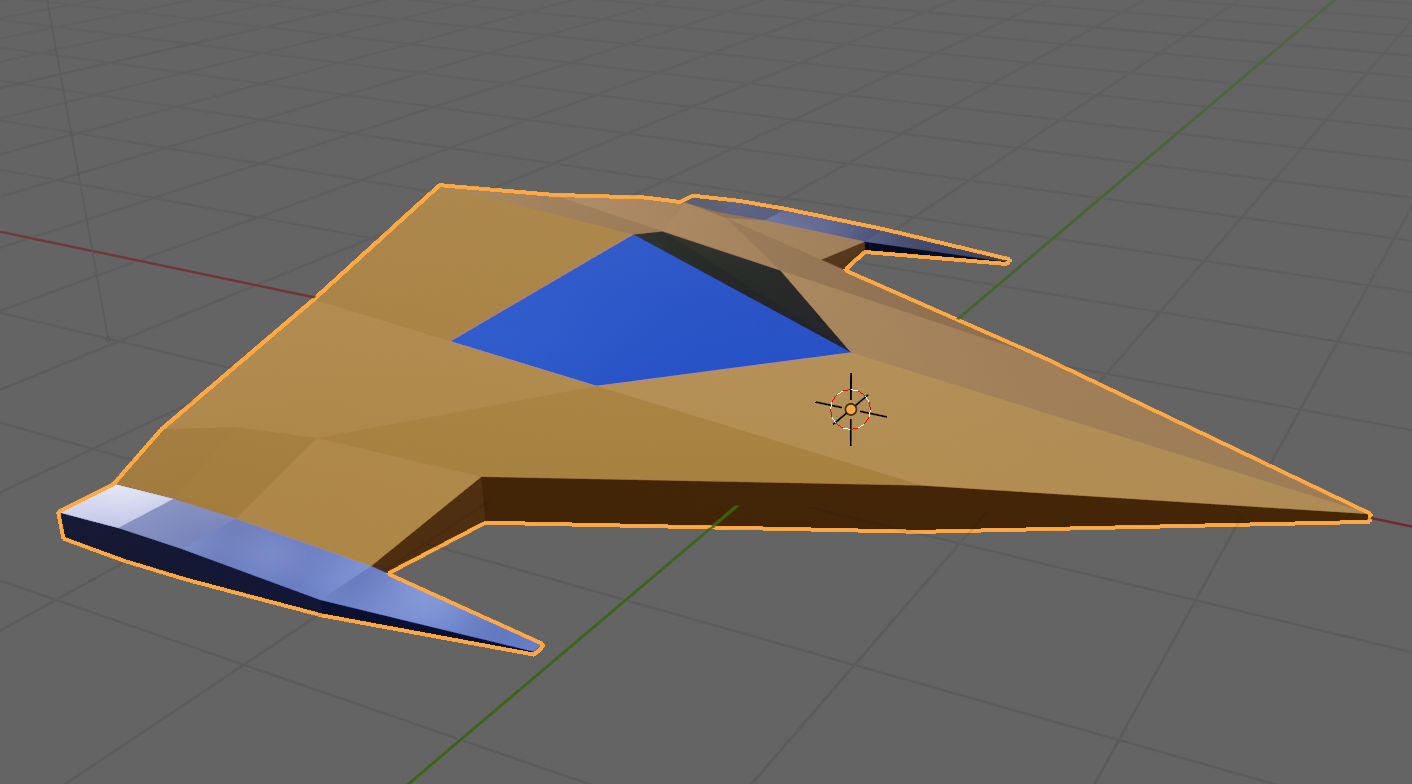
This week we completed our ship from the previous week by adding some materials. Materials are what provides colour to models.
Out model, by default, contains a single material slot. This default material is a grey material and because there’s a single slot, it’s applied to all faces.
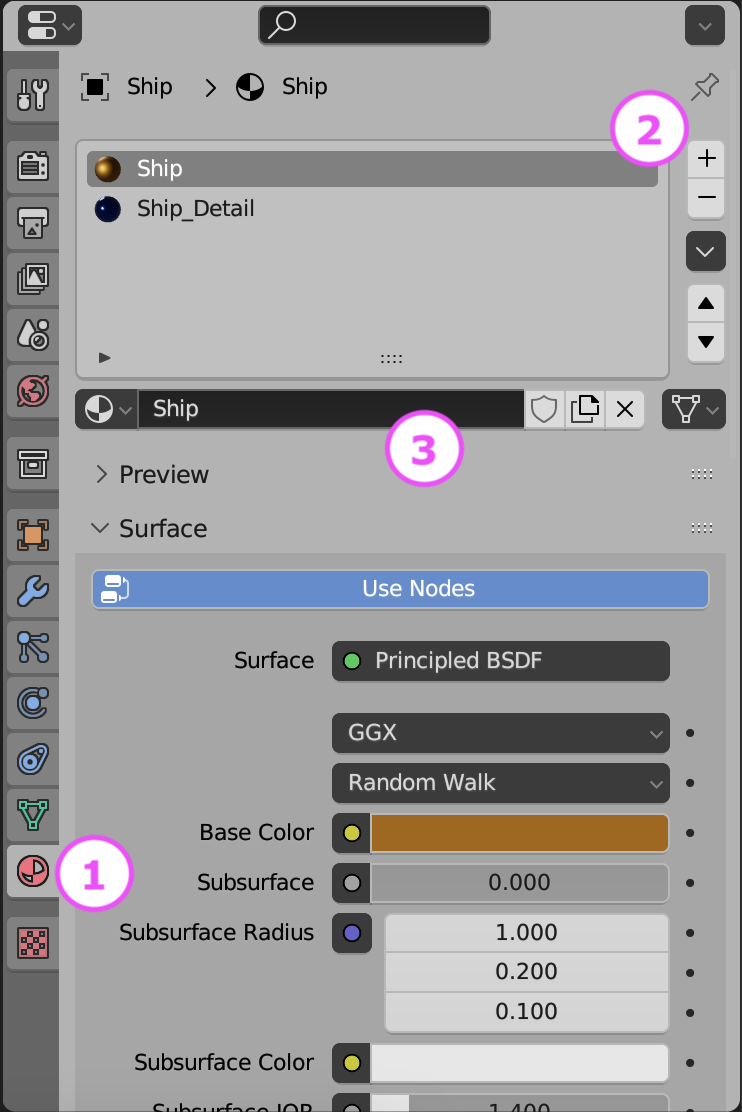
To start colouring our model we went to the material properties panel on the right-hand-side of the screen. It has a red circular icon as seen at (1) below.
We removed the default material slot by using the – key at (2) above then then added two new materials, called Ship and Ship_Detail by pressing + at (2) to make two new material slots and using the “New” button at (3) when those empty slots where selected to actually make a new material.
The default material component has a lot of inputs, but we can ignore most of them for now. The most important ones are:
Base Colour: This is the main colour of the material
Metallic: How much like a metal the material is. Although a slider, its normally to be either zero (not a metal) or 1 (a metal) rather than anything in-between.
Roughness: How smooth or rough the material is. Will greatly impact how light reflects off the object. Metallic materials with very low roughness look mirror-like.
We set Ship and Ship_Detail with contrasting colours, metallic finish and low roughness.
Environment
We are going to create loads of environment sections that snap together. The follow the basic pattern show above. A flat area 90x100m in size, with a vertical edge 4m high and a 20m flat area beyond that. We can add any embellishments to the raised flat area on the sides, so long as they’re not too high on the side facing the camera. We don’t want to obscure the ship.
Like the ship, we created two contrasting materials for the environment, one dark as a base and one bright as a contrast colour for details.
Getting the Model
The Blender model for this week can be downloaded from our Teams site here.
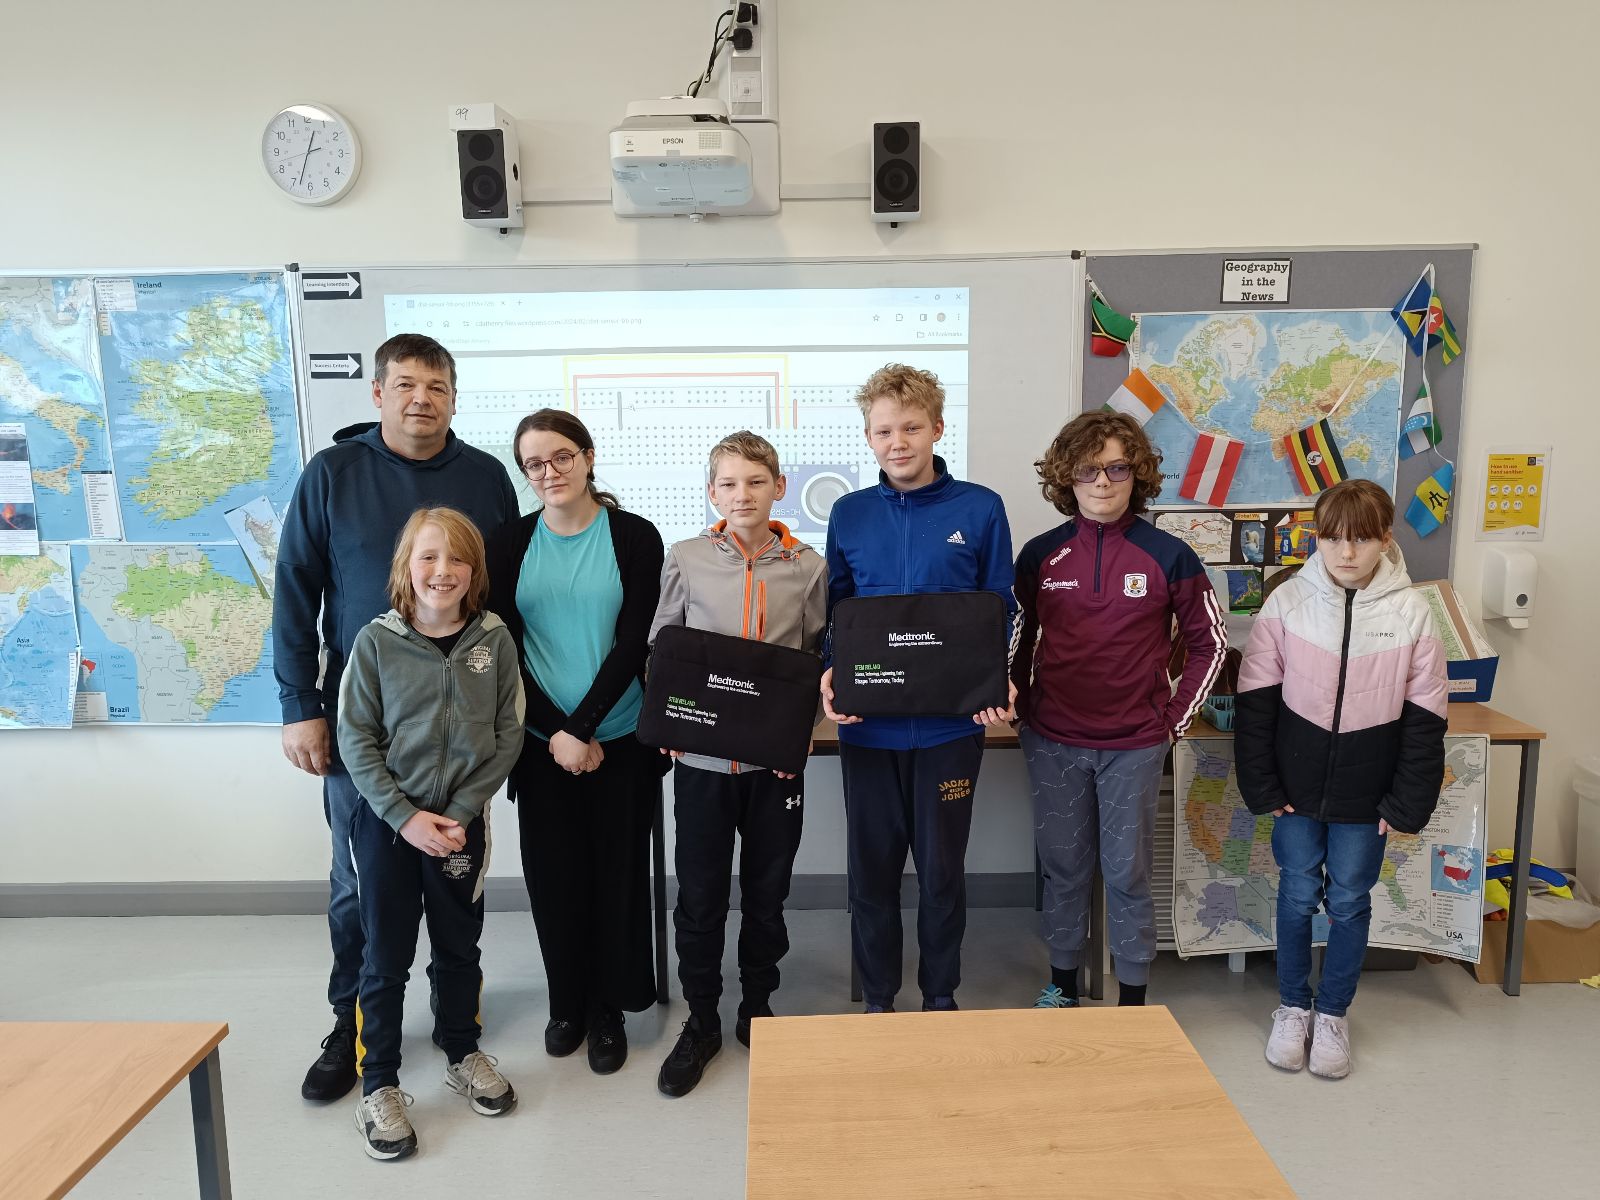
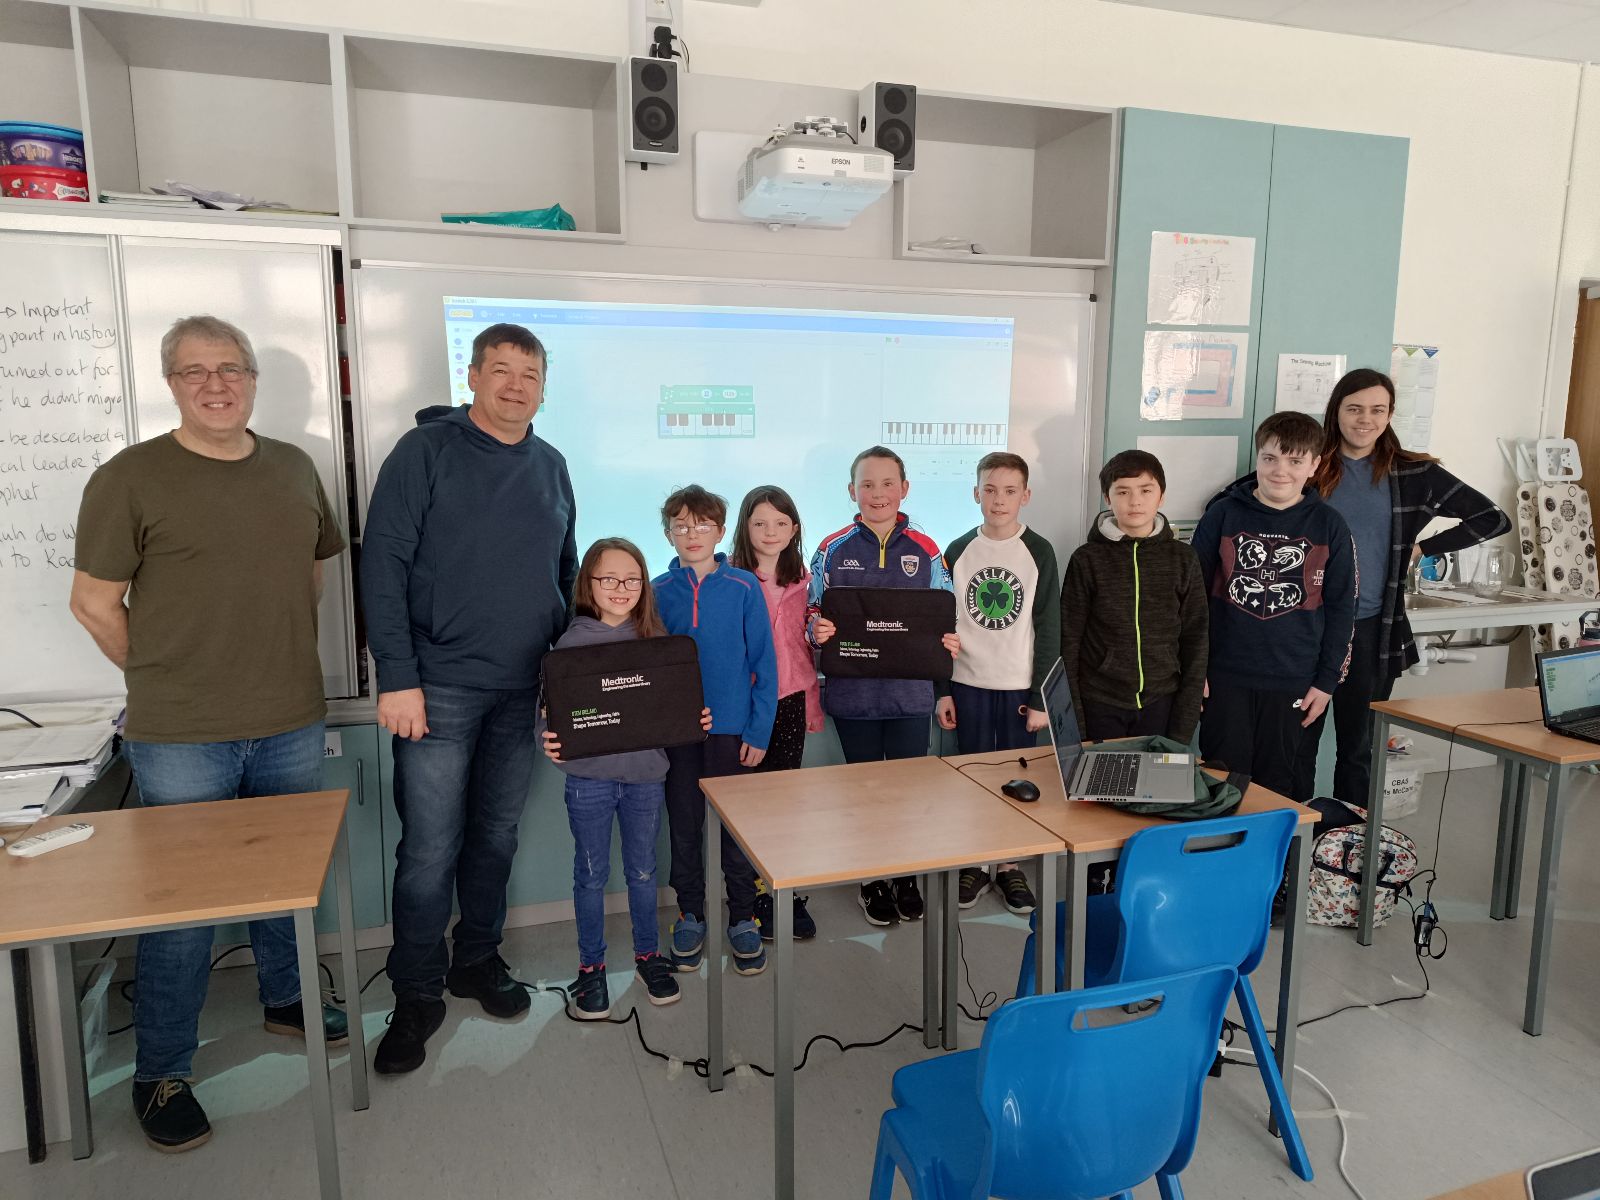
We are very grateful to the Medtronic Foundation, through Medtronic employee and mentor Declan Fox, for the donation of several laptops to CoderDojo Athenry. Our loaner laptop program helps those who cannot otherwise afford a laptop to attend CoderDojo Athenry. Keeping CoderDojo Athenry free to attend and as inclusive as possible is always one of our key aims.
The Medtronic Foundation partners to improve health for underserved populations, as well as supports communities where Medtronic employees live and give. They empower Medtronic employees to positively impact local communities by leveraging their skills, time and resources. If you’d like to read more about their work you can find their webpage here.
This week we will be using the HC-SR04 Ultrasonic Distance Sensor
Wire up the sensor as shown below
Here is the code we will need for the sensor.
#From www.tomshardware.com/how-to/raspberry-pi-pico-ultrasonic-sensor
from machine import Pin
import utime

trigger = Pin(17, Pin.OUT)
echo = Pin(16, Pin.IN, Pin.PULL_DOWN)

def ultra():
   trigger.low()
   utime.sleep_us(2)
   trigger.high()
   utime.sleep_us(5)
   trigger.low()
   while echo.value() == 0:
       signaloff = utime.ticks_us()
   while echo.value() == 1:
       signalon = utime.ticks_us()
   timepassed = signalon - signaloff
   distance = (timepassed * 0.0343) / 2
   print("The distance from object is ",distance,"cm")

while True:
   ultra()
   utime.sleep(1)
Once this is working you can move on to this week’s challenge. Combine this with the LED code from the last session so that the LED flashes when the distance measured by the sensor is less than 30CM. Here is the LED code:
from machine import Pin
from time import sleep

led = Pin(15, Pin.OUT)

def flash():
    led.value(1)
    sleep(0.5)
    led.value(0)
    sleep(0.5)

while True:
    flash()
This week we took our cube and made it vaguely more spaceship-shaped by moving it up to (0, 2, 0) and resizing it to (5, 1, 4). We also took our ground plane and scaled it to (10, 10, 10). Now it looks vaguely more like a flying craft than before!
The ship controls still work as before. WASD move the ship horizontally over the ground and there’s no vertical movement. To make it look more like a flying craft, we’d like it to bank (aka. tilt over) as it moves horizontally. That’s going to take a bit of figuring out.
Angles in Unity
Let’s take a little aside to talk about angles in Unity.
In the Unity Inspector we see three numbers for a transform’s rotation. These numbers represent rotations around the X, Y and Z axis respectively. This way of storing a rotation is known as “Euler angles”. It seems simple and straightforward and, if you’re rotating around just one of the X,Y or Z axes, it is, but for complex rotations it actually has a lot of problems. The order in which you apply the rotations matters. If you rotate first in X then Y and the Z, you get one orientation, but choose a different order and you’ll get something different. It’s ambiguous.
Look at these two boxes. Each are rotated by 90degrees around the X and Z axis but in a different order. They end up in completely different orientations:
Rotations internally in Unity are stored using a special variable called a Quaternion. Euler angles can easily be converted to Quaternions and back again. Quaternions store the axis that the object rotates around and the amount of the rotation. It’s completely unambiguous with no order to worry about.
When we code, we use Quaternions for rotations because that’s what Unity uses.
Variables for Ship Tilt
In ShipControls.cs we add two variables TiltSpeed and TiltLimit to control banking. TiltLimit represents the amount of degrees we’re going to bank as we move horizontally and TiltSpeed is how quickly we can change angle. We don’t want the craft immediately going from tilting one direction to tilting the other – we want a smooth change of rotations. That will look a lot better.
  public float TiltSpeed = 10.0f;
  public float TiltLimit = 10.0f;
Because these are public properties, we see them appear in the inspector for Ship Controller.
Determining What Tilt We Should Have
Tilt is dependent on the user input. If the user is pressing right, we should be titled to the right. If the user is pressing left, we should be tilted to the left. If the user isn’t pressing left or right, we should be level.
In the Update() function in ShipControls.cs we add this code near the top:
So depending on user input, tiltTarget will either be 0, TiltLimit or -TiltLimit (note the minus). We then turn this into a Quaternion representing this amount of a rotation around the X axis.
Moving Smoothly Between Rotations
How do we move smoothly between two rotations, namely the rotation we’re at and the rotation we want to be at?
There’s a general concept called “linear interpolation” for finding a value some proportion of the way between two other values. Let’s imagine a trivial example; if our numbers were 0 and 10 then the number 50% of the way (aka. half) between these would be 5. In Unity linear interpolation is known as “Lerp” and it can be used not just for simple numbers but for Vector3’s (representing positions and directions) and Quaternions (representing rotations) too.
For Quaternions, Unity has a special “Lerp” that works really well for rotations called Quaternion.Slerp(). “Slerp” stands for Spherical liner interpolation. Not a function name you’ll quickly forget. So to “Slerp” between the angle we’re currently at and the angle we’d like to be at, we need to know what proportion of that change we can make this frame. Here’s how we calculate that proportion:
Find the angular different between the rotation we’re at and the rotation we’d like to be at
Calculate how long, given the speed we’ve specified for changing angle, it would take to fully make that change in rotation
Calculate, given the time since the last frame, what proportion of that change we can actually make (it will be just a small bit of the change).
Finally we actually set the transform’s rotation using Slerp(), the rotation we’re at, the rotation we’d like to be at and the proportion of the change that we’ve calculated:
Testing the ship control code we found that good values for the variables were as follows:
Move Speed
50
Tilt Speed
100
Tilt Limit
30
We also noted that any values entered in the inspector override defaults in the code.
Simple Blender Spaceship
We started on a simple spaceship model in Blender, using the proportions of our cube in Unity as a guide [5m x 1m x 4m].
This was mine, but everyone had their own take. If anyone wants to download mine, it can be found here on our Teams site. If you’re not a member of our Teams site yet, get in touch to be added.
When we return after our break, we’ll look to texture this model and export it from Blender and import it into Unity.
Getting the Code
All the code we’re made this year is on our GitHub. It can be found here. If you don’t have the latest version of our code before any session, use the green Code button on that page to get the “Download ZIP” option which will give you a full copy of all code we’ll be writing this year.
This week we created our very own programming language in Scratch.
It reads a list of commands and does what it’s told.
It only understands a few commands:
M = Move T = Turn X = Go To X Y = Go To Y P = Pen Up or Down C = Change colour
The Lines in the list have to be in the right format for the code to work. The right format is the Single Letter for the command followed by a colon (:), followed by a Parameter, if the command needs it. For example this command:
M:10
Tells the code to M(ove) 10 steps.
Spirals – To create a list of Commands.
We also spent some time updating the Spirals project so that it could create a List of Commands that could be used by the Programming project to draw the same Spiral.
Export/Import a List
We also experimented with the Export List and Import List options in Scratch to move lists of Commands in and out of different Projects. So for Example you could:
1: Open the Spirals Project. 2: Run a Spiral to add entries to the List. 3: Right Click on the List and Export it to a file. 4: Open the Programming Project. 5: Right click on the List and Import the file you created in step 3. 6: Run the Programming project and it will draw the same spiral.
See it in Action.
Both the Programming Project and the Spirals project that can generate a List have been loaded up to the Scratch Web Site (https://scratch.mit.edu), you should be able to see them without connecting by using the following links:
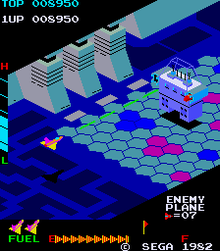
I decided, since we weren’t making a lot of progress with our Dungeon game, that we might need to switch to something simpler. We are going instead to make a game in the style of an isometric side-scrolling arcade shooter. This style of game first appeared back in 1982 with Sega’s Zaxxon (pictured below) but there have been many examples since.
We decided to call our game “Speedy Spaceship”.
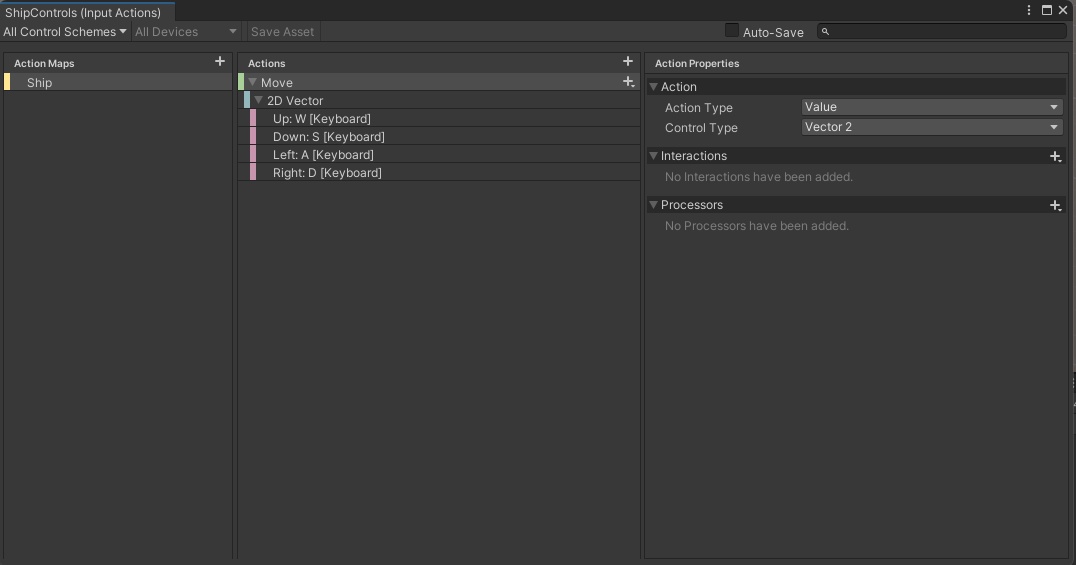
To start with the game we opened a new Unity project and used the Package Manager to install the new Unity Input Manager package. This is the preferred way to define user inputs in Unity these days as it’s far more flexible when you want to add alternative control schemes (gamepad instead of keyboard, for example).
We first created a folder called Input and in there we made a new “Input Actions” asset and called it “ShipControls”. Opening this, we defined a simple control scheme, for keyboard and mouse, as follows:
At the moment it only contains one action “Move” but we’ll be adding at least one more action later to enable shooting. Movement is bound to the WASD keys on the keyboard.
Once we’d done that, with this Input Actions asset still selected in the Project view, we selected the “Generate C# Class” option in the Inspector and pressed the “Apply” button. This made a script file called “ShipControls.cs” next to our Input Actions asset in the inputs folder. This file contains a lot of code for handling the interactions, but we don’t need to worry about it’s contents; it’s easy for us to make use of it.
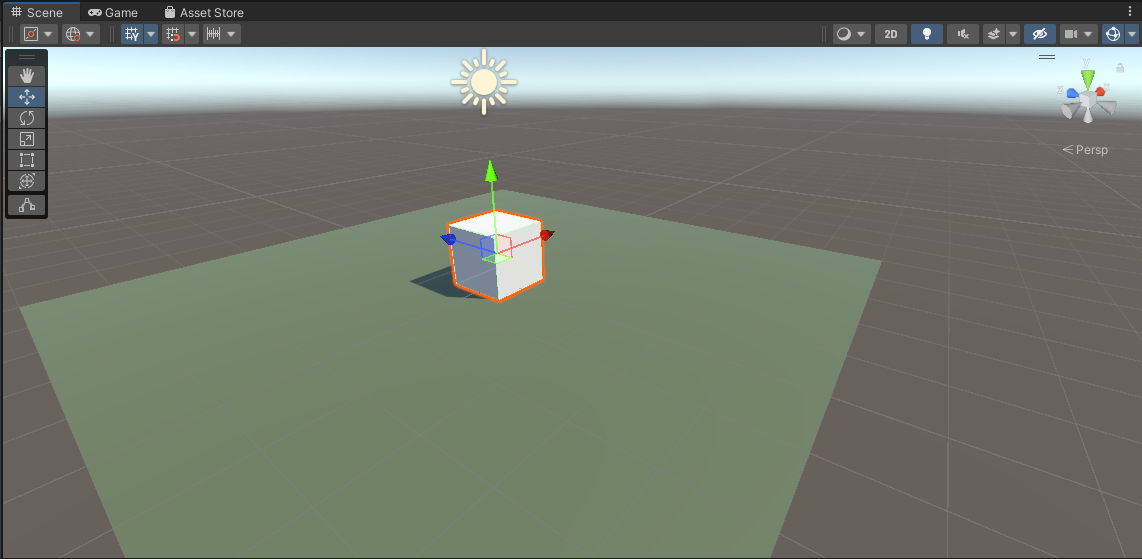
We then added a plane, which we added a material to, and a cube positioned just above the plane, to our current scene. With the cube selected, we positioned ourselves in the Scene View such that the cube’s X-axis (red) was pointing right and away from us and the cube’s Z-axis (blue) was pointing left and away from us.
We then selected “Main Camera” in the scene and used the GameObject|Align with View menu command to set the camera to the same angle as the Scene View. Toggling between Scene View and Game View now show the exact same angle, at least until we move in the scene view again.
We create a Scripts folder and made a new C# script inside called “ShipController”. We dragged and dropped this script over the cube in the scene view to assign it.
The first thing we needed to do was to attach the ShipControls to the ShipController (similar names, but two different things). We made a new private property in ShipController to hold a reference to a ShipControls instance, added the Awake() function where we created a new ShipControls object and then used the OnEnable() and OnDisable() functions to enable and disable the ShipControls when the ShipController was itself enabled or disabled. This is what that code looks like:
using System.Collections;
using System.Collections.Generic;
using UnityEngine;

public class ShipController : MonoBehaviour
{
  private ShipControls _controls;

  private void Awake()
  {
    _controls = new ShipControls();
  }

  // Start is called before the first frame update
  void Start()
  {

  }

  private void OnEnable()
  {
    _controls.Enable();
  }

  private void OnDisable()
  {
    _controls.Disable();
  }
}
For movement we then just need to find out what the value of our input is at every frame and move appropriately. First though, we need some control over the speed we’re going to move. We add a new public property for MoveSpeed:
public class ShipController : MonoBehaviour
{
  public float MoveSpeed = 10.0f;
Now we can add code to Update(), the function that Unity calls every time that a frame is drawn, to move the cube around in response to player input.
If we have a speed and a time, we just need to multiply them together to see how far we’ve gone. This is a simple mathematical way of expressing it:
speed * time = distance
If, for example, I’m travelling 100kph and I drive for two hours then the distance I’ve gone is 200km.
100km/h * 2h = 200km
The time between frames in Unity is stored in a special variable Time.deltaTime. This value for time is dependent on our framerate. As long as we use this value when we’re calculating distance moved in a single frame, the answer will be correct no matter if our computer is generating 20FPS or 200FPS.
The first thing is that we ask for the value of the moveInput. This is defined as Vector2 value so it has an x and a y part (representing the horizontal and vertical axes respectively). The y component will be +1 when we’re pushing W (Up) and -1 when we’re pushing S (Down). Similarly the x component will be +1 when we’re pushing A (Left) and negative when we’re pushing D (Right).
We take transform.position, which controls the position of the cube and we set it to a new value which is it’s current position plus an new Vector3 which represents the change in position this frame. The x and z portions, which represent horizontal movement, are both calculated from the input. The y portion, representing vertical movement, is always zero. The other two are of the form:
distance = input * speed * time
Distance being speed multiplied by time we’ve seen, but what’s input doing in there? Well input is like a switch. When you’re not providing input, it’s zero. Anything multiplied by zero is zero, so distance must be zero when we’re not actively providing input. When you’ve providing input it’s either 1 or -1 which means we’ll move forward or backwards depending on what the input is.
Next week we’re going to make our ship a little more ship-like in proportion and make it bank when it goes sideways. We’ll also be creating a simple ship model in Blender.
All the code we’re made this year is on our GitHub. It can be found here. If you don’t have the latest version of our code before any session, use the green Code button on that page to get the “Download ZIP” option which will give you a full copy of all code we’ll be writing this year.
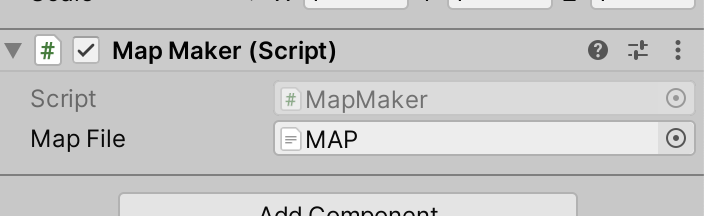
Today we worked on our first Unity component, MapMaker, and attached it to a GameObject in the scene.
We added a TextAsset property to the class definition and saw how it became visible in the Unity Inspector. We were then able to associate our map file with this slot.
In the code, we created a new method (aka function) to our class definition called BuildMap() and added some code to it. Ultimately it was able to:
Make sure that we had a map file specified before proceeding
Show us name of the map file and its content
Break the map file into individual lines
Tell us how many lines were in the file
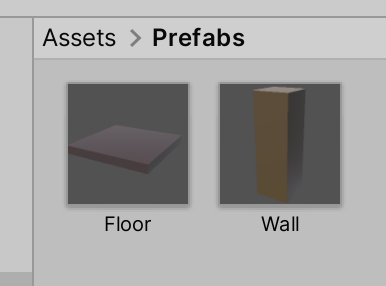
Then we created a pair of prefabs and a pair of matching materials. Prefabs are an essential Unity concept that represent pre-built combinations of GameObjects and associated components that we can quickly create copies of at runtime.
We are going to use these two prefabs to physically create our map from.
I have started a new GitHub repository to store our Unity project code. It can be found here. If you don’t have the latest version of our code before any session, use the green Code button on that page to get the “Download ZIP” option which will give you a full copy of all code we’ll be writing this year.
This week we created a platform game, the objectives of the game is to get as much milk as possible. But the more milk you get the smaller the platforms get and the smaller the milk gets.
If you end up at the bottom of the screen, you will lose a live and start at the top of the screen again.
You can use “Boosts” using the space key to jump up to higher platforms, but beware, you only get a few boosts, but getting milk will also give you 2 more boosts.
And remember, as always (well mostly always!) I have uploaded this to the Scratch web site, you can use the following URL to access it:
If you want to SignInand edit any of the projects you can use the following credentials:
Username : athenryadvancers Password : Advancers
Note: The password has an uppercase “A” at the beginning.
Hi everyone,
We completed our Mario game this week. We coded Mario so that he always floated down on to the wall. We added a fraction of a second of a wait so that it appears that he floats as he comes down. This also allows time for you to navigate left or right as needed.
We also introduced a more advanced concept, the Parallax effect, whereby objects further away appear to move slower than objects nearer. We coded mountains and a Sun to demonstrate this.