This week we looked at:
- Creating a custom resource to define a border and using it in mover.gd
- Allowing our player ship to shoot missiles
Border Resource
To define a new border resource, we created a new script in the scripts folder that inherits Resource. Here’s the code:
class_name Border extends Resource

@export var Top : int
@export var Bottom : int
@export var Left : int
@export var Right : int
It’s a very simple resource that just stores four values.
Note that we used “class_name Border” to ensure this new class had a name. This means, among other things, that we can create variables of this type in code.
In our mover.gd script, we added an additional exported variable of type Border to the class:
@export var direction : Vector2
@export var speed : float
@export var wander_time_min : float
@export var wander_time_max : float
@export var border : Border
Once we saved the file and looked at the inspector, we could see that this new exporter variable is there and by clicking on the drop down arrow, we could create a new Border resource and assign values to it. We entered the values 80, 20, 20 and 20 for the border.
In the mover.gd code we could then update our correct_dir_for_bounds() function to take this border into account. Note that they way we’ve structured the code, a border is optional:
func correct_dir_for_bounds() -> void:
	var top = 0
	var bottom = 0
	var left = 0
	var right = 0

	if (border):
		top = border.Top
		bottom = border.Bottom
		left = border.Left
		right = border.Right

	if (direction.x < 0 && parent.position.x < left):
		direction.x = 1
	if (direction.x > 0 && parent.position.x > vp_rect.size.x - right):
		direction.x = -1
	if (direction.y < 0 && parent.position.y < top):
		direction.y = 1
	if (direction.y > 0 && parent.position.y > vp_rect.size.y - bottom):
		direction.y = -1
This now keeps the enemy from going too close to the edge of the screen, especially at the top.
Creating a Missile
We went to Piskel and created a new 16×16 sprite to represent a missile, exported it and imported it into our Textures folder in Godot.

We then added a new Area2D to the scene and called it “Missile”. Under this we added a CollisionShape2D with a RectangleShape of size 16×16 and a Sprite2D containing the missile image.
We added a new script to MIssile:
class_name Missile extends Area2D

@export var direction : Vector2
@export var speed : float

# Called every frame. 'delta' is the elapsed time since the previous frame.
func _process(delta: float) -> void:
	position += direction * speed * delta
	rotation = Vector2.UP.angle_to(direction)
This code moves the missile in the given direction at the given speed, pointing it towards the direction of travel. Because we’ve specified a class name, we can access the variables here easily in other code.
We also wanted a way to ensure that missiles we create don’t go on for ever. A cheap and easy way to do this is with a timer. We added timer under the Missile node and set its time out to 3s and enabled both One Shot (fire the timer once and don’t repeat) and Autostart (start counting down as soon as the node appears in the tree).
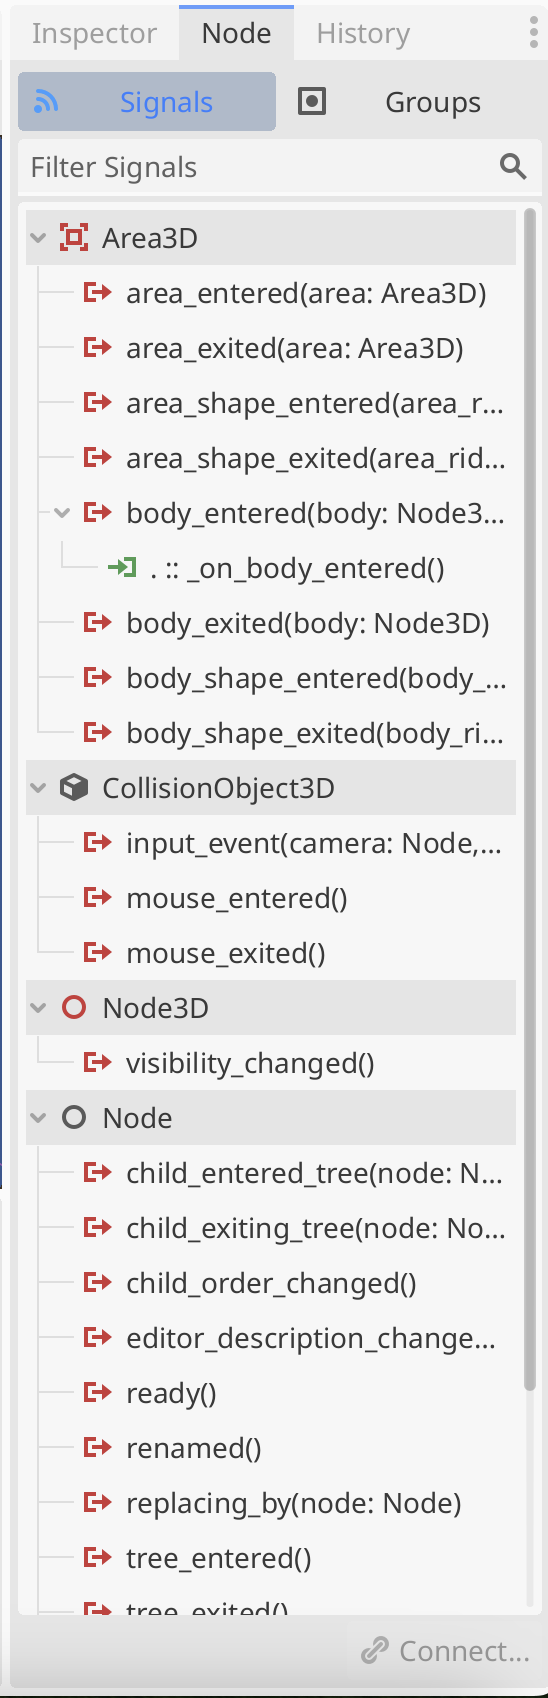
We then needed to connect this timer to the missile code, we selected the Timer and opened the Node panel in the UI. Right-clicking on Timer – timeout and connected it to the missile.gd script with a function _on_timer_timeout(). All we need in _on_time_timeout() is to call queue_free(). Now the missile self destructs after three seconds.
Finally we dragged Missile from the tree into the scenes folder in the file system view, making it a separate scene. With that done. we could remove it from the scene.
Shooting
We went to the Project | Project Settings | Input Map and added a new Action called “Shoot”. We bound this to the spacebar and the left mouse button.
In ship.gd we added the following export variable to store the missile scene:
@export var missile_scene : PackedScene
We then added a _process() function to check for the shoot action being triggered and to spawn a missile a little ahead of the player and moving in the same direction the player is moving in:
const MISSILE_OFFSET : int = 32

func _process(delta: float) -> void:
	if (Input.is_action_just_pressed("Shoot")):
		var new_missile = missile_scene.instantiate() as Missile

		new_missile.direction = velocity.normalized()
		if (new_missile.direction == Vector2.ZERO):
			new_missile.direction = Vector2.UP

		new_missile.position = position + new_missile.direction * MISSILE_OFFSET

		get_parent().add_child(new_missile)
This code:
- Creates a new instance of the missile scene
- Sets the direction, based on the player’s velocity
- Ensures the direction isn’t zero, because this would mean the missile doesn’t move
- Sets the missile’s position a little ahead of the player
- Adds the new missile to the scene at the same level as player’s ship (we don’t want the missile to be a child of the ship or to move with it)
Rate Limiting Shots
Finally, we added a little code to implement a minimum time between shots. We added two new variables, one an export and the other internal:
@export var min_time_between_missiles : float = 0.1

var missile_countdown : float = 0
We updated _process() as follows:
func _process(delta: float) -> void:
	missile_countdown -= delta

	if (Input.is_action_just_pressed("Shoot") && missile_countdown < 0):
		var new_missile = missile_scene.instantiate() as Missile

		new_missile.direction = velocity.normalized()
		if (new_missile.direction == Vector2.ZERO):
			new_missile.direction = Vector2.UP

		new_missile.position = position + \
							   new_missile.direction * MISSILE_OFFSET

		get_parent().add_child(new_missile)
		missile_countdown = min_time_between_missiles
Every time we run _process() (i.e. every frame) we count down missile_countdown. Since it starts at zero, it will keep getting negative until we first shoot,. We only shoot when it is less than zero. If we shoot, we set it to min_time_between_missiles this means there can’t be another shot until this time has elapsed.
Getting the Code
All our code for this year is available on our GitHub.