Creators – Week 12

This week we:

  1. Made our missiles destroy the enemies
  2. Added a score to the GameManager
  3. Set the enemies to automatically increase the game score when they die
  4. Added a new enemy type, with a different movement behaviour – pursuit of the player

Making Missiles Destroy the Enemy

To make our missiles destroy the enemy, we first created a new function in missile.gd called _on_body_entered():

func _on_body_entered(body : Node2D):
	body.queue_free()

This function we then connected to the body_entered signal by updating the _ready() function as follows:

# Called when the node enters the scene tree for the first time.
func _ready() -> void:
	body_entered.connect(_on_body_entered)

Now when a body is detected entering the Area2D that defines the missile, that body is removed from the game.

The last part of the process was to set the collision layer and layer mask correctly. Missiles are player projectiles and belong in layer 5 and only interact with enemies, which are layer 4. This is how the correctly set-up layer and layer mask look for the missile:

One quirk at the moment is that the missiles don’t get destroyed when they hit something. We may update this later.

Adding a Score to the GameManager

We first set a class name first in game_manager.gd by editing the first line to read:

class_name GameManager extends Node2D

This will be convenient to us later.

We then added a new exported variable, of type int, called score:

@export var score : int = 0

Finally we also added a function to increase the score by an amount:

func increase_score(amount : int) -> void:
	score = score + amount

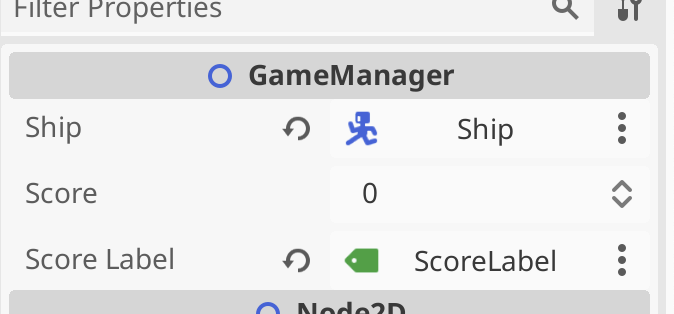
Now we have a score we can increase. To allow us to see the score, we added a Label called ScoreLabel to the main scene. We then added a variable in game_manager.gd to allow us to reference it from that code:

@export var score_label : Label

We then assigned this value in the inspector to hold a reference to ScoreLabel:

Finally, to update the label with the value of score, we added a _process() function to keep them in sync every frame:

func _process(delta: float) -> void:
	if (score_label):
		score_label.text = str(score)

Because it’s possible that score_label hasn’t been assigned, we check that it’s not null before we set it’s text property. Note the use of the str() function that takes a number and turns it into text.

Increase Score when Enemies Die

One of the signals all nodes have access to is one that is triggered just before the node is about to exit the tree. As an enemy, we can use this as a good time to inform the GameManager that we have died and that the score should be increased.

We first added a new exported score variable to ememy.gd:

@export var score : int = 100

We then also created a variable to store a reference to the GameManager:

@onready var game_manager: GameManager = %GameManager

Godot automatically writes this line of code for us if we drag and drop the GameManager from the tree into our code, holding down the CTRL (or CMD on Mac) key just before releasing the left mouse button. The @onready means that this variable assignment happens once this node is added to the tree. Is is a variable of type GameManager and it looks for a node in the tree with the unique name “GameManager”.

We then created a new function _on_tree_exiting():

func _on_tree_exiting() -> void:
	game_manager.increase_score(score)

And in _ready() we connected it to the tree_exiting signal:

# Called when the node enters the scene tree for the first time.
func _ready() -> void:
	vp_rect = get_viewport_rect() 
	set_wander_change_dir_time()
	tree_exiting.connect(_on_tree_exiting)

Now when ever an enemy is removed from the tree, regardless of why, the score in the game manager is increased accordingly.

Adding New Enemy Type

We wanted to introduce a new enemy behaviour: pursuing the player instead of just wandering aimlessly. We also decided to have a percentage that could be dialed up or down so that the enemy could spend part of the time pursuing and part of the time wandering. We added a new exported variable to control this:

@export var persuit_percent : float = 0

We also drag-and-dropped the GameManager into the code (holding down CTRL just before releasing the mouse button) to get this:

@onready var game_manager: GameManager = %GameManager

Then we wrote a new function pick_direction():

func pick_direction() -> void:
	if (randf() < persuit_percent && game_manager.ship != null):
		direction = game_manager.ship.position - position
		direction = direction.normalized()
	else:
		pick_random_direction()

This function checks a random number between 0 -> 1 against the pursuit percentage to see if it should be pursuing the player. It also checks the the reference to the player in the GameManager is set, as it needs this to know where the player is. If these checks both pass, it calculates the direction from the enemy to the player and normalises it (makes it length 1). Otherwise, it picks a random direction instead.

Finally we just replaced the call to pick_random_direction() in _process() to call pick_direction() instead:

# Called every frame. 'delta' is the elapsed time since the previous frame.
func _process(delta: float) -> void:
	wander_change_dir_time -= delta
	
	if (wander_change_dir_time < 0):
		pick_direction()
		set_wander_change_dir_time()

We then duplicated the existing enemy_0.tscn in the scenes folder as enemy_1.tscn. With a new sprite and updated settings to make it faster, change direction quickly and pursue the player all the time, we got a brand new enemy type.

Getting the Code

All our code for this year is available on our GitHub.

Creators – Week 11

This week we:

  1. Moved our enemy’s root node from Area2D to AnimatableBody2D
  2. Wrote a new enemy script, enemy.gd, for the enemy, based on mover.gd
  3. Improved the code in enemy.gd so that it now works as a physics object
  4. Created a set of collision layers for the game
  5. Wrote new code for the body-on-body contact
  6. Added sound for when we shoot

Moving Enemy from Area2D to AnimatableBody2D

It was necessary to move the enemy from an Area2D based node to a physics body of some sort. AnimatableBody2D is intended for physics bodies that are moved with animation or code.

To change the type of the Enemy node, we right-clicked on it and choose “Change Type”. We then searched for AnimatableBody2D.

Moving code from Mover.gd to Enemy.gd

We added new script directly to the Enemy’s root node, called Enemy.gd. We copied all the code from Mover.gd with the exception of the line “extends Area2D” at the very top and pasted it into Enemy,gd overwriting everything except the very first line, “extends AnimatableBody2D”.

We copied the variables from Mover in the inspector, and assigned the same values to the variables in Enemy.

Testing we found that this worked a bit, bit there was weird effects. It was moving the player too, for example. We recalled that Mover.gd was designed to move the parent of the node it was attached to. For Enemy, that is the scene root, and not what we want. We removed the variable storing the parent and all reference to it, setting our own position instead,

Additionally, we noted that the node called Mover, with a Mover.gd script attached, was still part of the Enemy node tree. It would also be moving our enemy, which we didn’t want. We deleted this node from the tree.

Now when we tested, we found that the the enemy was more-or-less behaving as before, excepting that it was wiggling about. Disabling “Sync to Physics” in the inspector resolved that.

Improving the Code so that Enemy Behaves as a Physics Object

Since AnimatableBody2D is a physics object, we could improve how we were moving it.

With physics objects, we don’t normally set the position explicitly, we set a suggested position, or a suggested velocity and let the physics engine then influence the actual outcome.

To move towards that change, we added a new function _physics_process() and moved the last line of _process() into it, changing position (explicit) to global_position (suggested). We also changed position to global_position in the bounds checking code. The last line in _physics_process() is a call to move_and_collide() which is passing control to the physics engine, once we’ve made our suggestion on position:

func _process(delta: float) -> void:
	wander_change_dir_time -= delta
	
	if (wander_change_dir_time < 0):
		pick_random_direction()
		set_wander_change_dir_time()
	
func _physics_process(delta: float) -> void:
	global_position += direction.normalized() * speed * delta
	move_and_collide(direction)

What we then noted, was that the AnimatableBody2D respects collisions with other physics bodies, so the bounds checking that we had previously in Mover.gd was no longer necessary to prevent the enemy moving out of bounds, so we removed exported variable bounds and the function check_pos_for_bounds().

Even though the Enemy was constrained to stay within the play area by the walls around the edge, there was no way yet for it to automatically reverse direction on hitting a wall (or other physics body). We added the following code to _process_physics() to achieve this:

func _physics_process(delta: float) -> void:
	global_position += direction.normalized() * speed * delta
	var collision = move_and_collide(direction)
	if (collision):
		var collision_pos = collision.get_position()
		
		if (direction.x < 0 && collision_pos.x < global_position.x):
			direction.x = 1
		if (direction.x > 0 && collision_pos.x > global_position.x):
			direction.x = -1
			
		if (direction.y < 0 && collision_pos.y < global_position.y):
			direction.y = 1
		if (direction.y > 0 && collision_pos.y > global_position.y):
			direction.y = -1

Creating Collision Layers

Objects that can collide with other objects have layers and layer masks:

  1. Layers: These are the layers that an object itself is in
  2. Mask: These are the layers that containing other objects that this object will collide with

Imagine these scenarios:

  1. Player is in layer 1. Wall is in layer 1. The player’s layer mask is set to 1. The player cannot pass through the wall.
  2. Player is in layer 1. Wall is in layer 2. The player’s layer mask is set to 1. The player pass through the wall.
  3. Player is in layer 1. Wall is in layer 2. The player’s layer mask is set to 2. The player cannot pass through the wall.

We established these layer:

  1. Player
  2. Boundaries
  3. Things that can destroy the player (obstacles, bombs, etc.)
  4. Enemies
  5. Player projectiles
  6. Pickups

We moved our player, enemy and boundary walls into their appropriate layers and set their layer masks. The player (ship) is in layer 1 and it’s mask is set to 2, 3, 4.

New Code for Body-on-Body Contact

In ship.gd we could now add code to detect body-on-body contact:

func _physics_process(delta: float) -> void:
	var mouse_pos : Vector2 = get_viewport().get_mouse_position()
	var ship_to_mouse : Vector2 = mouse_pos - position
	var distance : float = ship_to_mouse.length()

	if (distance > DEADZONE):
		velocity = ship_to_mouse * speed_by_distance
	else:
		velocity = Vector2.ZERO

	move_and_slide()
	
	for i in get_slide_collision_count():
		var collision = get_slide_collision(i)
		var collision_obj = collision.get_collider() as CollisionObject2D
		if (collision_obj && \
			collision_obj.get_collision_layer_value(2) == false):
			%GameManager.inform_body_entered(self)

After move_and_slide() above, we can check for collisions. We need to take any collisions that are not with objects in layer 2 (the boundary layer) and inform the name manager that we’ve hit something we shouldn’t.

Adding Sound when we Shoot

We went to freesound.org to look for suitable sound effects for our Ship when it shoots. Note that the site requires an account before it allows downloading.

We then added a new AudioStreamPlayer2D under Ship and called it ShootSound. Dragging it into the top of the Ship.gd script and pressing CTRL before releasing the mouse button provided this reference:

@onready var shoot_sound: AudioStreamPlayer2D = $ShootSound

In _process() after we’ve created the missile, we just have to insert this line to get the sound to play:

shoot_sound.play()

Getting the Code

All our code for this year is available on our GitHub.