Creators – Week 6

This week we added some pickups to our game, some signals (Godot’s term for messages or events) to indicate their creation or collection, and a game manager to keep track of everything.

Pickups

To create our pickups we created a new scene with an Area3D as the root node. An Area3D, in conjunction with a CollisionShape3D, allows us to define an area where bodies entering and exiting this area can be detected.

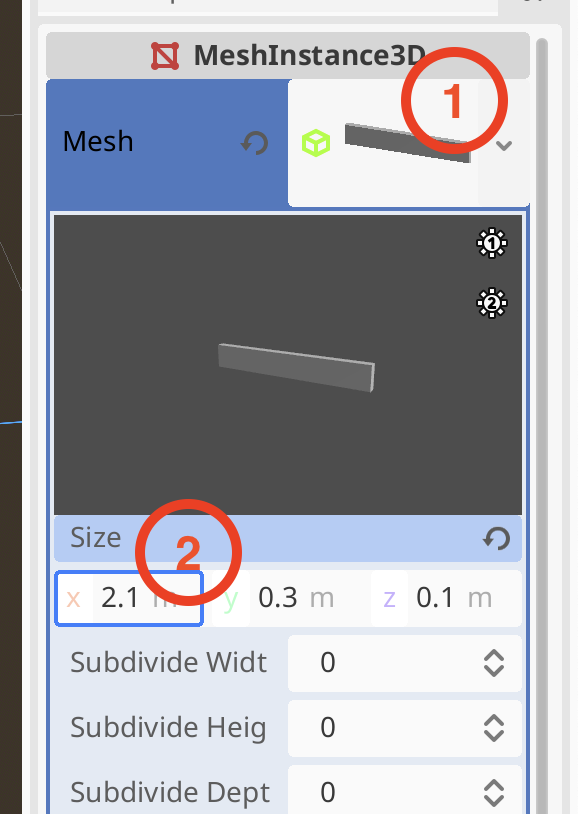
We paired this Area3D with a cylinder CollisionShape3D and a cylinder MeshInstance3D, both about the same height as our player ball.

We created a new StandardMaterial3D resource for our pickup and used the checker texture again, this time scaled to appear multiple times on the object, to give it some visual interest.

Signals

Signals are Godot’s way for nodes to tell other nodes when something’s happened. There are many built-in signals in the existing nodes and you can easily define others yourself.

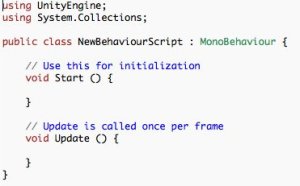
To demonstrate, we created a new script attached to the root node of the pickup scene, and with this same node selected, we then went to the tab underneath the Inspector tab, a tab called Node.

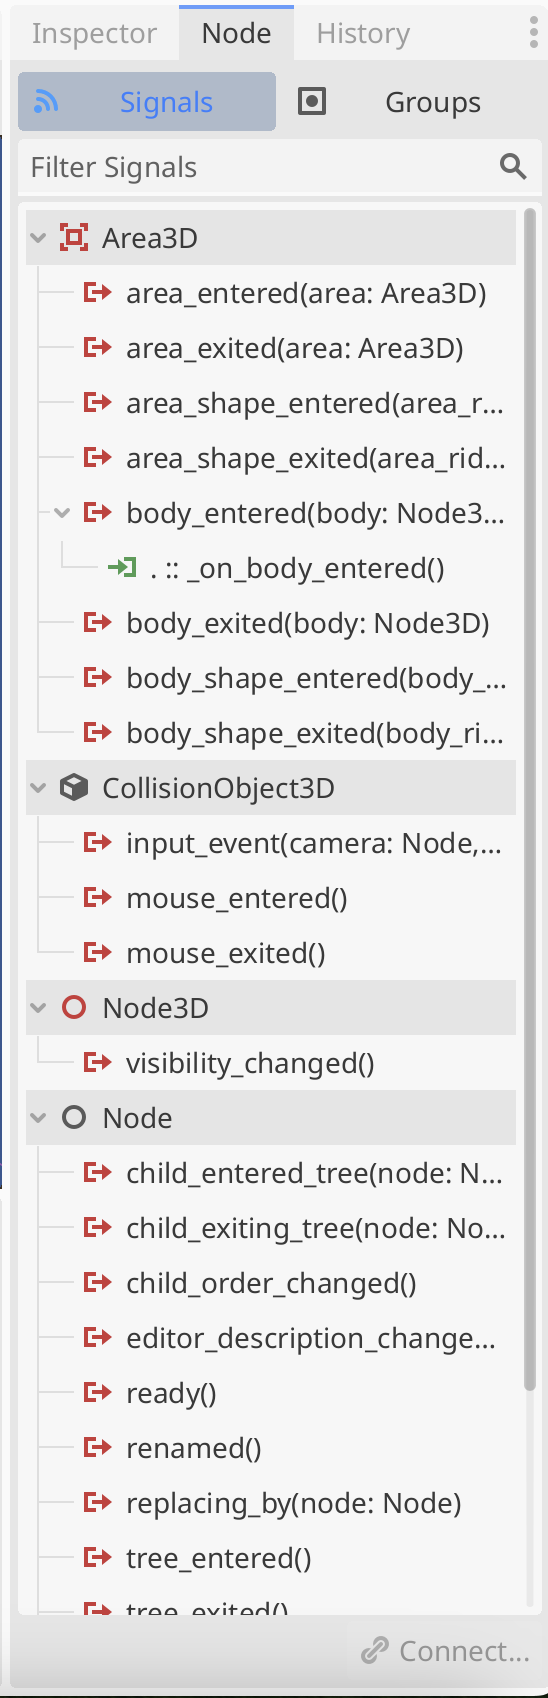
This shows the list of signals on this node available to connect to. We right clicked on body_entered() and connected it to the pickup script, creating a new function called _on_body_entered() in that script.

We just set the following code there to show that we’d detected something entering the area (as defined by the collider):

func _on_body_entered(body: Node3D) -> void:
	print(body.name + " entered the area")

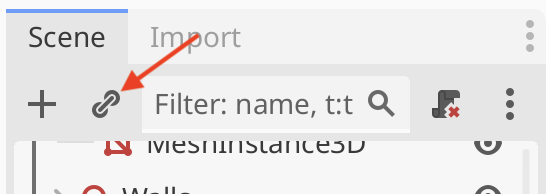
We created an instance of the pickup in our Main scene by using the “Instantiate Child Scene” button at the top of the scene view, and selecting the pickup scene:

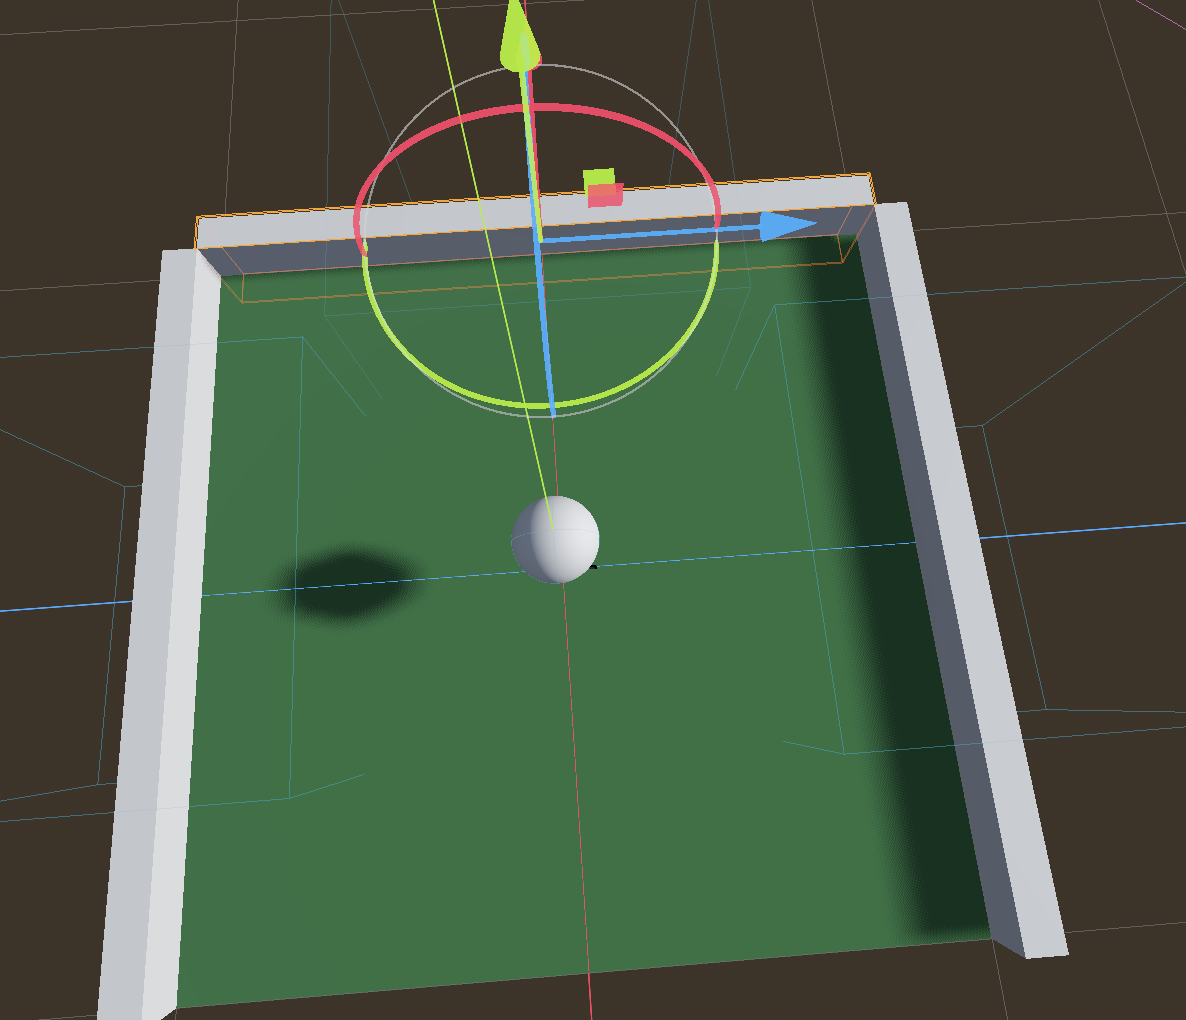
We moved this pickup off centre and tested our code by playing it and rolling the player into the pickup. The message “Player entered the area” was printed to the Output window.

We updated this code by adding queue_free() at the end of the function:

func _on_body_entered(body: Node3D) -> void:
	print(body.name + " entered the area")
	queue_free()

This function means “please queue this node (and all it’s child nodes) for deletion at the end of this frame”. When we test again, we see that rolling the player into the pickup now makes the pickup disappear.

A Handy Way To Handle Events

In Godot connecting a node to another’s signal normally means that the first node has to have a reference to the second.

There’s a nice pattern that simplifies things. We make a central place that holds the signals, nodes that want to “emit” (or cause the signal to fire) and nodes that want to know when the signal was emitted just need to know about this central place, they don’t need to know about each other.

Godot has a system whereby a script can be set to autoload when the game starts, it doesn’t have to be connected to a node in a scene. Even more convenient, it will declare a global (visible everywhere) variable for this class instance that everyone can easily access.

This might sound complex, but it’s super easy in practice. We created a new script called events.gd. The contents were as follows:

extends Node

signal pickup_created
signal pickup_collected

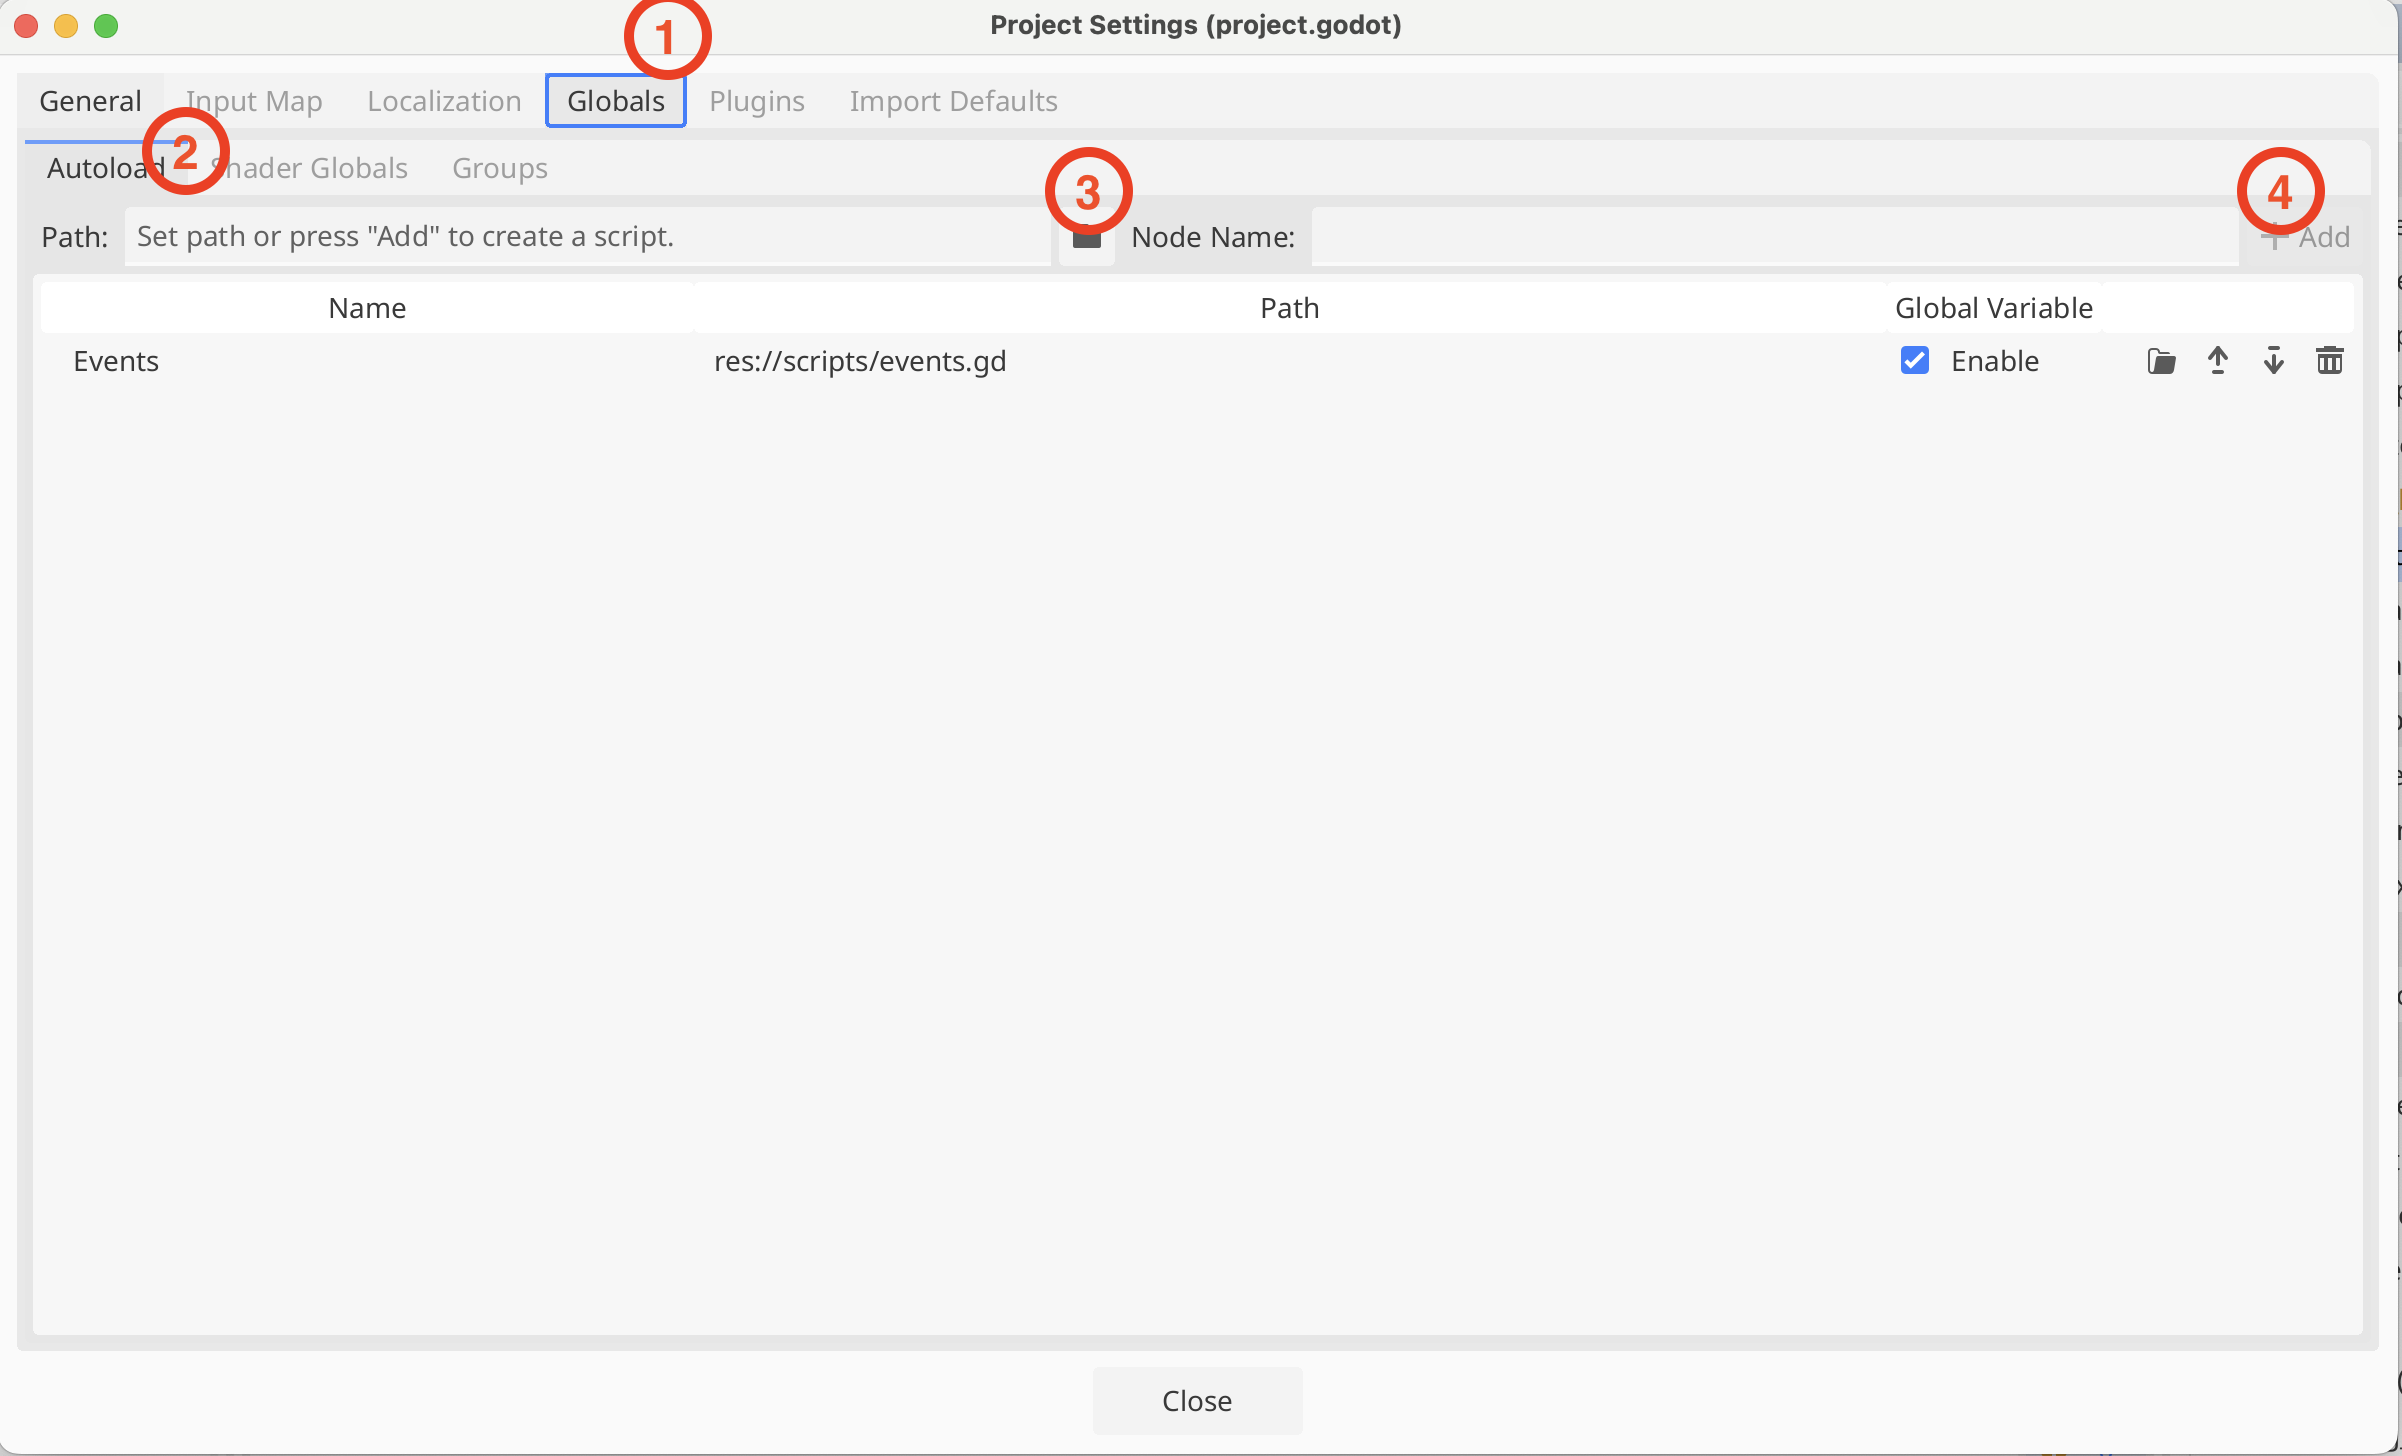
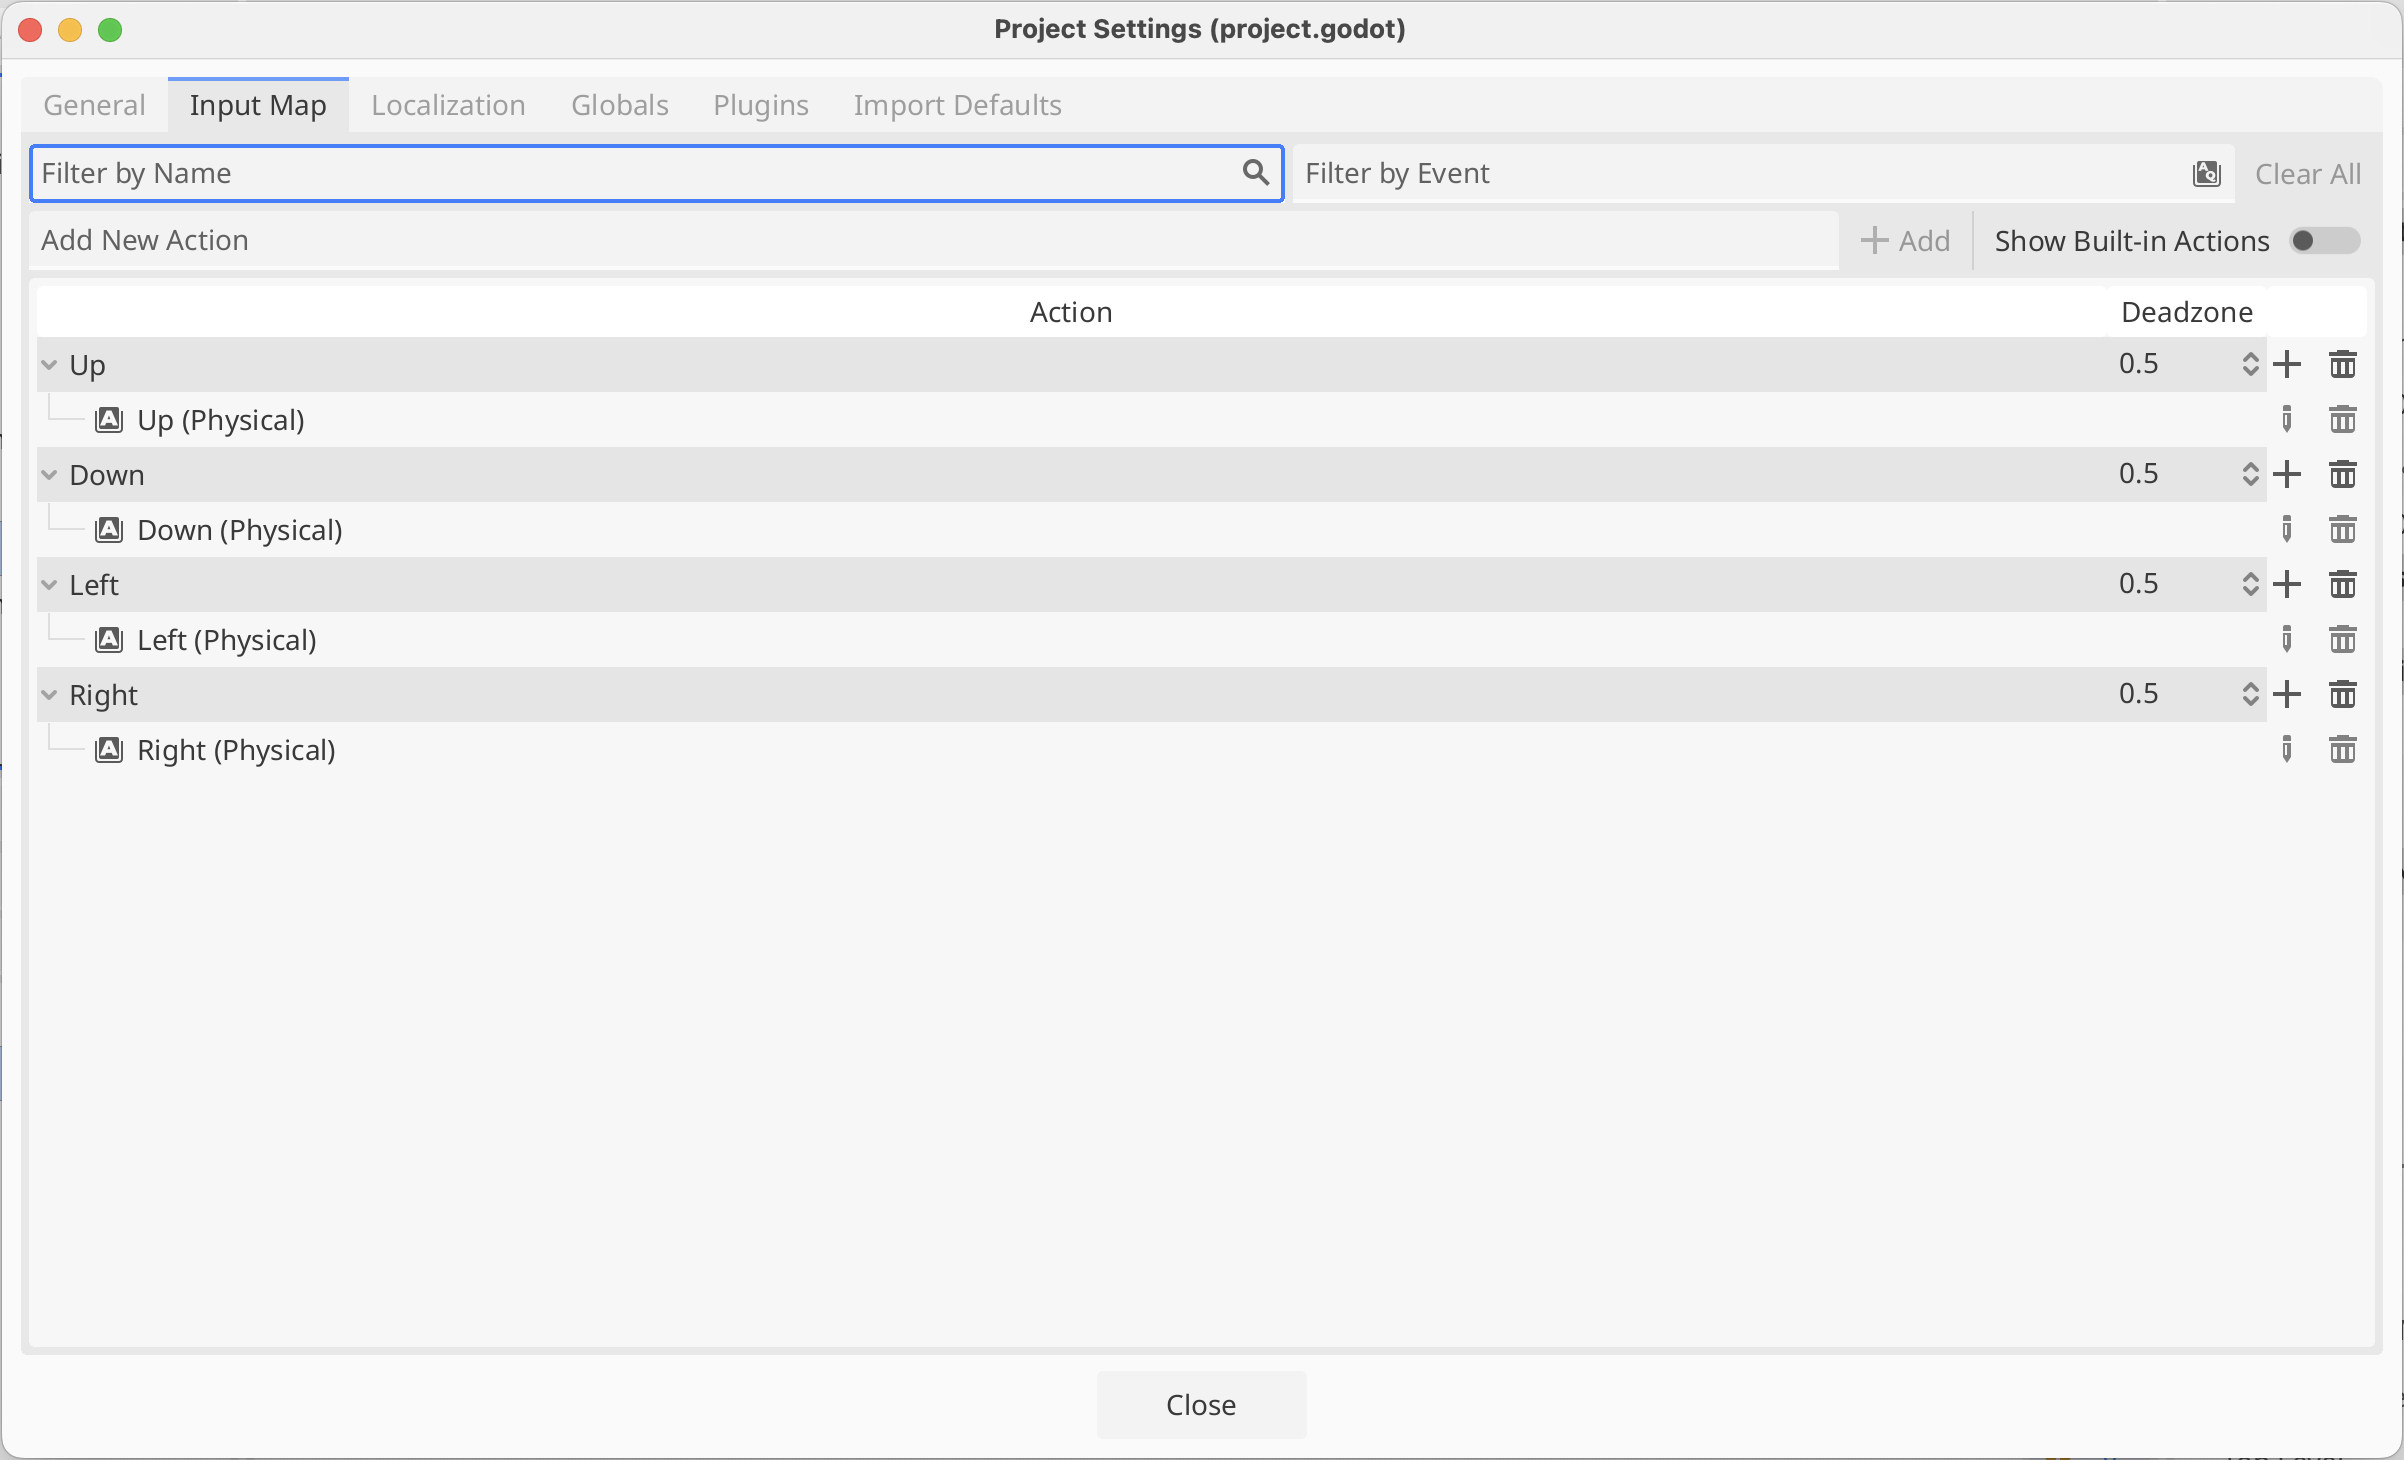
We then went to Project Settings | Globals and under Autoload, selected the events.gd script and pressed “+ Add”

Firing the Events from Pickup

In pickup.gd we added two lines to our _ready() and _on_body_entered() functions to cause the appropriate signals to be emitted when the pickup was created and collected respectively:

func _ready() -> void:
	Events.pickup_created.emit()

func _on_body_entered(body: Node3D) -> void:
	print(body.name + " entered the area")
	queue_free()
	Events.pickup_collected.emit()

See that we’re using the global variable “Events” here to access the signals.

We tested that we could read these signals by putting code into Player, but as this was just for quick testing, we won’t replicate it here.

Game Manager

We created a new Node3D in the Main scene, called it Game Manager, and created a new script attached to it.

In this script we added two variables to the top of the class:

extends Node3D

@export var pickup_count : int = 0
@export var game_time : float = 0

One is an integer variable to keep track of the number of pickups. The second is a float variable that tracks how long the game has been running for. Both have “@export” at the start, this means that they both appear as variables in the Inspector, which is handy.

For the pickup count, we first added two new functions, to respond to the creation and collection signals respectively:

func _on_pickup_created() -> void:
	pickup_count += 1
	
func _on_pickup_collected() -> void:
	pickup_count -= 1

All these to is increase or decrease the pickup_count variable. We need then to connect them to the signals, so that they get called if the signal is emitted. We do that in _ready():

func _ready() -> void:
	Events.pickup_created.connect(_on_pickup_created)
	Events.pickup_collected.connect(_on_pickup_collected)

For game_time, all we have to do is keep adding the delta values available in _process(), which represent the time in seconds since the last frame was drawn, together:

func _process(delta: float) -> void:
	game_time += delta

To see these running we ran our game and in the Scene view, switched to the “Remote” tree. The remote tree is the tree of the game that’s running. Looking at the Game Manager node in the inspector, we could verify the variables were working as expected.

Getting the Code

All our code for this year is be available on our GitHub.

Creators – Week 5

This week we continued working on Roll-A-Ball.

More Walls and Resource Copies

We left off last week with two walls. This week we copied one of those to create a third. It’s new transform position is (1.05, 0, 0) and it’s transform rotation is (0, 90, 0). That rotation represents 90 degrees around the vertical axis (y-axis).

It was immediately clear that we ideally needed to close the gaps at the corners where the walls meet.

To adjust the size of the third node, we select its MeshInstance3d child node. To adjust the mesh size, we click on the picture of the mesh in the inspector to see it’s properties and then adjust the size to 2.1m:

We can see all the walls change size. This is because they are all using the same mesh resource. We set the size back to (2.0, 0.3, 0.1) first. Now, we can make this mesh resource separate to the one used by the other two walls. Click on the drop-down arrow next to the mesh picture and then select “Make Unique”

Now when we change the size to (2.2, 0.3, 0.1) it doesn’t change the other two walls.

Finally we copy this third wall and move it to (-1.05, 0, 0). Now we have four walls.

Materials

We created a wall material in a very similar fashion to how we created the original ground material and assigned it to all four walls.

We also created a new material and assigned it to the ball. We gave it a strong red colour in ‘Albedo’. Because the ball was going to be impossible to tell if it was rolling, being all one uniform colour, we decided to apply a checker board texture to it. Here’s a texture we used today:

We placed this in a textures folder in the FileSystem and then assigned it to the Texture slot under ‘Albedo’ in the ball material. That gave the ball a checkered look.

We also looked at some of the other most commonly used material settings, including roughness, metallic and transparency.

Turning the Ball into the Player

We wanted to create a Player object and make it it’s own scene. We renamed “ball” in the Main scene to Player and right-clicked on and chose “Save branch as scene”. This created a new scene called “Player” which opened a new tab in the centre of the editor.

The Player node still had the transformation from the main scene (lifted up along the y-axis). We removed this and saved the Player scene. Switching back to Main we could see the Player node was now cutting through the ground so we moved it upwards again. Note that changes in the child scene were reflected in the parent scene, but not the other way around.

Creating an Input Map

To capture user input, we set up some Input Actions. Under the Project menu, we selected Project Settings and then selected the Input Map tab:

Where it says “Add New Action” we typed the name of each action in turn (Up, Down, Left and Right) and pressed the Enter key or the “+ Add” button to create it.

We then selected each action in turn and pressed the + at the right hand side of it’s row. We then just pressed the key we wanted for that action and closed the dialog to confirm the selection. Above I’ve chosen the arrow keys, but others chose WASD. Either is fine.

Making the Player Move

We next want to make our player move in response to input.

First we created a scripts folder in our file system

In the Player scene, we selected the Player node and pressed the Attach Scripts button. We then change the path on the dialog that appeared to make sure to place our new script in the scripts folder (instead of the scenes folder).

Our script automatically opens in the editor. It extends RigidBody3D, which is the type of the existing Player node. It has two empty functions, _ready() and _process(), by default. _ready() is called when the object is first created and _process() is called every time the scene is drawn.

We’d like to apply physical forces to our object, specifically torque, which is a turning force. There is another function where we should put code that interacts with the physics system: _physics_process(). Here’s what that empty function should like:

func _physics_process(delta : float) -> void:
      pass

This is a function that takes one parameter called “delta” which is a float. A float is a number with a decimal point. The “-> void” means that this functions doesn’t send back a value to the code that calls it. You must have at least one line inside a function in GDScript; “pass” doesn’t do anything, it’s just there to prevent the function from having no lines in it.

We can get our input values like this:

func _physics_process(delta : float) -> void:
	var input = Input.get_vector("Up", "Down", "Left", "Right")

These are the names of the input actions we’ve already defined. This is going to return a Vector2 value which we’re storing in the variable called “input”. As a Vector2, this has an x and a y value. The x value will vary between 1, -1 and 0 depending on whether “Up” or “Down” or neither are being pressed. Similarly the y value will vary between 1, -1 and 0 depending on whether “Left” or “Right” or neither are being pressed.

We can now actually apply torque (turning force) to our ball:

func _physics_process(delta : float) -> void:
	var input = Input.get_vector("Up", "Down", "Left", "Right")
	apply_torque(Vector3(input.x, 0, -input.y))

The function apply_torque() is part of RigidBody3D and expects a Vector3 which indicates how much to apply around the x, y and z axes respectively. We don’t want any applied around the y-axis as this would just spin the ball around the vertical axis and not roll it along he ground. So we make a Vector3 where the “Up”/”Down” actions add torque around the X-axis and the “Left”/”Right” actions add torque around the z-axis. When testing, because of our camera angles, we find the “Left”/”Right” is backwards to what we want, so we use – to flip the direction.

The ball now rolls! Too fast and there’s a problem with colliders, which we need to fix – the wall colliers are the wrong size, but once that’s corrected we have something not too bad.

Getting the Code

All our code for this year is be available on our GitHub. Please see Creators – Week 4 for more details.

Week 5 – Unity

UnityLogo

This week we returned to the Roll-A-Ball game that we had shown in the introductory session. Because people were at different levels of completion with this, we started from the beginning again, but we put some detail around things that we’d glossed over the first time around.

Concept of Classes

A class is a programming concept that allows you to define objects which contain both Properties and Methods. Properties are what they sound like; a value associated with object that we can get or set. Methods are actions, in the form of a function, that we can ask the object to perform.

SampleObject

If you think of yourself as a Person object then you could imagine some of the Properties and Methods you might have.

For Properties you might have things like NameAge, HeightWeight, etc. An example of a Method you might have could be SayHi() [notice the round brackets after the name marking this as a method]. That would make you say “Hi!”. A method might have arguments, so it could be SayHiTo(“Dave”) which would make you say “Hi Dave!”.

A method could equally calculate a value. An example might be CalculateBMI() which would calculate your Body Mass Index (BMI) value based on your Height and Weight properties.

Another nice thing about classes are that we can create specialised versions of them. They get all the Properties and Methods of the base class, plus all the new Properties and Methods that we defined for the derived ones. In this example, we might want to declare SchoolChild and Worker as new classes, both based on Person. SchoolChild might have additional properties such as School and Class while Worker would have WorkPlace and JobTitle. They would still share Name/Age/Height/Weight, etc.

Classes in Unity

Unity has a base class called MonoBehaviour and when we define behaviour for a game object, we do this by deriving a specialised class of our own design based on MonoBehaviour.

There are four Methods that MonoBehaviour has that we have looked at so far:

  • Start()
  • Update()
  • FixedUpdate()
  • LateUpdate()

We have provided custom versions of these in our own classes to define the behaviour that we want. This behaviour is also known as “overriding” as we are overriding the base behaviour of these Methods (which is to do nothing).

  • Start() is called when our game object is created. We can so things here that we need to do once when the game object is created.
  • Update() is called every time the scene is drawn. It’s a good place to do any updates that impact how the scene looks. However, it’s not called at a constant rate and that makes it unsuitable for some jobs.
  • FixedUpdate() is called every time the internal game timer for physics calculations fires. This is guaranteed to be at a regular interval. Any physics based calculations where time is a component should therefore should be done within FixedUpdate() rather than Update().
  • LateUpdate() is called after all game objects have had their Update() functions called. Use this when we need to be sure that another object has definitely been updated before we do something based on that object’s Properties.

Vectors & Physics

If I tell you that someone is moving at 5kph and ask you were they’ll be in 10mins, you won’t be able to answer that question. If I tell you that they’re moving 5kph due North, then you will. That combination of a quantity and a direction is called a vector.

vectors_basicA vector in 3D space is usually represented as three numbers, written as (X, Y, Z). Let’s see what the vector (1, 2, 3) looks like.

We’re familiar enough with using vectors like this to indicate a position, but what about representing a velocity or a force? The direction is apparent, but what about the quantity? Well the quantity is simply the length of the vector. This is calculated using Pythagoras’ theorem:

distanceeq3

So we can calculate the quantity or magnitude of the vector (1, 2, 3) as approximately 3.74.

Note too that if our vector (1, 2, 3) represents a force then a vector (2, 4, 6) also representing a force, would be a force in the same direction but twice as strong. You can see that each part of the vector has simply been multiplied by two.

Basic Structure of a C# File

When we derive custom behaviours for our game objects, Unity is kind enough to provide us with a basic file containing a class definition containing empty methods for Start() and Update()monobehaviour

It’s tricky making the transition from a visual language like Scratch to a language like C# where you have to type code. A few simple rules may help:

  • Lines starting in two forward slashes (//) are comment lines. They have no effect on the program; they’re there for you to read. You can delete or change them as you need.
  • Semicolons (a dot over a comma) mark the end of statements. They’re easy to forget at first so you need to be careful.
  • You need spaces and newlines to separate things, but this does not have to be precise. Two spaces are equivalent to one. Because a statement doesn’t end until a semicolon, you can split if across several lines and it will still be fine. Hard to read though.
  • Braces (or curly brackets) enclose things and they must always be in pairs (open/close). In the sample code the braces are such that the methods Start() and Update() are inside of (and belong to) the class NewBehaviourScript because they are inside its braces. Similarly any lines we add inside Start() will belong to that method because they are inside its braces.
  • Neat formatting really helps keep your code readable and helps you quickly find mistakes. Try to mimic how code is formatted in the examples, especially the practice of “indenting” lines; placing spaces at the start of the line to make it clear what it is inside of.

Next Week

Next week we will continue to develop Roll-A-Ball and hopefully get it finished up.