Creators – Week 10

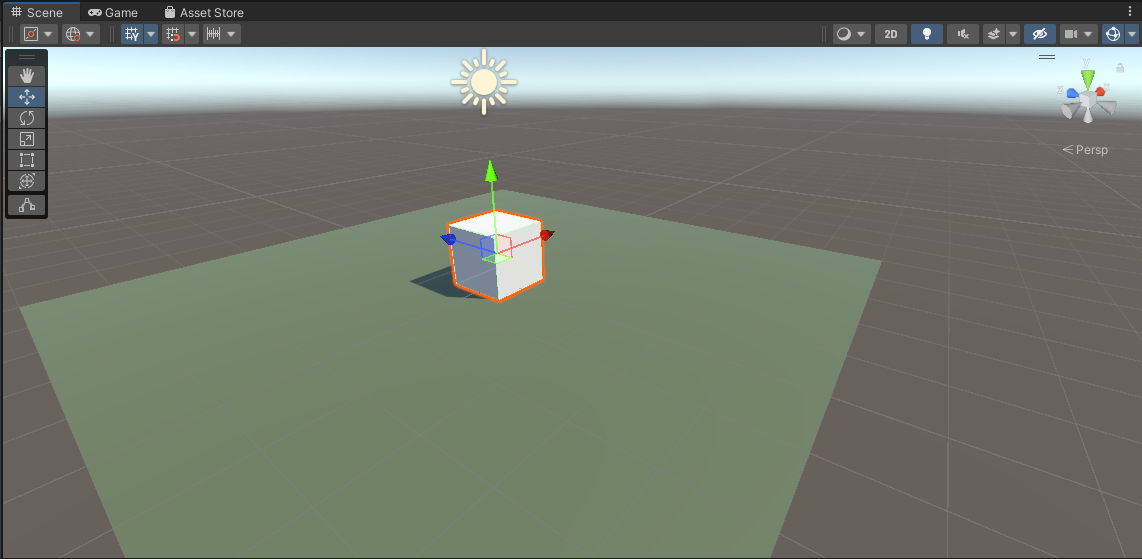
This week we took our cube and made it vaguely more spaceship-shaped by moving it up to (0, 2, 0) and resizing it to (5, 1, 4). We also took our ground plane and scaled it to (10, 10, 10). Now it looks vaguely more like a flying craft than before!

The ship controls still work as before. WASD move the ship horizontally over the ground and there’s no vertical movement. To make it look more like a flying craft, we’d like it to bank (aka. tilt over) as it moves horizontally. That’s going to take a bit of figuring out.

Angles in Unity

Let’s take a little aside to talk about angles in Unity.

In the Unity Inspector we see three numbers for a transform’s rotation. These numbers represent rotations around the X, Y and Z axis respectively. This way of storing a rotation is known as “Euler angles”. It seems simple and straightforward and, if you’re rotating around just one of the X,Y or Z axes, it is, but for complex rotations it actually has a lot of problems. The order in which you apply the rotations matters. If you rotate first in X then Y and the Z, you get one orientation, but choose a different order and you’ll get something different. It’s ambiguous.

Look at these two boxes. Each are rotated by 90degrees around the X and Z axis but in a different order. They end up in completely different orientations:

Rotations internally in Unity are stored using a special variable called a Quaternion. Euler angles can easily be converted to Quaternions and back again. Quaternions store the axis that the object rotates around and the amount of the rotation. It’s completely unambiguous with no order to worry about.

When we code, we use Quaternions for rotations because that’s what Unity uses.

Variables for Ship Tilt

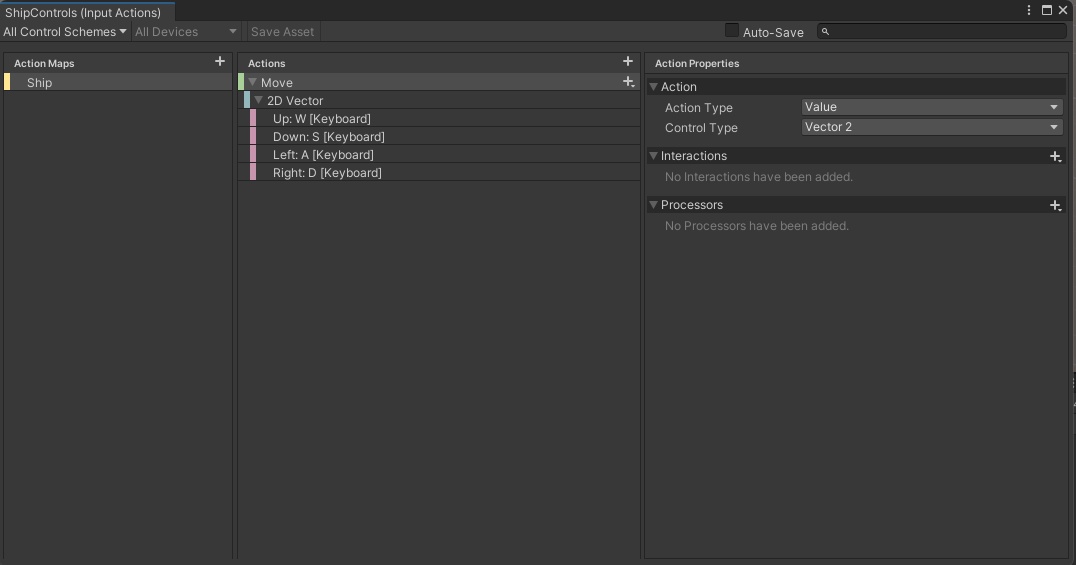
In ShipControls.cs we add two variables TiltSpeed and TiltLimit to control banking. TiltLimit represents the amount of degrees we’re going to bank as we move horizontally and TiltSpeed is how quickly we can change angle. We don’t want the craft immediately going from tilting one direction to tilting the other – we want a smooth change of rotations. That will look a lot better.

  public float TiltSpeed = 10.0f;
  public float TiltLimit = 10.0f;

Because these are public properties, we see them appear in the inspector for Ship Controller.

Determining What Tilt We Should Have

Tilt is dependent on the user input. If the user is pressing right, we should be titled to the right. If the user is pressing left, we should be tilted to the left. If the user isn’t pressing left or right, we should be level.

In the Update() function in ShipControls.cs we add this code near the top:

    float tiltTarget = 0;

    if (moveInput.x < 0)
      tiltTarget = TiltLimit;
    else if (moveInput.x > 0)
      tiltTarget = -TiltLimit;

    Quaternion targetRotation = Quaternion.Euler(tiltTarget, 0, 0);

So depending on user input, tiltTarget will either be 0, TiltLimit or -TiltLimit (note the minus). We then turn this into a Quaternion representing this amount of a rotation around the X axis.

Moving Smoothly Between Rotations

How do we move smoothly between two rotations, namely the rotation we’re at and the rotation we want to be at?

There’s a general concept called “linear interpolation” for finding a value some proportion of the way between two other values. Let’s imagine a trivial example; if our numbers were 0 and 10 then the number 50% of the way (aka. half) between these would be 5. In Unity linear interpolation is known as “Lerp” and it can be used not just for simple numbers but for Vector3’s (representing positions and directions) and Quaternions (representing rotations) too.

For Quaternions, Unity has a special “Lerp” that works really well for rotations called Quaternion.Slerp(). “Slerp” stands for Spherical liner interpolation. Not a function name you’ll quickly forget. So to “Slerp” between the angle we’re currently at and the angle we’d like to be at, we need to know what proportion of that change we can make this frame. Here’s how we calculate that proportion:

  1. Find the angular different between the rotation we’re at and the rotation we’d like to be at
  2. Calculate how long, given the speed we’ve specified for changing angle, it would take to fully make that change in rotation
  3. Calculate, given the time since the last frame, what proportion of that change we can actually make (it will be just a small bit of the change).

Here’s what the code looks like:

    float rotationDiff = Quaternion.Angle(targetRotation, 
                                          transform.rotation);
    float timeToFullyRotate = rotationDiff / TiltSpeed;
    float rotationProportion = Time.deltaTime / timeToFullyRotate;

Finally we actually set the transform’s rotation using Slerp(), the rotation we’re at, the rotation we’d like to be at and the proportion of the change that we’ve calculated:

transform.rotation = Quaternion.Slerp(transform.rotation, 
                                      targetRotation, 
                                      rotationProportion);

Tuning the Variables

Testing the ship control code we found that good values for the variables were as follows:

Move Speed50
Tilt Speed100
Tilt Limit30

We also noted that any values entered in the inspector override defaults in the code.

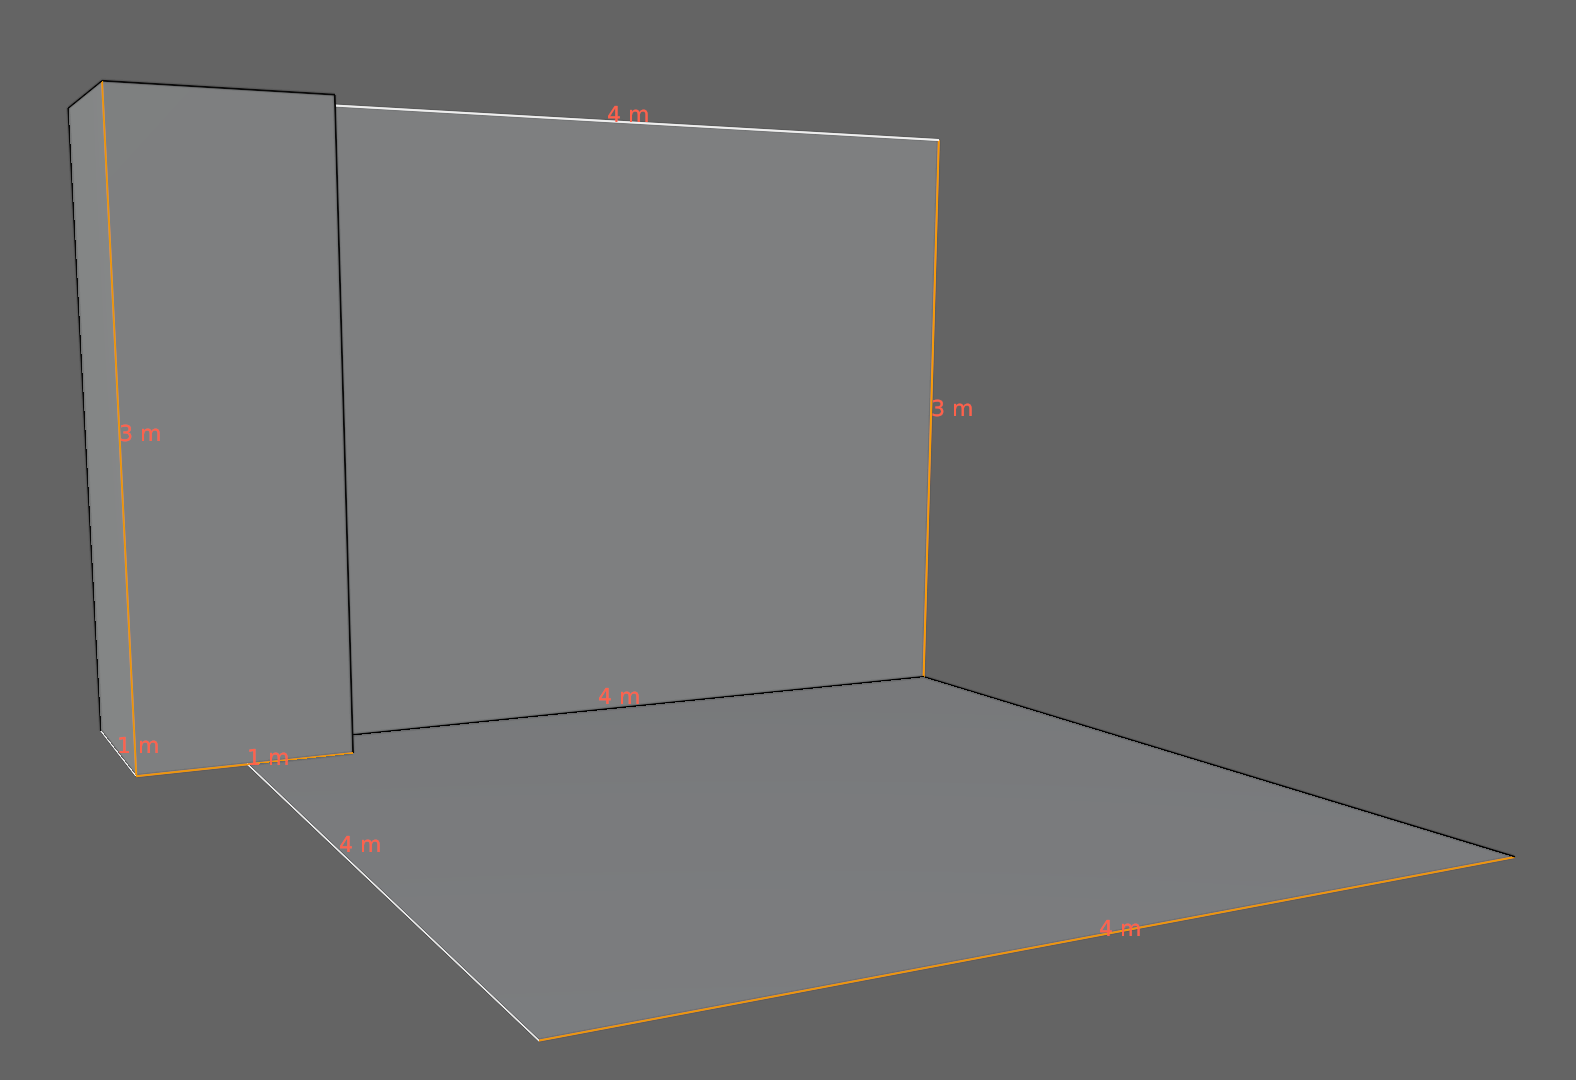
Simple Blender Spaceship

We started on a simple spaceship model in Blender, using the proportions of our cube in Unity as a guide [5m x 1m x 4m].

This was mine, but everyone had their own take. If anyone wants to download mine, it can be found here on our Teams site. If you’re not a member of our Teams site yet, get in touch to be added.

When we return after our break, we’ll look to texture this model and export it from Blender and import it into Unity.

Getting the Code

All the code we’re made this year is on our GitHub. It can be found here. If you don’t have the latest version of our code before any session, use the green Code button on that page to get the “Download ZIP” option which will give you a full copy of all code we’ll be writing this year.

Creators – Week 9

I decided, since we weren’t making a lot of progress with our Dungeon game, that we might need to switch to something simpler. We are going instead to make a game in the style of an isometric side-scrolling arcade shooter. This style of game first appeared back in 1982 with Sega’s Zaxxon (pictured below) but there have been many examples since.

We decided to call our game “Speedy Spaceship”.

To start with the game we opened a new Unity project and used the Package Manager to install the new Unity Input Manager package. This is the preferred way to define user inputs in Unity these days as it’s far more flexible when you want to add alternative control schemes (gamepad instead of keyboard, for example).

We first created a folder called Input and in there we made a new “Input Actions” asset and called it “ShipControls”. Opening this, we defined a simple control scheme, for keyboard and mouse, as follows:

At the moment it only contains one action “Move” but we’ll be adding at least one more action later to enable shooting. Movement is bound to the WASD keys on the keyboard.

Once we’d done that, with this Input Actions asset still selected in the Project view, we selected the “Generate C# Class” option in the Inspector and pressed the “Apply” button. This made a script file called “ShipControls.cs” next to our Input Actions asset in the inputs folder. This file contains a lot of code for handling the interactions, but we don’t need to worry about it’s contents; it’s easy for us to make use of it.

We then added a plane, which we added a material to, and a cube positioned just above the plane, to our current scene. With the cube selected, we positioned ourselves in the Scene View such that the cube’s X-axis (red) was pointing right and away from us and the cube’s Z-axis (blue) was pointing left and away from us.

We then selected “Main Camera” in the scene and used the GameObject|Align with View menu command to set the camera to the same angle as the Scene View. Toggling between Scene View and Game View now show the exact same angle, at least until we move in the scene view again.

We create a Scripts folder and made a new C# script inside called “ShipController”. We dragged and dropped this script over the cube in the scene view to assign it.

The first thing we needed to do was to attach the ShipControls to the ShipController (similar names, but two different things). We made a new private property in ShipController to hold a reference to a ShipControls instance, added the Awake() function where we created a new ShipControls object and then used the OnEnable() and OnDisable() functions to enable and disable the ShipControls when the ShipController was itself enabled or disabled. This is what that code looks like:

using System.Collections;
using System.Collections.Generic;
using UnityEngine;

public class ShipController : MonoBehaviour
{
  private ShipControls _controls;

  private void Awake()
  {
    _controls = new ShipControls();
  }

  // Start is called before the first frame update
  void Start()
  {
        
  }

  private void OnEnable()
  {
    _controls.Enable();
  }

  private void OnDisable()
  {
    _controls.Disable();
  }
}

For movement we then just need to find out what the value of our input is at every frame and move appropriately. First though, we need some control over the speed we’re going to move. We add a new public property for MoveSpeed:

public class ShipController : MonoBehaviour
{
  public float MoveSpeed = 10.0f;


Now we can add code to Update(), the function that Unity calls every time that a frame is drawn, to move the cube around in response to player input.

If we have a speed and a time, we just need to multiply them together to see how far we’ve gone. This is a simple mathematical way of expressing it:

speed * time = distance

If, for example, I’m travelling 100kph and I drive for two hours then the distance I’ve gone is 200km.

100km/h * 2h = 200km

The time between frames in Unity is stored in a special variable Time.deltaTime. This value for time is dependent on our framerate. As long as we use this value when we’re calculating distance moved in a single frame, the answer will be correct no matter if our computer is generating 20FPS or 200FPS.

Let’s see the final Update() function code:

  void Update()
  {
    Vector2 moveInput = _controls.Ship.Move.ReadValue<Vector2>();

    transform.position = transform.position +
                         new Vector3(moveInput.y * MoveSpeed * Time.deltaTime,
                                     0,
                                     -moveInput.x * MoveSpeed * Time.deltaTime);
  }

The first thing is that we ask for the value of the moveInput. This is defined as Vector2 value so it has an x and a y part (representing the horizontal and vertical axes respectively). The y component will be +1 when we’re pushing W (Up) and -1 when we’re pushing S (Down). Similarly the x component will be +1 when we’re pushing A (Left) and negative when we’re pushing D (Right).

We take transform.position, which controls the position of the cube and we set it to a new value which is it’s current position plus an new Vector3 which represents the change in position this frame. The x and z portions, which represent horizontal movement, are both calculated from the input. The y portion, representing vertical movement, is always zero. The other two are of the form:

distance = input * speed * time

Distance being speed multiplied by time we’ve seen, but what’s input doing in there? Well input is like a switch. When you’re not providing input, it’s zero. Anything multiplied by zero is zero, so distance must be zero when we’re not actively providing input. When you’ve providing input it’s either 1 or -1 which means we’ll move forward or backwards depending on what the input is.

Next week we’re going to make our ship a little more ship-like in proportion and make it bank when it goes sideways. We’ll also be creating a simple ship model in Blender.

All the code we’re made this year is on our GitHub. It can be found here. If you don’t have the latest version of our code before any session, use the green Code button on that page to get the “Download ZIP” option which will give you a full copy of all code we’ll be writing this year.

Creators – Week 7

Today we worked on our first Unity component, MapMaker, and attached it to a GameObject in the scene.

We added a TextAsset property to the class definition and saw how it became visible in the Unity Inspector. We were then able to associate our map file with this slot.

In the code, we created a new method (aka function) to our class definition called BuildMap() and added some code to it. Ultimately it was able to:

  1. Make sure that we had a map file specified before proceeding
  2. Show us name of the map file and its content
  3. Break the map file into individual lines
  4. Tell us how many lines were in the file

Then we created a pair of prefabs and a pair of matching materials. Prefabs are an essential Unity concept that represent pre-built combinations of GameObjects and associated components that we can quickly create copies of at runtime.

We are going to use these two prefabs to physically create our map from.

I have started a new GitHub repository to store our Unity project code. It can be found here. If you don’t have the latest version of our code before any session, use the green Code button on that page to get the “Download ZIP” option which will give you a full copy of all code we’ll be writing this year.

Creators – Week 6

This week we looked to get started with Unity. To install Unity:

  1. Go to https://unity.com/download
  2. Download and install Unity Hub
  3. Create an account with Unity, if you don’t have one already
  4. Log into Unity Hub with your Unity account
  5. In the Installs section of Unity Hub, install the latest version of Unity 2021.3. At the time of writing, this is 2021.3.35f1
  6. Make sure you pick the option to install Visual Studio Community Edition (Windows) or Visual Studio for Mac (macOS) when installing Unity

We just barely started on our first script before the end of the session. We’ll expand on that next week.

Creators – Week 5

This week we saw where we were going with the dungeon:

The screenshot shows a completed dungeon, made from the modular parts that we are currently building.

We finished off the two pillar designs, shaping one straight-sided and the other rounded and we worked on a wall section. For the wall section, we used a mirror modifier to make it two sided while only having to work on a single side.

Our file from today can be found here.

Creators – Week 4

This week we first created a crate:

This used many of the same techniques as the barrel last week.

We then started with a plan for our dungeon pieces. As long we we stick to these generic dimensions for floor, pillar and wall pieces, we can mix and match and everything will slot together easily:

Our file for today can be downloaded from here.

Creators – Week 3

This week we started Blender in earnest and created our first model, a wooden barrel with metal rings. The file is available here. You need to be a member of the Creators’ Teams group to download it, so let me know next week if you aren’t yet a member and I can get you added.

For those catching-up, Blender can be downloaded through the Windows App Store or from https://www.blender.org/download/.

You can review Blender basics using these videos:

Creators – Week 2

This week we looked some game designs from our ninjas. We ended with four:

  1. Duty to Defend – A tank-based flag-defence game played in first-person.
  2. Monster POV – Play as a monster defending a dungeon against hero characters. Isometric viewpoint.
  3. Red Panda’s Shopping – An exploration and collection game with puzzle elements.
  4. Gardening Simulator – Grow and harvest plants in a top-down game to earn money and unlock new seeds and areas

A vote was held and the winner was Monster POV!

We’ve asked ninjas this week to find some visual references for the look-and-feel of the game (given that it’ll be low-poly) and also to consider some lore or story that would enhance the game and inform the creation process.

We downloaded and installed the latest Blender from here: https://www.blender.org/download/

We looked at some of the most basic Blender commands. I handed out copies of the Blender Infographic which can also be found here: https://www.giudansky.com/illustration/infographics/blender-map

Next week we will look at building some environmental building blocks using Blender. To suit our selected game, these will be dungeon elements.

Creator – Week 1

Hi folks, we kicked off our Creators group for 2023/2024 today. The slides from today’s session can be found here:

CoderDojo Athenry – Creators – Session 1.pptx

For next week, please try to use one of these files:

to document your game idea. Remember that we don’t need a timeline, just the game concept. These files are just templates, so feel free to add anything you thinks is important and to ignore or delete anything you don’t think is important.

You will need to be connected to Microsoft Teams to download these files. Once you’re successfully connected to Teams, remember to say “Hello” in the 2023 Say Hello channel.

Also try to have Blender installed before next weeks session. This will avoid problems with passwords/IT locks/etc. Blender can be downloaded here.

See you next week!

Creators – Gem Search – Final Version

Hi Creators, the final version of Gem Search is uploaded to our GitHub. The HighScore functionality is completed. The InitialiseInventory component has been disabled, but the word “Inventory” on the inventory screen is now a secret button you can use to get some gems at run-time.

Updated 22/05: Credits added.

Looking forward to seeing you all at the party on next Saturday! Thanks for a fun year.