Notes for weeks 13-15 covering the creation of foliage, the blended ground texture and distributing the foliage.
Copies of files can be found on our Github.
Notes for weeks 13-15 covering the creation of foliage, the blended ground texture and distributing the foliage.
Copies of files can be found on our Github.
Notes for weeks 9-12 covering the creation of the lantern, candle, lantern stand and tree.
Copies of files can be found on our Github.
Hi folks,
Below are links to some resources we’re going to use today:
Hi folks, here are the notes for Modelers Week 4, we completed our island scene with materials, lighting and effects.
Copies of files can be found on our Github.
Hi folks, here are some video notes for Weeks 1 & 2 for those who’d like to review what we did, or missed our sessions.
Download and install Blender from here: https://www.blender.org/download/
This week we looked at adding obstacles to our game and detecting collisions.
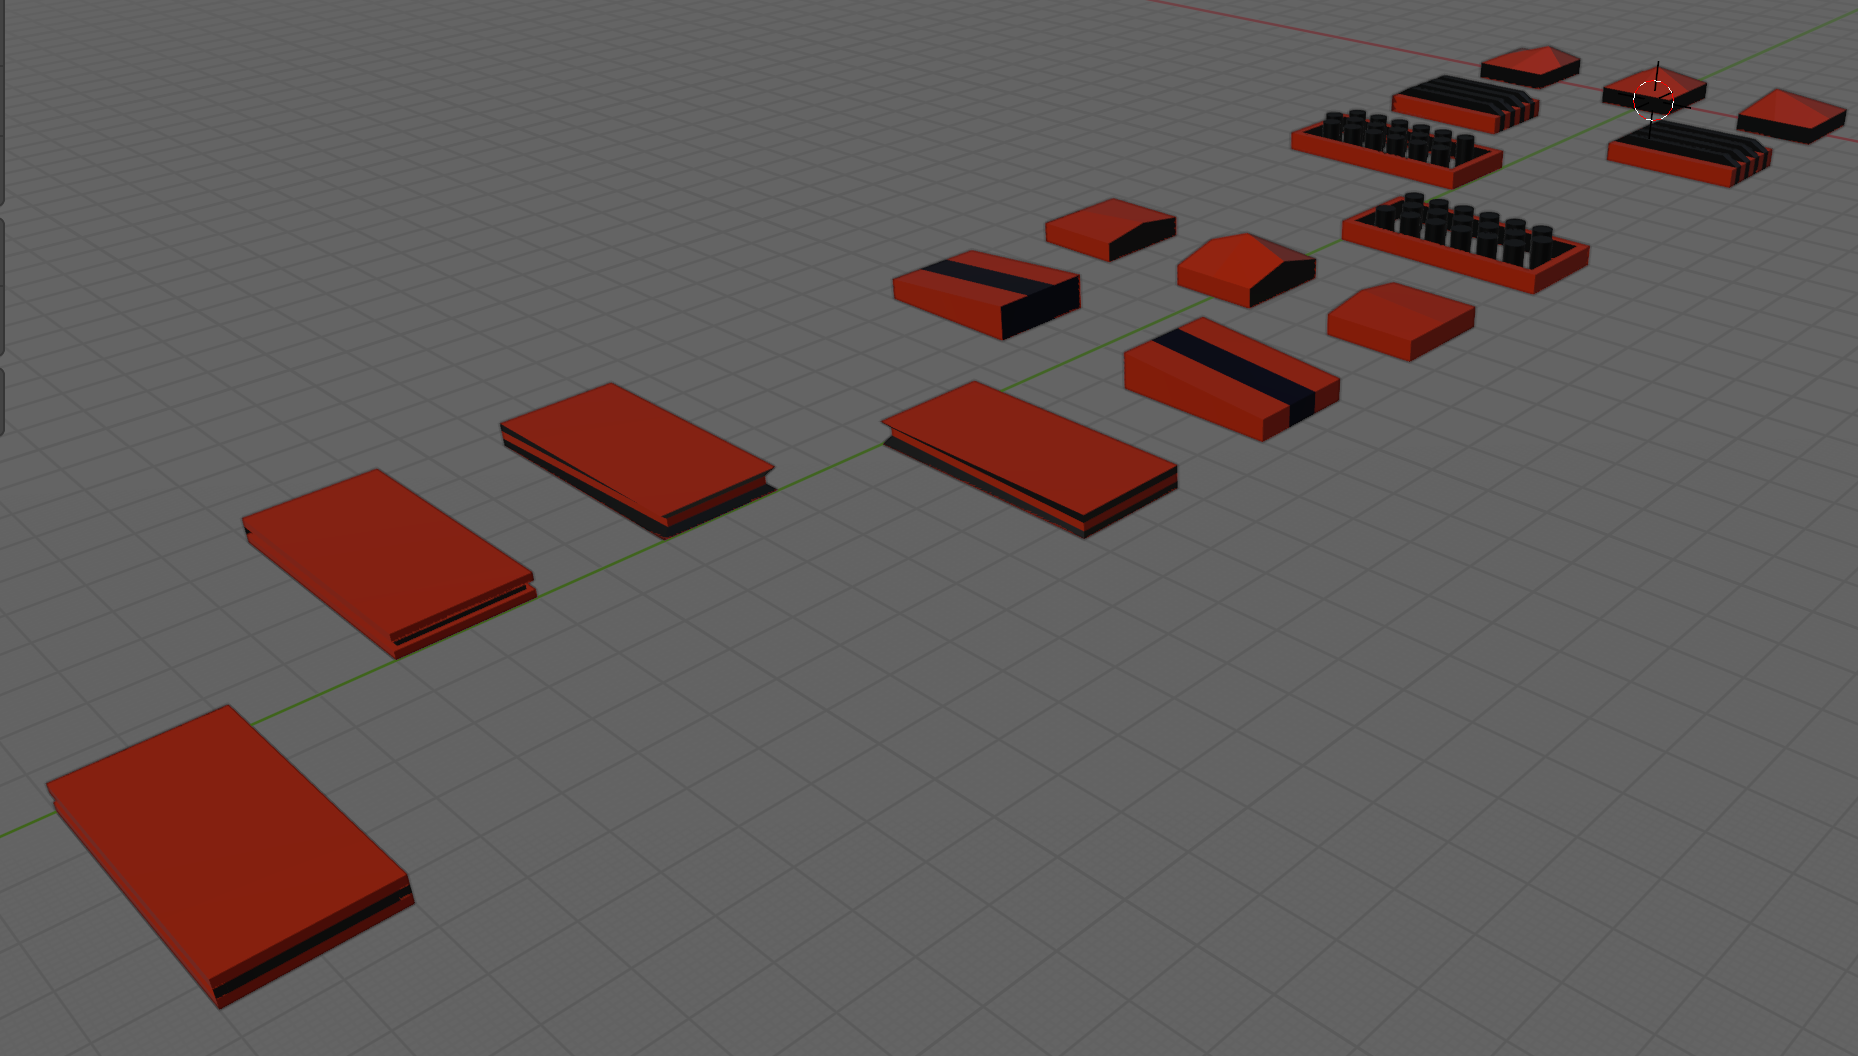
The obstacles were created in Blender and provided as an FBX file. To process them we:
Generally speaking, Unity tracks collisions between objects as long as:
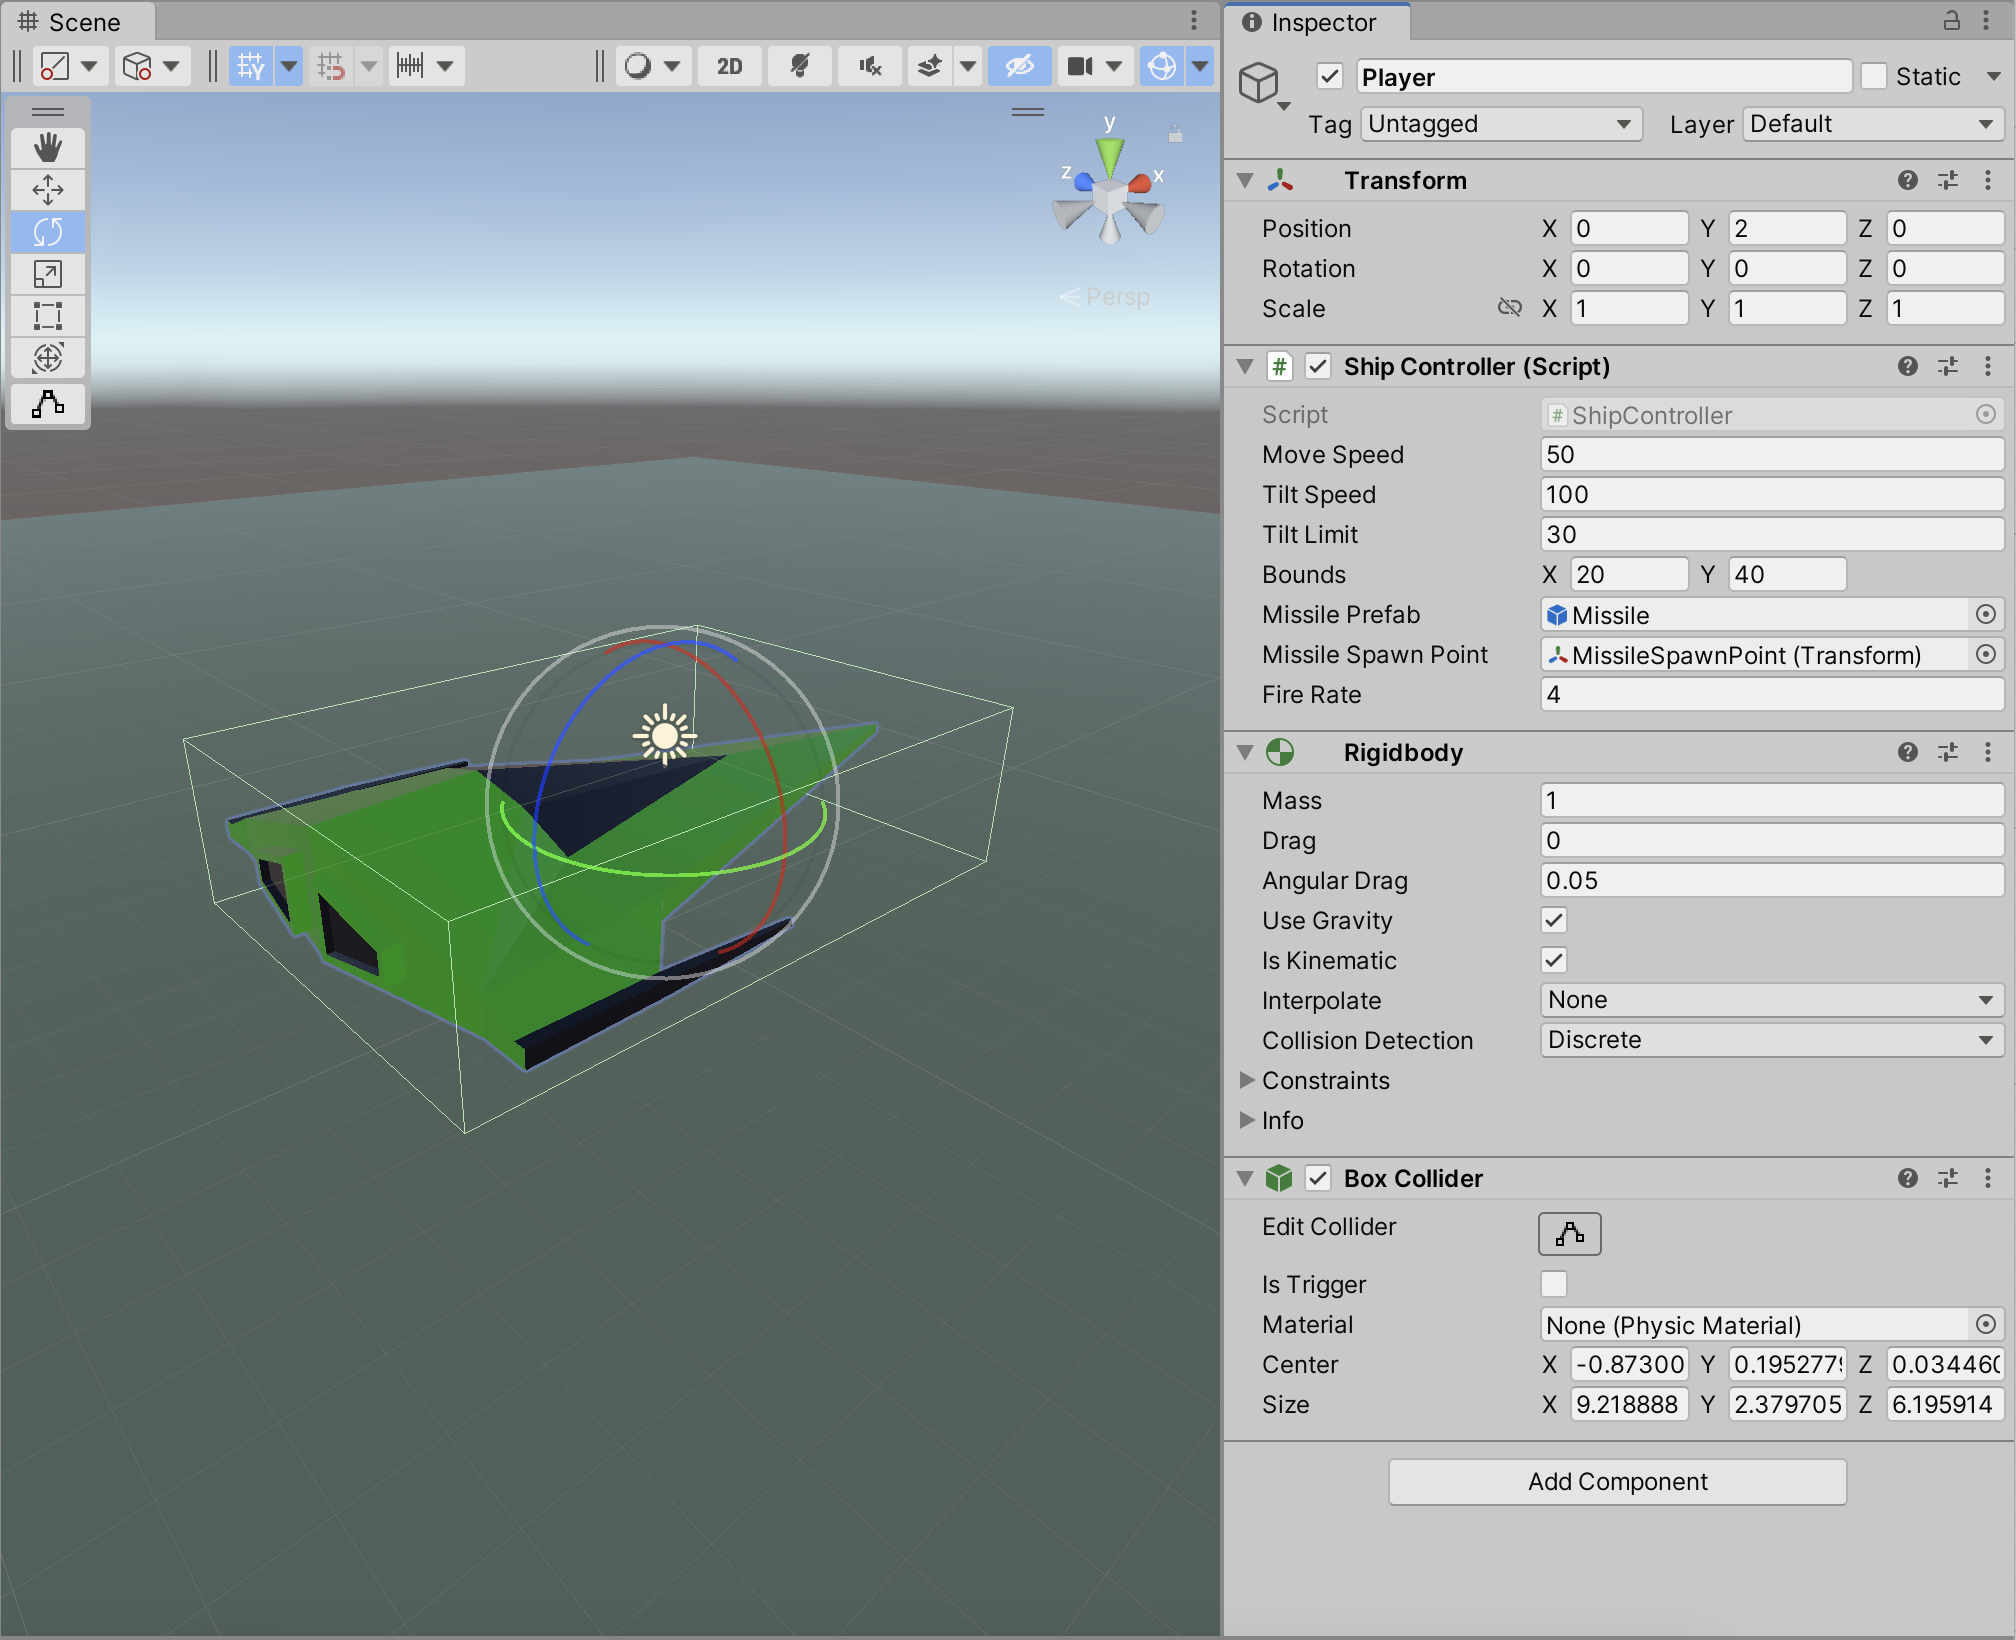
Unity draws a distinction between RigidBody components depending on the setting of “Is Kinematic”. If “Is Kinematic” is false, Unity takes responsibility for moving the object according to physics rules. If “Is Kinematic” is true, we’re responsible for moving the object, but Unity will still track if for collisions, etc. The latter is appropriate for our game.
When Unity detects collision it looks for functions OnTriggerEnter() or OnCollisionEnter() to call, depending on whether the RigidBody is kinematic or not. Ours isn’t so we’ll be implementing OnTriggerEnter() when it’s time to do so.
We added two new public properties to EnvController.cs, one to determine how likely that a piece of environment contains an obstacle and another to hold the prefabs for the obstacles:
  public float ChanceOfObstacle = 0.2f;
  public GameObject[] ObstaclePrefabs;
We then added a new function GenerateObstacles() to EnvController.cs:
  private void CreateObstacle(Vector3 position, Transform transform)
  {
    // Pick a random prefab
    int numPrefabs = ObstaclePrefabs.Length;
    GameObject prefab = ObstaclePrefabs[Random.Range(0, numPrefabs)];

    // Create an instance of it
    Quaternion rotation = Quaternion.Euler(0, -90, 0);
    GameObject go = Instantiate(prefab, position,
                                rotation, transform);

  }
and called it from just before the last line of CreatePrefab():
    // Create obstacle?
    if (Random.value <= ChanceOfObstacle)
    {
      // Create an obstacle as a child of this piece of env
      CreateObstacle(position, go.transform);
    }
We don’t want obstacles at the start because they can lie on top of our ship. Adding a second argument to CreatePrefabs() allows us to control this:
private GameObject CreatePrefab(Vector3 position, bool createObstacles = true)
  {
Because this argument has a default value (= true) and is at the end of the argument list, this makes it optional. If we don’t use it, it’s assumed that we want obstacles.
We can check this value were we create obstacles:
    // Create obstacle?
    if (createObstacles && Random.value <= ChanceOfObstacle)
    {
      // Create an obstacle as a child of this piece of env
      CreateObstacle(position, go.transform);
    }
The double-ampersand (&&) means “and”. Both things have to be true or no obstacles are created.
Finally we modify Preload() so that obstacles are not created when it’s generating the first few environment pieces:
  private void Preload()
  {
    for (int i = 0; i < Count; i++)
    {
      Vector3 pos = Vector3.right * i * Spacing;
      _lastGo = CreatePrefab(pos, false);
    }
  }
To set up the player for collisions, we need to:
With our simple OnTrigger() we can see when collisions are being detected:
  private void OnTriggerEnter(Collider other)
  {
    Debug.Log("I hit something");
  }
All the code we’re made this year is on our GitHub. It can be found here. If you don’t have the latest version of our code before any session, use the green Code button on that page to get the “Download ZIP” option which will give you a full copy of all code we’ll be writing this year.
Please note that there was no Week 14 session as it had to be cancelled owing to bad weather.
When we finished our last session, our EnvController was creating random pieces of environment continuously and scrolling them under the ship. It looked good, but there were gaps between the environment pieces, getting larger the higher we set the environment speed.
Why was this gap happening? Well it’s easy to understand if you look at it this way: if something is moving and you shout stop at a random time, what are the chances that it’s moved some exact distance? Almost no chance of that at all. This is what the current code is doing and why, the faster it’s moving, the larger the gaps get.
The first thing we can do to make this easier is to check more often if the blocks have moved far enough to create a new one. By changing Update() to FixedUpdate() this helps because while Update() is called every frame, FixedUpdate() is called much more often and on a regular timer, independent of frame rate. It’s normally used for physics calculations.
The second thing we can do is to not create our new block at _spawnPoint but to work out the proper position to create it so it’s exactly 100m from the previous one. This is what that code looks like:
void FixedUpdate()
  {
    if (_lastGo == null)
      return;

    float distToLast = Vector3.Magnitude(_lastGo.transform.position -
                                         _spawnPoint);
    if (distToLast >= Spacing)
    {
      Vector3 spawnAt = _lastGo.transform.position + Vector3.right * Spacing;

      _lastGo = CreatePrefab(spawnAt);
    }
  }
I thought we’d done this ages ago, but we never implemented bounds checking for our ShipController. It’s only supposed to be able to move within a fixed area. To achieve this we added a new property to ShipController of type Vector2d called Bounds. We are going to use the x part of this property to store how far we want to allow the ship to move forward and backwards and we’re going to use the y part to store how much we want to allow the ship to move side-to-side. In testing we found good values for this were (20, 40). Here’s the change to the ShipController.Update() function:
    Vector3 newPos = transform.position +
                         new Vector3(moveInput.y * MoveSpeed * Time.deltaTime,
                                     0,
                                     -moveInput.x * MoveSpeed * Time.deltaTime);
    if (newPos.x > Bounds.x)
      newPos = new Vector3(Bounds.x, newPos.y, newPos.z);

    if (newPos.x < -Bounds.x)
      newPos = new Vector3(-Bounds.x, newPos.y, newPos.z);

    if (newPos.z > Bounds.y)
      newPos = new Vector3(newPos.x, newPos.y, Bounds.y);

    if (newPos.z < -Bounds.y)
      newPos = new Vector3(newPos.x, newPos.y, -Bounds.y);

    transform.position = newPos;
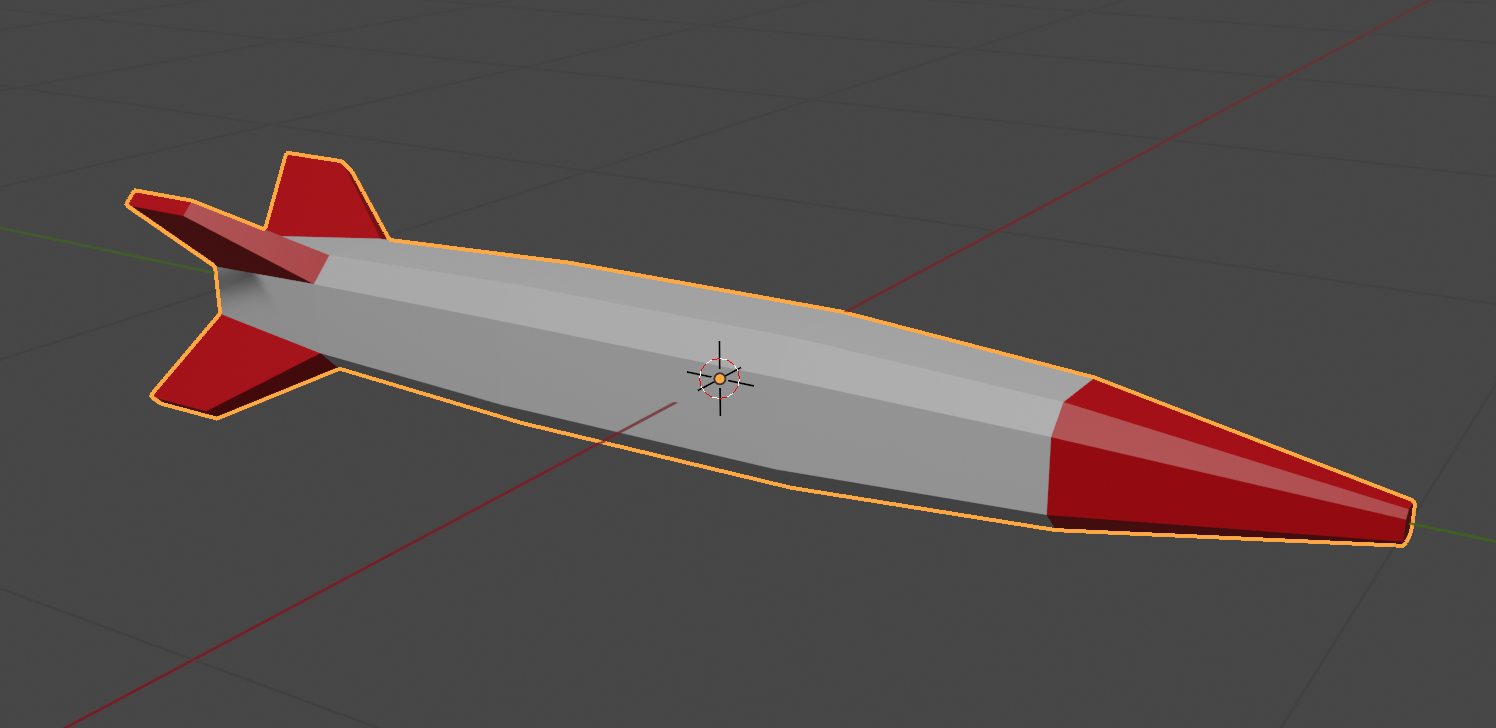
We made a simple missile in Blender and exported it as an FBX file and imported it into Unity. We then created and empty GameObject, placed the missile model under it in the hierarchy and created a prefab from them.
Once in the prefab folder, we edited the prefab and added a ConstantMovement behaviour and a DestroyOnDistance behaviour. This makes the missile fly and eventually destroy itself.

First we had to edit our ShipControlls.inputaction in our Inputs folder by double clicking on it. We then added a new action of type Button called Shoot with a single Binding to the Spacebar on the keyboard.


We used the Save Asset button on the dialog above to save the input actions.
In our code then in ShipController we added the following at the bottom of update:
    // Shooting
    if (_controls.Ship.Shoot.WasPerformedThisFrame())
    {
      Debug.Log("Shoot was pressed on frame " + Time.frameCount.ToString());
    }
This allowed us to see that the shoot command was being picked up with a message getting written to the console every time the spacebar was pressed.
We added two new properties to ShipController:
  public GameObject MissilePrefab;
  public Transform MissileSpawnPoint;
The first is to store our Missile prefab and the second is to store a location under the ship where the missile can be launched from. To create this we added an empty called MissileSpawnPoint under Player in the scene and, in a side view, moved it down below the ship and towards the front of the ship.

We could then assign this and the missile prefab to the appropriate properties of ShipContoller attached to the Player object.
In PlayerController we swapped the call in Update() to Debug.Log() for a call to a new private function Shoot() which we also created, to look like this:
  private void Shoot()
  {
    // Create a missile at the missile spawn point
    Instantiate(MissilePrefab,
                MissileSpawnPoint.position,
                MissileSpawnPoint.rotation);
  }
Every time now that the spacebar is pressed, a missile is created below the spaceship and flies forward for approx. 8 seconds before destroying itself.
It’s unrealistic to be able to shoot missiles as quickly as we can hit the spacebar, so some idea of fire rate is useful. It’s easy to convert a rate into an interval, all you have to do is divide one by the rate to get the interval. For example, if the rate is 2 per second then the minimum interval between shots is 1/2 = 0.5 seconds. Similarly, if the rate is 10 per second then the minimum interval between shots would be 1/10 = 0.1 seconds.
We add a new property to ShipController called FireRate.
public float FireRate = 1.0f;
We also add a couple of private properties:
  private float _minTimeBetweenShots;
  private float _lastShotTime = -10.0f;
The first of these is the minimum interval between shots. We calculate if from the rate, as described above. Since we just need to do this once, we pop the code in Start():
  void Start()
  {
    _minTimeBetweenShots = 1.0f / FireRate;
  }
The second private property stores the last time we fired a missile. We set it to a arbitrary large negative value so that at the start of the game it’s the same as if it’s been ages since we fired a missile, even though we’ve never actually fire one yet.
We can now check the time since we last fired a missile against the minimum time between shots in the Shoot() function:
  private void Shoot()
  {
    if (Time.time - _lastShotTime < _minTimeBetweenShots)
      return;

    // Create a missile at the missile spawn point
    Instantiate(MissilePrefab,
                MissileSpawnPoint.position,
                MissileSpawnPoint.rotation);

    _lastShotTime = Time.time;
  }
All the code we’re made this year is on our GitHub. It can be found here. If you don’t have the latest version of our code before any session, use the green Code button on that page to get the “Download ZIP” option which will give you a full copy of all code we’ll be writing this year.
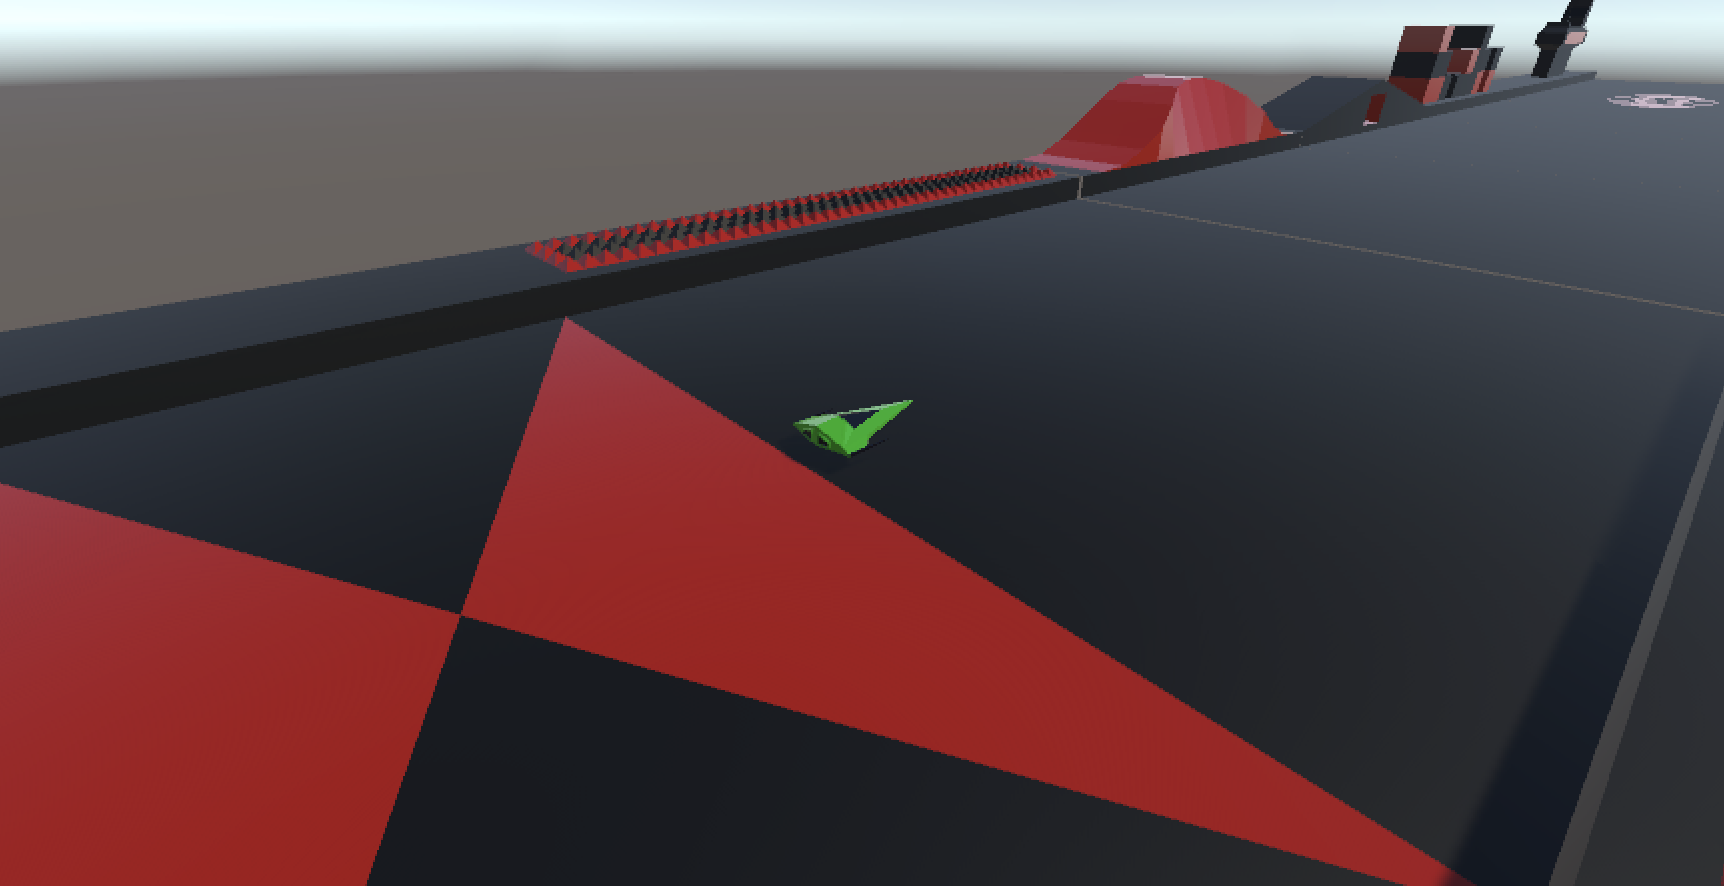
This week we continued writing the code to control our environment.
We started by adding a new function CreatePrefab() to EnvController.cs. It uses Random.Range() to pick a random prefab from EnvPrefabs and then uses Instantiate() to create a copy of that prefab in the scene. Here’s the first version we wrote:
  private GameObject CreatePrefab(Vector3 position)
  {
    // Pick a random prefab
    int numPrefabs = EnvPrefabs.Length;
    GameObject prefab = EnvPrefabs[Random.Range(0, numPrefabs)];

    // Create an instance of it
    GameObject go = Instantiate(prefab, position,
                                Quaternion.identity, transform);

    // Add DestroyAfterDistance to it
    DestroyAfterDistance dad = go.AddComponent<DestroyAfterDistance>();
    dad.Distance = 700.0f;

    // Add ConstantMovement to it
    ConstantMovement cm = go.AddComponent<ConstantMovement>();
    cm.Direction = Vector3.left;
    cm.Speed = 100.0f;

    // Return it
    return go;
  }
Note that CreatePrefab() takes a position to create the new instance at as an argument. It also returns the GameObject we created, which will prove useful later.
To make the code actually run, we added this to the Start() function:
CreatePrefab(Vector3.zero)
Vector3.zero represents (0, 0, 0).
We quickly found that this created our random piece of environment, but it wasn’t rotated the way we wanted. We updated CreatePrefab() as follows to correct that:
    // Create an instance of it
    Quaternion rotation = Quaternion.Euler(0, -90, 0);
    GameObject go = Instantiate(prefab, position,
                                rotation, transform);
We create a new variable rotation which represents a rotation of -90 degrees around Y (the vertical) and then use it in the call to Instantiate() instead of Quaternion.identity.
When the game starts, we want to have the ground under and ahead of the spaceship filled in. To do this, we first create some new class properties:
  public GameObject[] EnvPrefabs;
  public float Spacing = 100.0f;
  public float Speed = 50.0f;
  public int Count = 6;

  private Vector3 _spawnPoint;
  private GameObject _lastGo;
There are three new public properties. Spacing represents the size of each environment piece. Speed is the speed we’d like everything to move at. Count is how many environment pieces to have visible at a time.
There are also two private properties. _spawnPoint represents the place we’d like new pieces of environment to appear. _lastGo stores the last piece of environment we created.
In Start() we initialise _spawnPoint() like this:
    // Calculate the spawn point based on spacing and count
    _spawnPoint = Vector3.right * Count * Spacing;
We’ll use all these properties eventually. For now, we just write a new function Preload() and call it from Start() instead of CreatePrefab().
  private void Preload()
  {
    for (int i = 0; i < Count; i++)
    {
      Vector3 pos = Vector3.right * i * Spacing;
      _lastGo = CreatePrefab(pos);
    }
  }
This function just loops for Count times, working out a new location to place the environment piece and calling CreatePrefab(). It stores each prefab as we create it in _lastGo. When we run, we see the environment under the ship, but once it passes it’s gone and no more is created.
Instead of having each environment piece we create have it’s speed set and constant, we decided to link it to the EnvController. To to that we create a new class called MoveWithEnvironment.cs. It looks like this:
using UnityEngine;

public class MoveWithEnvironment : MonoBehaviour
{
  public EnvController EnvController;

  // Update is called once per frame
  void Update()
  {
    if (EnvController == null)
      return;

    transform.position = transform.position +
      (Vector3.left * EnvController.Speed * Time.deltaTime);
  }
}
It’s very similar to ConstantMovement but it always moves towards Vector3.left and it takes speed from the EnvController. This allows us to vary the speed in the EnvController and have all environmental pieces immediately react to that. We need to add this, instead of ConstantMovement, to our newly created piece of environment in EnvController.CreatePrefab():
    :   :    :
    // Add DestroyAfterDistance to it
    DestroyAfterDistance dad = go.AddComponent<DestroyAfterDistance>();
    dad.Distance = 700.0f;

    // Add MoveWithEnvironment to it
    MoveWithEnvironment mwe = go.AddComponent<MoveWithEnvironment>();
    mwe.EnvController = this;

    // Return it
    return go;
}
All the code relating to ConstantMovement is replaced with code relating to MoveWithEnvironment instead. We assign the special variable this to set the EnvController property in MoveWithEnvironment.
To create environment as we need it, we added code to Update() as follows:
  void Update()
  {
    if (_lastGo == null)
      return;

    float distToLast = Vector3.Magnitude(_lastGo.transform.position -
                                         _spawnPoint);
    if (distToLast >= Spacing)
    {
      _lastGo = CreatePrefab(_spawnPoint);
    }
  }
The code first checks to make sure that _lastGo has been set. If it has, it worked out how far the last piece of environment has moved from the _spawnPoint. If it’s equal to, or greater than, the spacing then we make a new piece of environment.
Now, as pieces of the environment move towards Vector3.left new ones are created as needed in front of our spaceship.
This code almost works great, but there’s one thing – there’s clearly gaps between the pieces of environment some times. This is because it’s not likely that on a specific frame the environment piece will have moved exactly Spacing meters. It will usually have moved a little more, hence the gaps.
Next session, we’ll correct for this.
All the code we’re made this year is on our GitHub. It can be found here. If you don’t have the latest version of our code before any session, use the green Code button on that page to get the “Download ZIP” option which will give you a full copy of all code we’ll be writing this year.
This week we took our Blender creations back into Unity. We started with the same file, ShipsAndEnv3.5,blend, which can be found here on our Teams site (for site members only).

Blender offers extensive export options and we quickly ran through the list. The one we’re going to use is FBX. It’s a widely used format, well supported in lots of 3D software, with good material and animation support.

To export the file, we made sure all object were unhidden, and chose File|Export|FBX. We left all the options as-is except the “Apply Transforms” option, which we selected. This option has a warning next to it, as it doesn’t work with animations, but that doesn’t apply to us here.
The resulting FBX file was saved to the same folder as our BLEND file.
To import the FBX file into Unity, we created a new folder called “Model” and dragged the FBX file from Windows Explorer/macOS Finder into it.
We decided to extract the materials from the file. This will allow us to change them in Unity. To do that we selected the FBX in the Model folder in Unity and in the Inspector window, went to the Material tab and chose “Extract Materials”. All the materials in the FBX were then extracted as Unity materials in the same folder as the FBX file.
We then wanted to break apart the combined FBX file into it’s separate parts. To do that we first created a blank scene and dropped the model from the “Model” folder into the Hierarchy window. We checked the Inspector window to make sure it was positioned at (0, 0, 0) and adjusted it if needs be.
Note that Unity showed the model coloured blue in the Hierarchy. This means it was treating it as a “Prefab”. A prefab in Unity is just a collection of GameObjects and components that are treated as a template. It’s easy to create copies of them at run-time.
We want prefabs of all the things in the FBX file, not the FBX model itself. To separate out the bits from the FBX model, we right-clicked on it in the hierarchy and chose Prefab|Break Apart Completely. Not much obviously changed except everything in the hierarchy turned black, indicating it was no longer a prefab, just normal objects.
We then created a new folder called “Prefabs” and dragged everything inside the FBX model (but not the FBX model itself) into it. That’s all you have to do to make something you already have in a Unity scene into a prefab, drag it into the Project window. Now we can create copies of all these objects at run-time very easily.
To add our ship to the scene, we dragged the Ship prefab from the Prefabs folder and dropped it onto the Player gameobject in the Hierarchy. The Ship model was then a child of the Player object. We needed to rotate the Ship by -90 around the Y axis to make it point in the correct direction. We also set the scale of teh Plater object to (1, 1, 1) and removed the Mesh Filter, Mesh Renderer and Box Collider components from Player, as these were no longer needed.
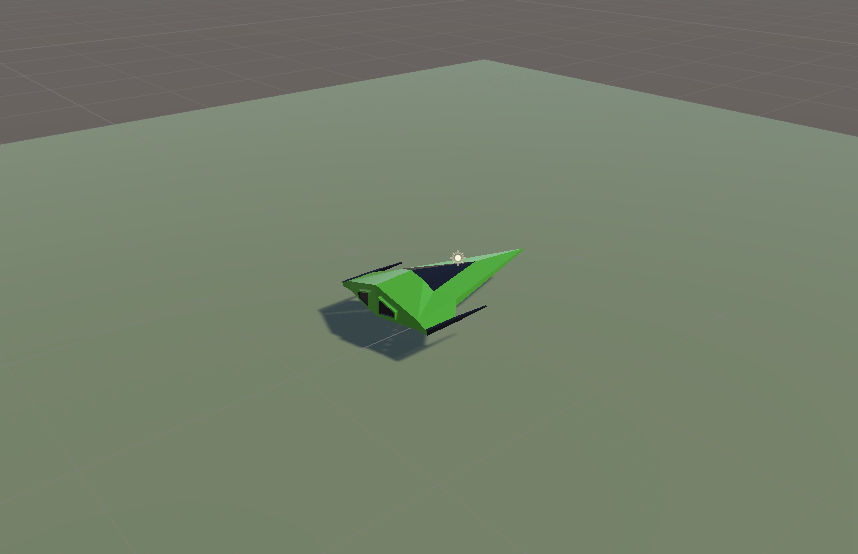
Our game looks better already with a ship model rather than a flying mattress!
We tested two simple components on a test cube added to the scene. One which created constant movement in a particular direction and the other which deletes the attached gameobject once we’ve traveled a set distance from where we started.
The first of these, ConstantMovement.cs looks like this:
using UnityEngine;

public class ConstantMovement : MonoBehaviour
{
  public Vector3 Direction = Vector3.forward;
  public float Speed = 10.0f;

  // Update is called once per frame
  void Update()
  {
    Vector3 offset = Direction.normalized * Speed * Time.deltaTime;
    transform.position = transform.position + offset;
  }
}
Two public variables define the direction and speed respectively. In Update() we calculate how to move this frame by multiplying the normalised version of the Direction (normalised meaning the length is set to 1) by the speed and Time.deltaTime (the time since the last frame). We then set a new value for the position by adding this offset to the previous position.
The second DestroyAfterDistance.cs looks like this:
using UnityEngine;

public class DestroyAfterDistance : MonoBehaviour
{
  public float Distance = 10.0f;

  private Vector3 _initPos;

  // Start is called before the first frame update
  void Start()
  {
    _initPos = transform.position;
  }

  // Update is called once per frame
  void Update()
  {
    Vector3 offset = _initPos - transform.position;
    float offsetDist = offset.magnitude;

    if (offsetDist >= Distance)
    {
      Destroy(gameObject);
    }
  }
}
It just has once public variable, the distance the GameObject is allowed to travel. It also has one private variable, set in Start(), which stores the initial position.
In Update() we check how far we’ve travelled by getting the vector difference between the start position and our current position and then getting it’s magnitude (aka length). This tells us how far we have moved. if this distance is greater than the the specified Distance, we call Destroy(gameObject) thereby destroying the GameObject this component is attached to.
All the code we’re made this year is on our GitHub. It can be found here. If you don’t have the latest version of our code before any session, use the green Code button on that page to get the “Download ZIP” option which will give you a full copy of all code we’ll be writing this year.
