This week we continued working on Roll-A-Ball.
More Walls and Resource Copies
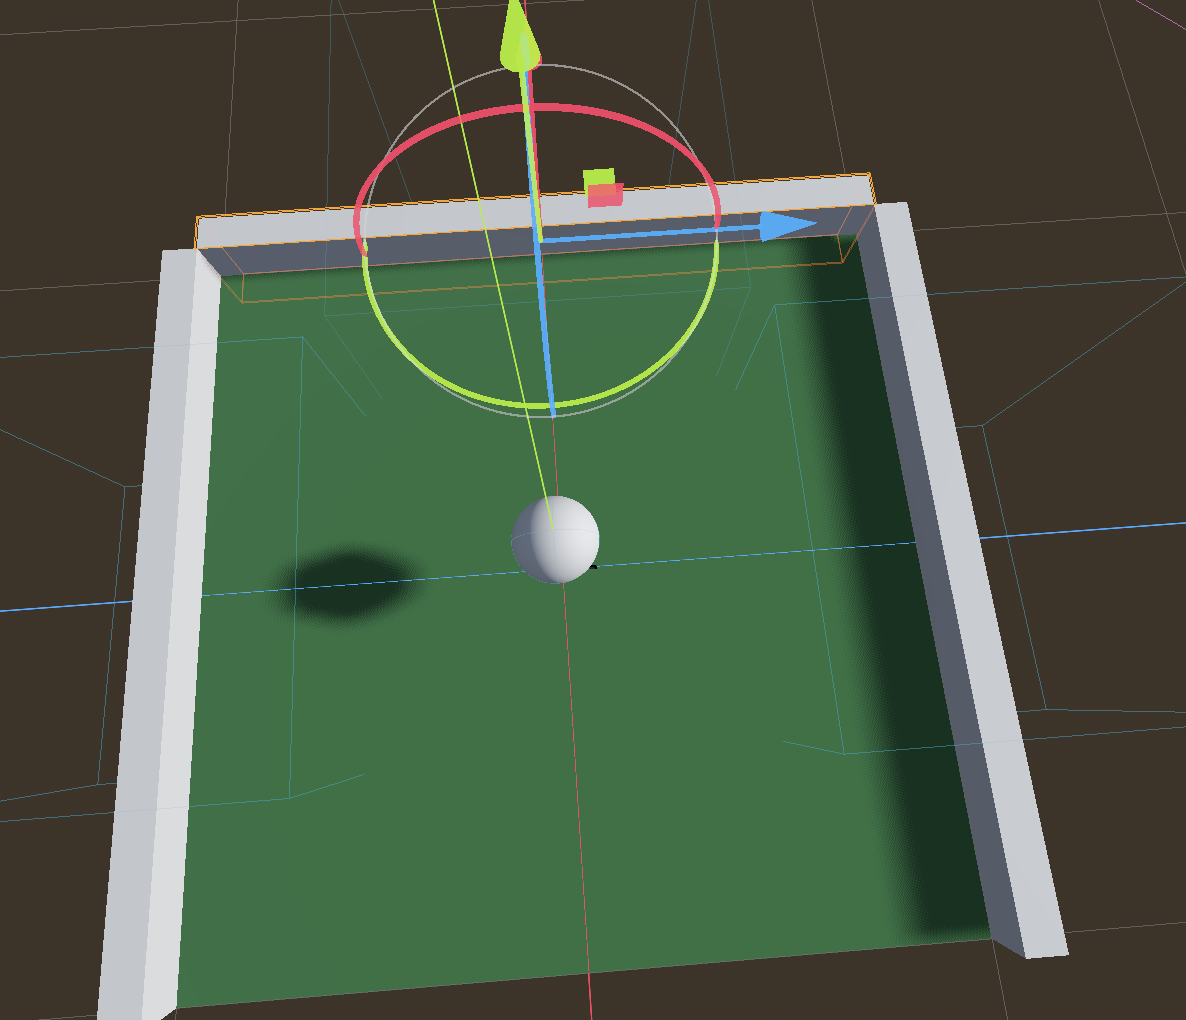
We left off last week with two walls. This week we copied one of those to create a third. It’s new transform position is (1.05, 0, 0) and it’s transform rotation is (0, 90, 0). That rotation represents 90 degrees around the vertical axis (y-axis).
It was immediately clear that we ideally needed to close the gaps at the corners where the walls meet.
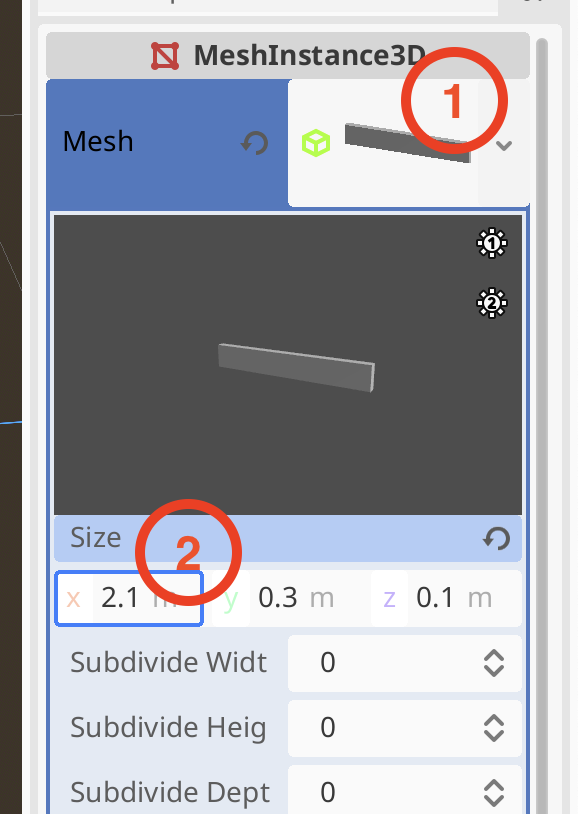
To adjust the size of the third node, we select its MeshInstance3d child node. To adjust the mesh size, we click on the picture of the mesh in the inspector to see it’s properties and then adjust the size to 2.1m:
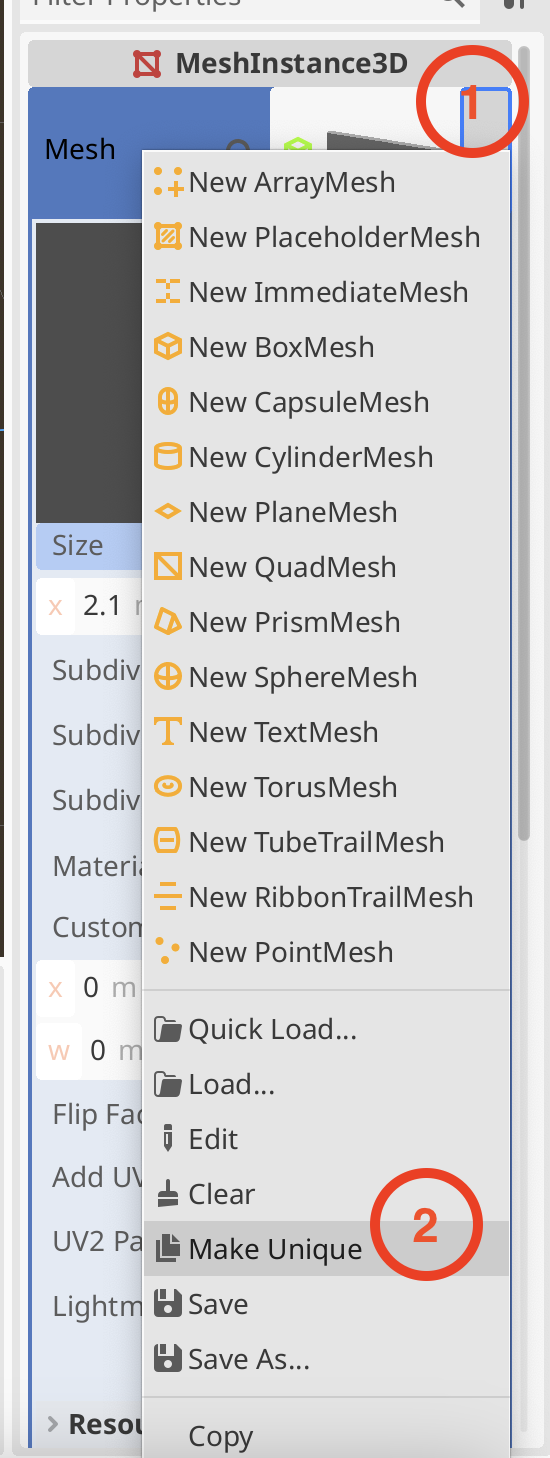
We can see all the walls change size. This is because they are all using the same mesh resource. We set the size back to (2.0, 0.3, 0.1) first. Now, we can make this mesh resource separate to the one used by the other two walls. Click on the drop-down arrow next to the mesh picture and then select “Make Unique”
Now when we change the size to (2.2, 0.3, 0.1) it doesn’t change the other two walls.
Finally we copy this third wall and move it to (-1.05, 0, 0). Now we have four walls.
Materials
We created a wall material in a very similar fashion to how we created the original ground material and assigned it to all four walls.
We also created a new material and assigned it to the ball. We gave it a strong red colour in ‘Albedo’. Because the ball was going to be impossible to tell if it was rolling, being all one uniform colour, we decided to apply a checker board texture to it. Here’s a texture we used today:

We placed this in a textures folder in the FileSystem and then assigned it to the Texture slot under ‘Albedo’ in the ball material. That gave the ball a checkered look.
We also looked at some of the other most commonly used material settings, including roughness, metallic and transparency.
Turning the Ball into the Player
We wanted to create a Player object and make it it’s own scene. We renamed “ball” in the Main scene to Player and right-clicked on and chose “Save branch as scene”. This created a new scene called “Player” which opened a new tab in the centre of the editor.
The Player node still had the transformation from the main scene (lifted up along the y-axis). We removed this and saved the Player scene. Switching back to Main we could see the Player node was now cutting through the ground so we moved it upwards again. Note that changes in the child scene were reflected in the parent scene, but not the other way around.
Creating an Input Map
To capture user input, we set up some Input Actions. Under the Project menu, we selected Project Settings and then selected the Input Map tab:
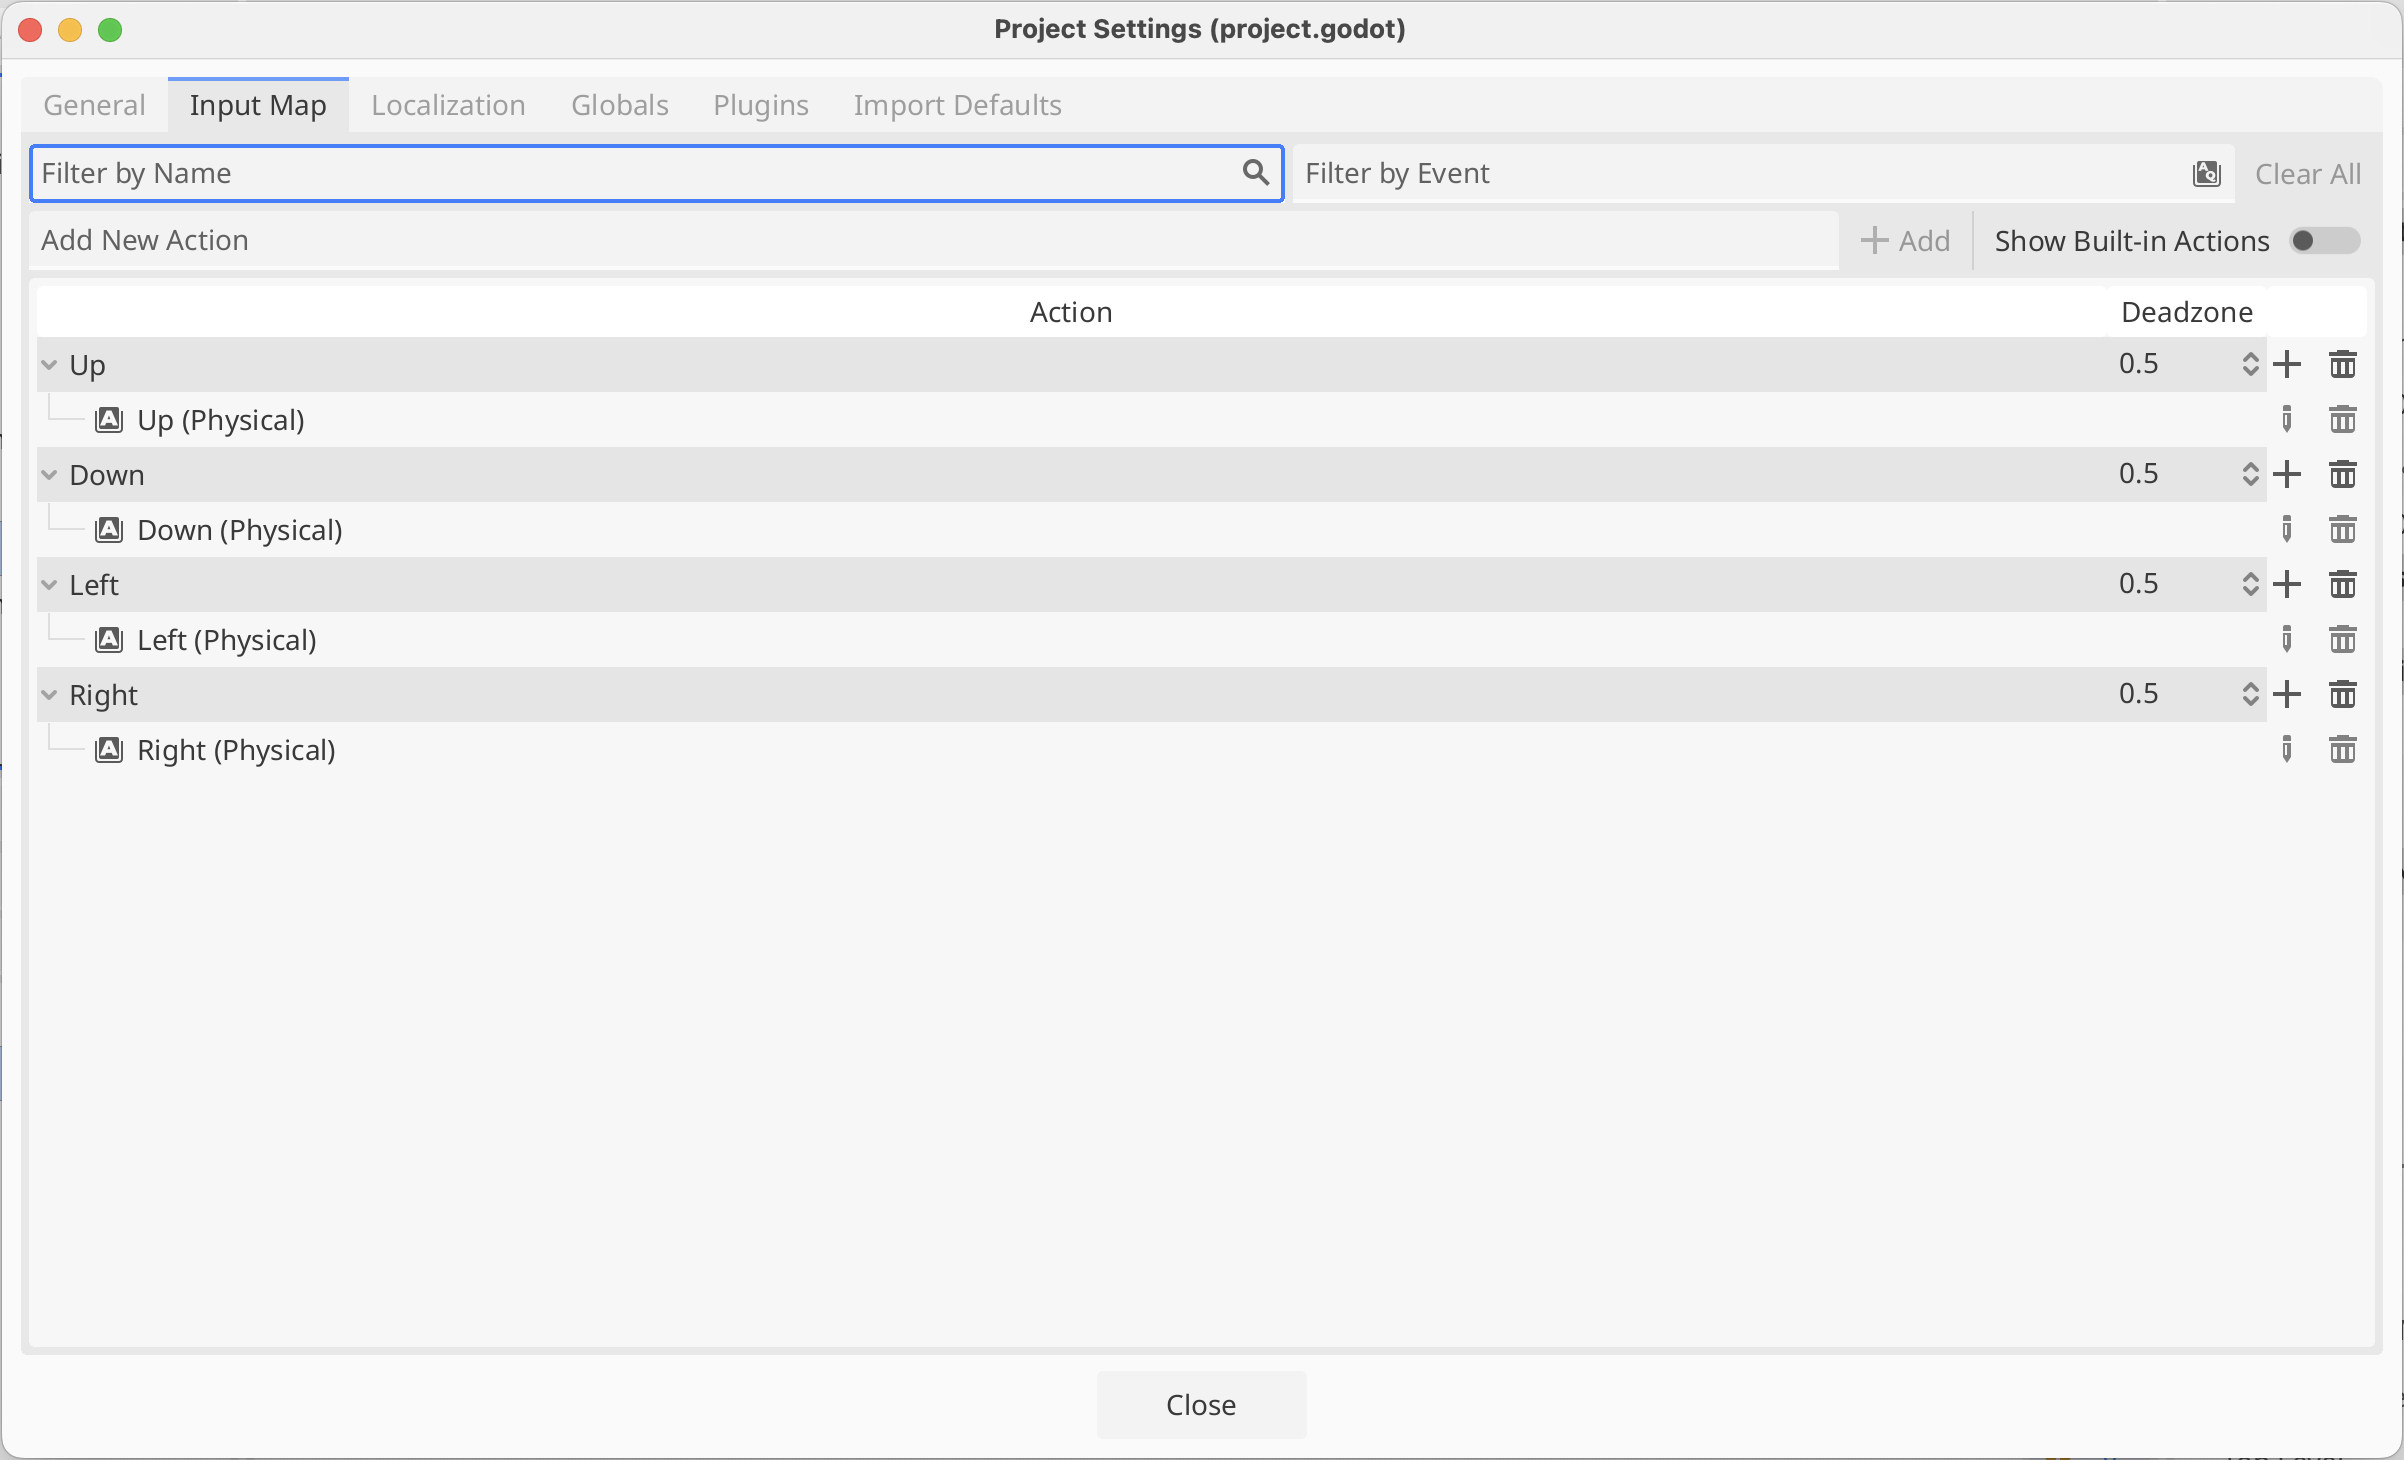
Where it says “Add New Action” we typed the name of each action in turn (Up, Down, Left and Right) and pressed the Enter key or the “+ Add” button to create it.
We then selected each action in turn and pressed the + at the right hand side of it’s row. We then just pressed the key we wanted for that action and closed the dialog to confirm the selection. Above I’ve chosen the arrow keys, but others chose WASD. Either is fine.
Making the Player Move
We next want to make our player move in response to input.
First we created a scripts folder in our file system
In the Player scene, we selected the Player node and pressed the Attach Scripts button. We then change the path on the dialog that appeared to make sure to place our new script in the scripts folder (instead of the scenes folder).

Our script automatically opens in the editor. It extends RigidBody3D, which is the type of the existing Player node. It has two empty functions, _ready() and _process(), by default. _ready() is called when the object is first created and _process() is called every time the scene is drawn.
We’d like to apply physical forces to our object, specifically torque, which is a turning force. There is another function where we should put code that interacts with the physics system: _physics_process(). Here’s what that empty function should like:
func _physics_process(delta : float) -> void:
      pass
This is a function that takes one parameter called “delta” which is a float. A float is a number with a decimal point. The “-> void” means that this functions doesn’t send back a value to the code that calls it. You must have at least one line inside a function in GDScript; “pass” doesn’t do anything, it’s just there to prevent the function from having no lines in it.
We can get our input values like this:
func _physics_process(delta : float) -> void:
	var input = Input.get_vector("Up", "Down", "Left", "Right")
These are the names of the input actions we’ve already defined. This is going to return a Vector2 value which we’re storing in the variable called “input”. As a Vector2, this has an x and a y value. The x value will vary between 1, -1 and 0 depending on whether “Up” or “Down” or neither are being pressed. Similarly the y value will vary between 1, -1 and 0 depending on whether “Left” or “Right” or neither are being pressed.
We can now actually apply torque (turning force) to our ball:
func _physics_process(delta : float) -> void:
	var input = Input.get_vector("Up", "Down", "Left", "Right")
	apply_torque(Vector3(input.x, 0, -input.y))
The function apply_torque() is part of RigidBody3D and expects a Vector3 which indicates how much to apply around the x, y and z axes respectively. We don’t want any applied around the y-axis as this would just spin the ball around the vertical axis and not roll it along he ground. So we make a Vector3 where the “Up”/”Down” actions add torque around the X-axis and the “Left”/”Right” actions add torque around the z-axis. When testing, because of our camera angles, we find the “Left”/”Right” is backwards to what we want, so we use – to flip the direction.
The ball now rolls! Too fast and there’s a problem with colliders, which we need to fix – the wall colliers are the wrong size, but once that’s corrected we have something not too bad.
Getting the Code
All our code for this year is be available on our GitHub. Please see Creators – Week 4 for more details.

