This week we started our first Godot game. We downloaded the engine from the Godot website: https://www.godotengine.org
To install Godot on Windows, you just need to download the ZIP file and extract the two files inside to a folder on your computer. Double-click on the larger of the two to open Godot. Once run, you can pin the program icon to the taskbar to easily run it again.
Godot opens with the Project List. Here we see projects we’ve already created and can create new ones. We made a new project called “Roll a Ball”.
We found some machines had trouble with opening the project if the rendering mode was set to “Forward+”. For those people we found switching it to “Compatibility” fixed that issue. It seems that the underlying issue here is support for the Vulkan graphics API in the “Forward+” rendered. Switching back to “Compatability” uses the OpenGL API instead, which is more widely supported. Vulkan is intended as the successor to OpenGL.
Godot Scenes, Nodes and Resources
Scenes
The key building blocks of Godot are Nodes. Scenes are nothing more than a collection of nodes.
Each scene has a single node at the very top of the list. It can have nodes below it that are known as its children. Each of those child nodes can themselves have children. We call this structure a “tree” because of how it branches from a “root” – notwithstanding that the tree is upside down with the root at the top!
Nodes
There are lots of different types of Nodes and they all have specialised jobs to do. Most nodes “extend” other simpler node types, meaning that they do everything that the simpler node does, plus a bit more. For examples, the XRCamera3D, which is a camera used for VR and AR development looks like this:
Node -> Node3D -> Camera3D -> XRCamera3D
So an XRCamera3D is a specialised version of a Camera3D, which is a specialised version of a Node3D which is a specialised version of a Node.
Later, when we’re writing our own scripts, we’ll also effectively be extending existing nodes and adding our functionality on top of their existing functionality.
Resources
Resources are not nodes, but they are used by nodes. They provide extra information that Nodes need. Examples are meshes (3D shapes) and materials (which define the finish of 3D shapes).
Resources can often be created directly attached to the Node that needs them, but they can also be created as a file within the project. Having them as a file is good when you want to share the resource with several nodes and quickly find it later to edit it.
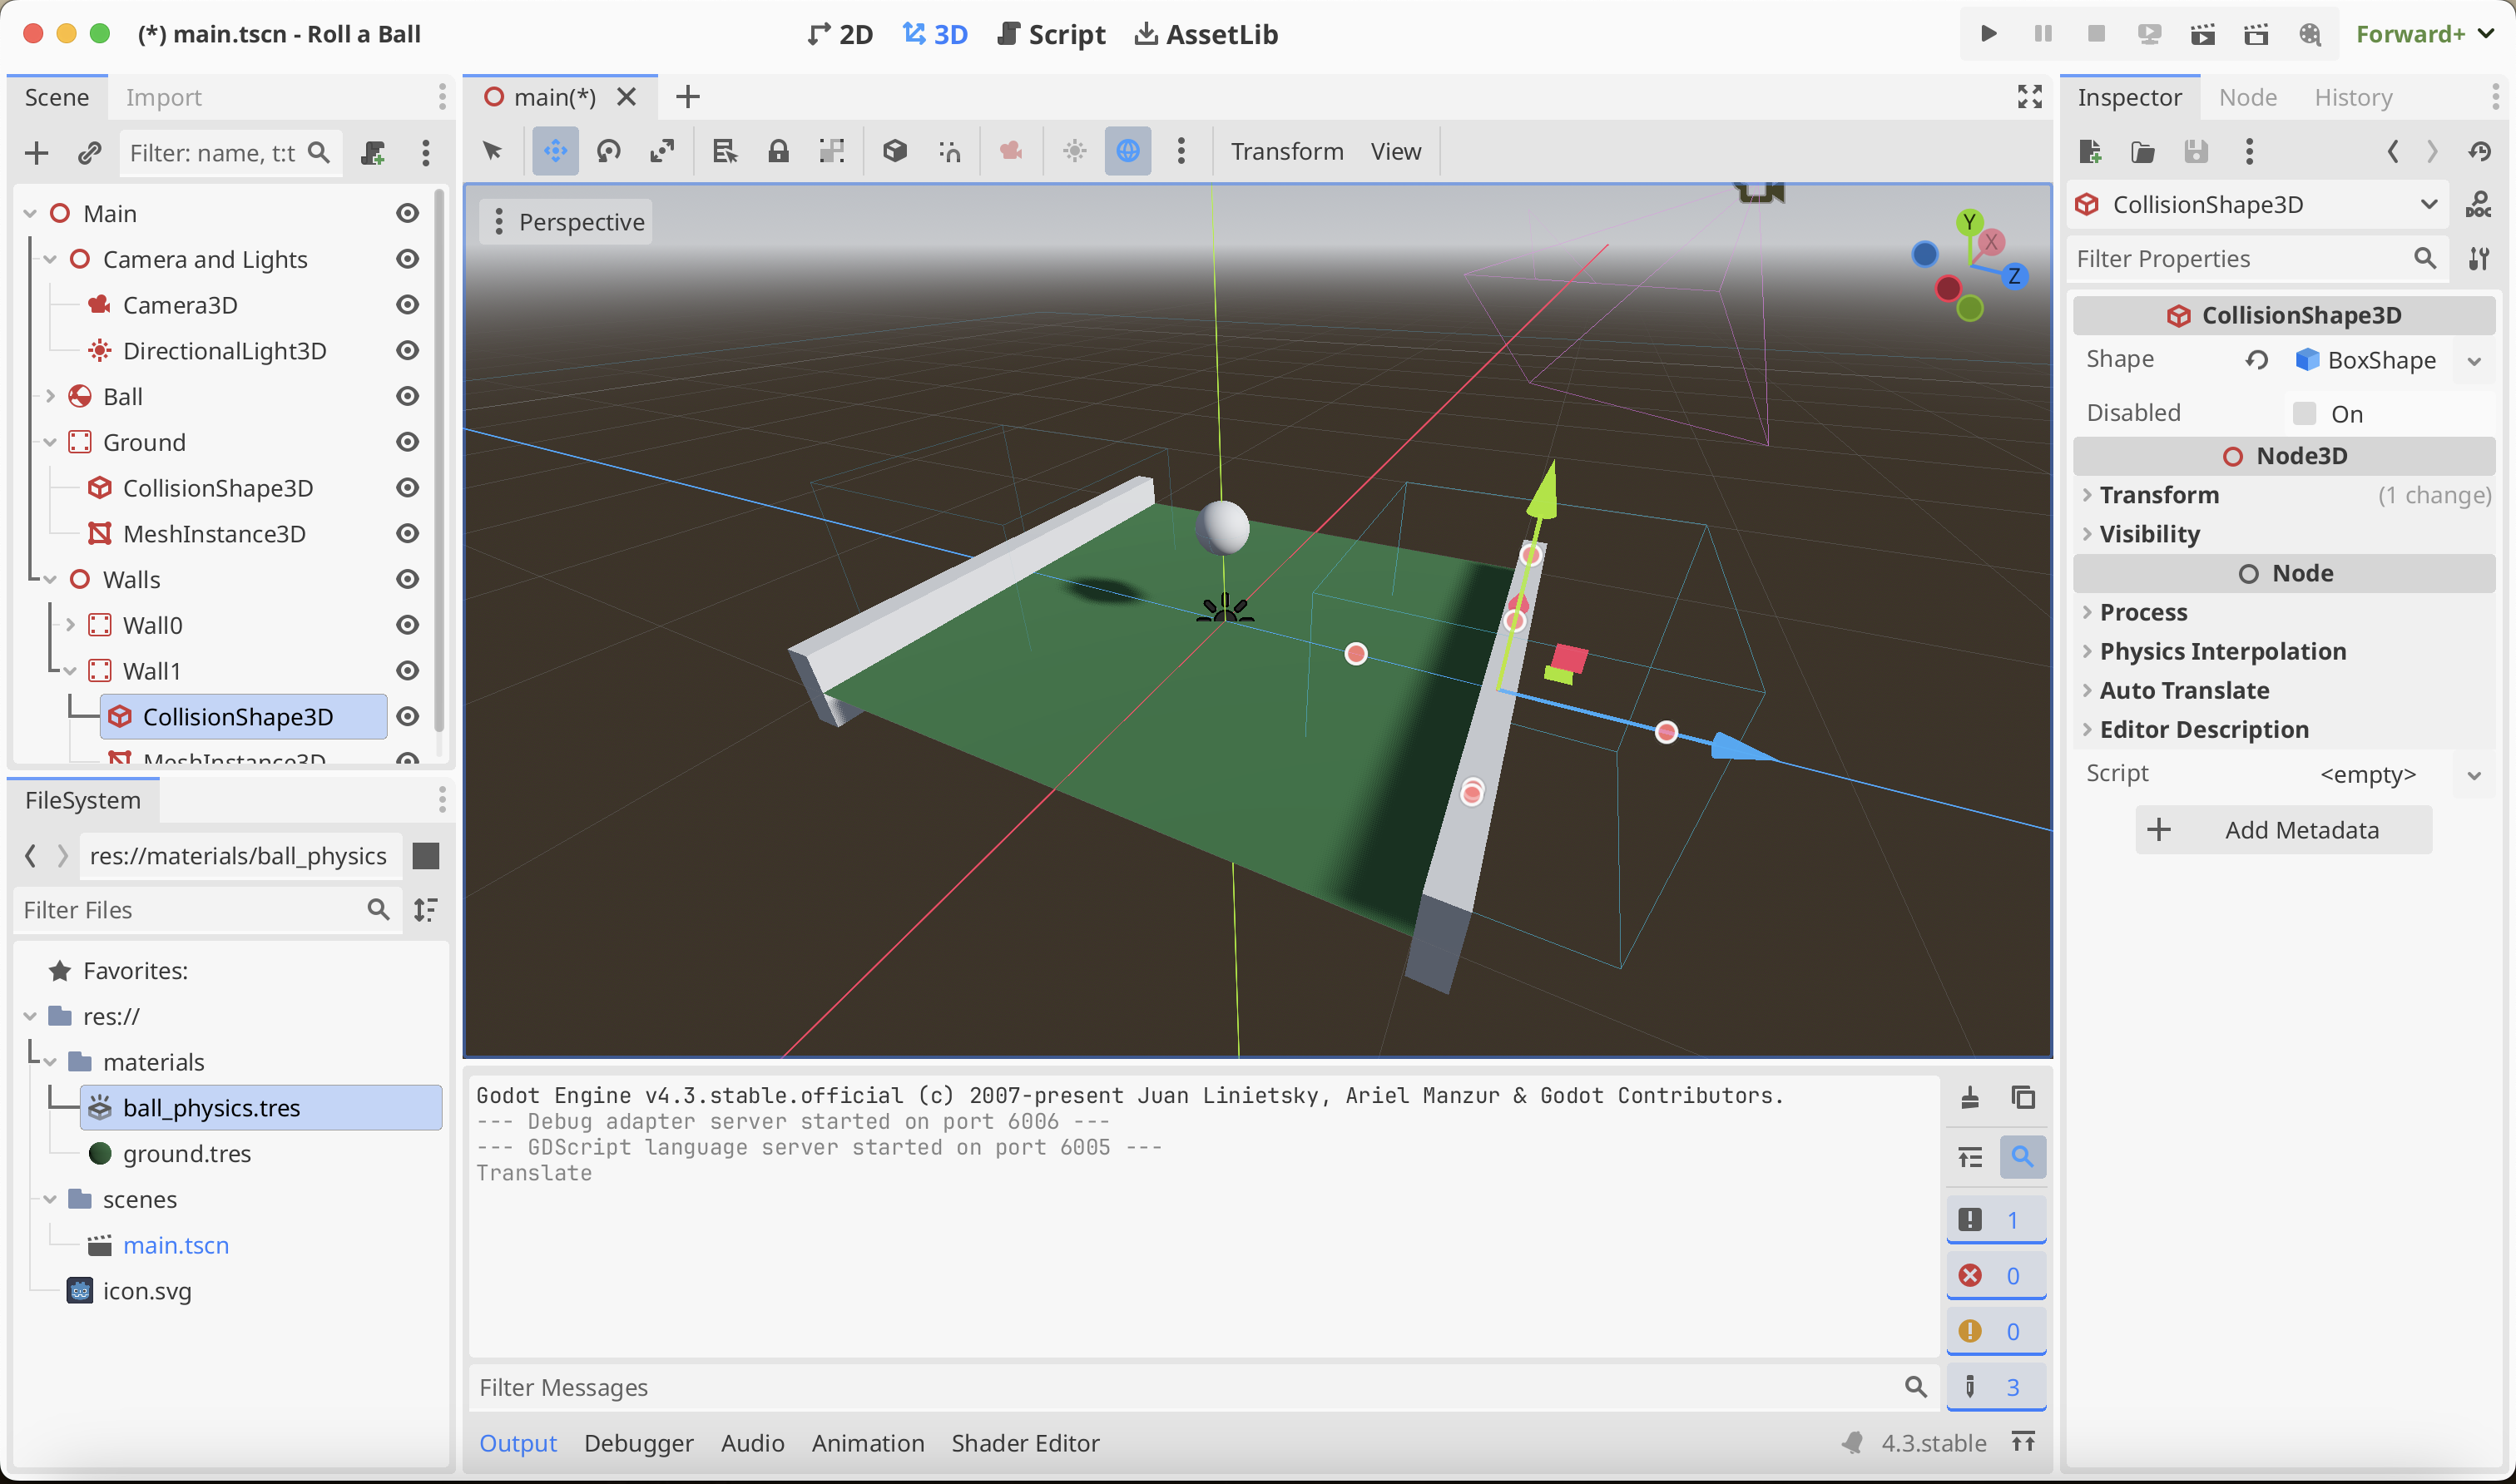
Godot Editor Layout
Unlike some other game engines, Godot has a fairly fixed layout. With reference to the image above, we will take a look at the most important parts.
The upper left is the Scene view, this is where we see the tree of nodes in the current scene.
Below the Scene view is the File System view. This shows the files in the current project. We can easily create folders here, rename and reorganise things. We can also create resources.
In the upper centre of the program is the main editor area. Using the buttons above it, it can be switched between 2D, 3D Script and Asset Lib views.
On the right hand side is the Inspector. This shows all the properties of the currently selected node or resource and allows us to edit them.
Building our Scene
We created a scene with a plane and a ball, both as physics objects. We dropped the ball and watched it bounce on the plane.
Both objects were build similarly, but the root node in each was slightly different. Let’s look at the ball first:
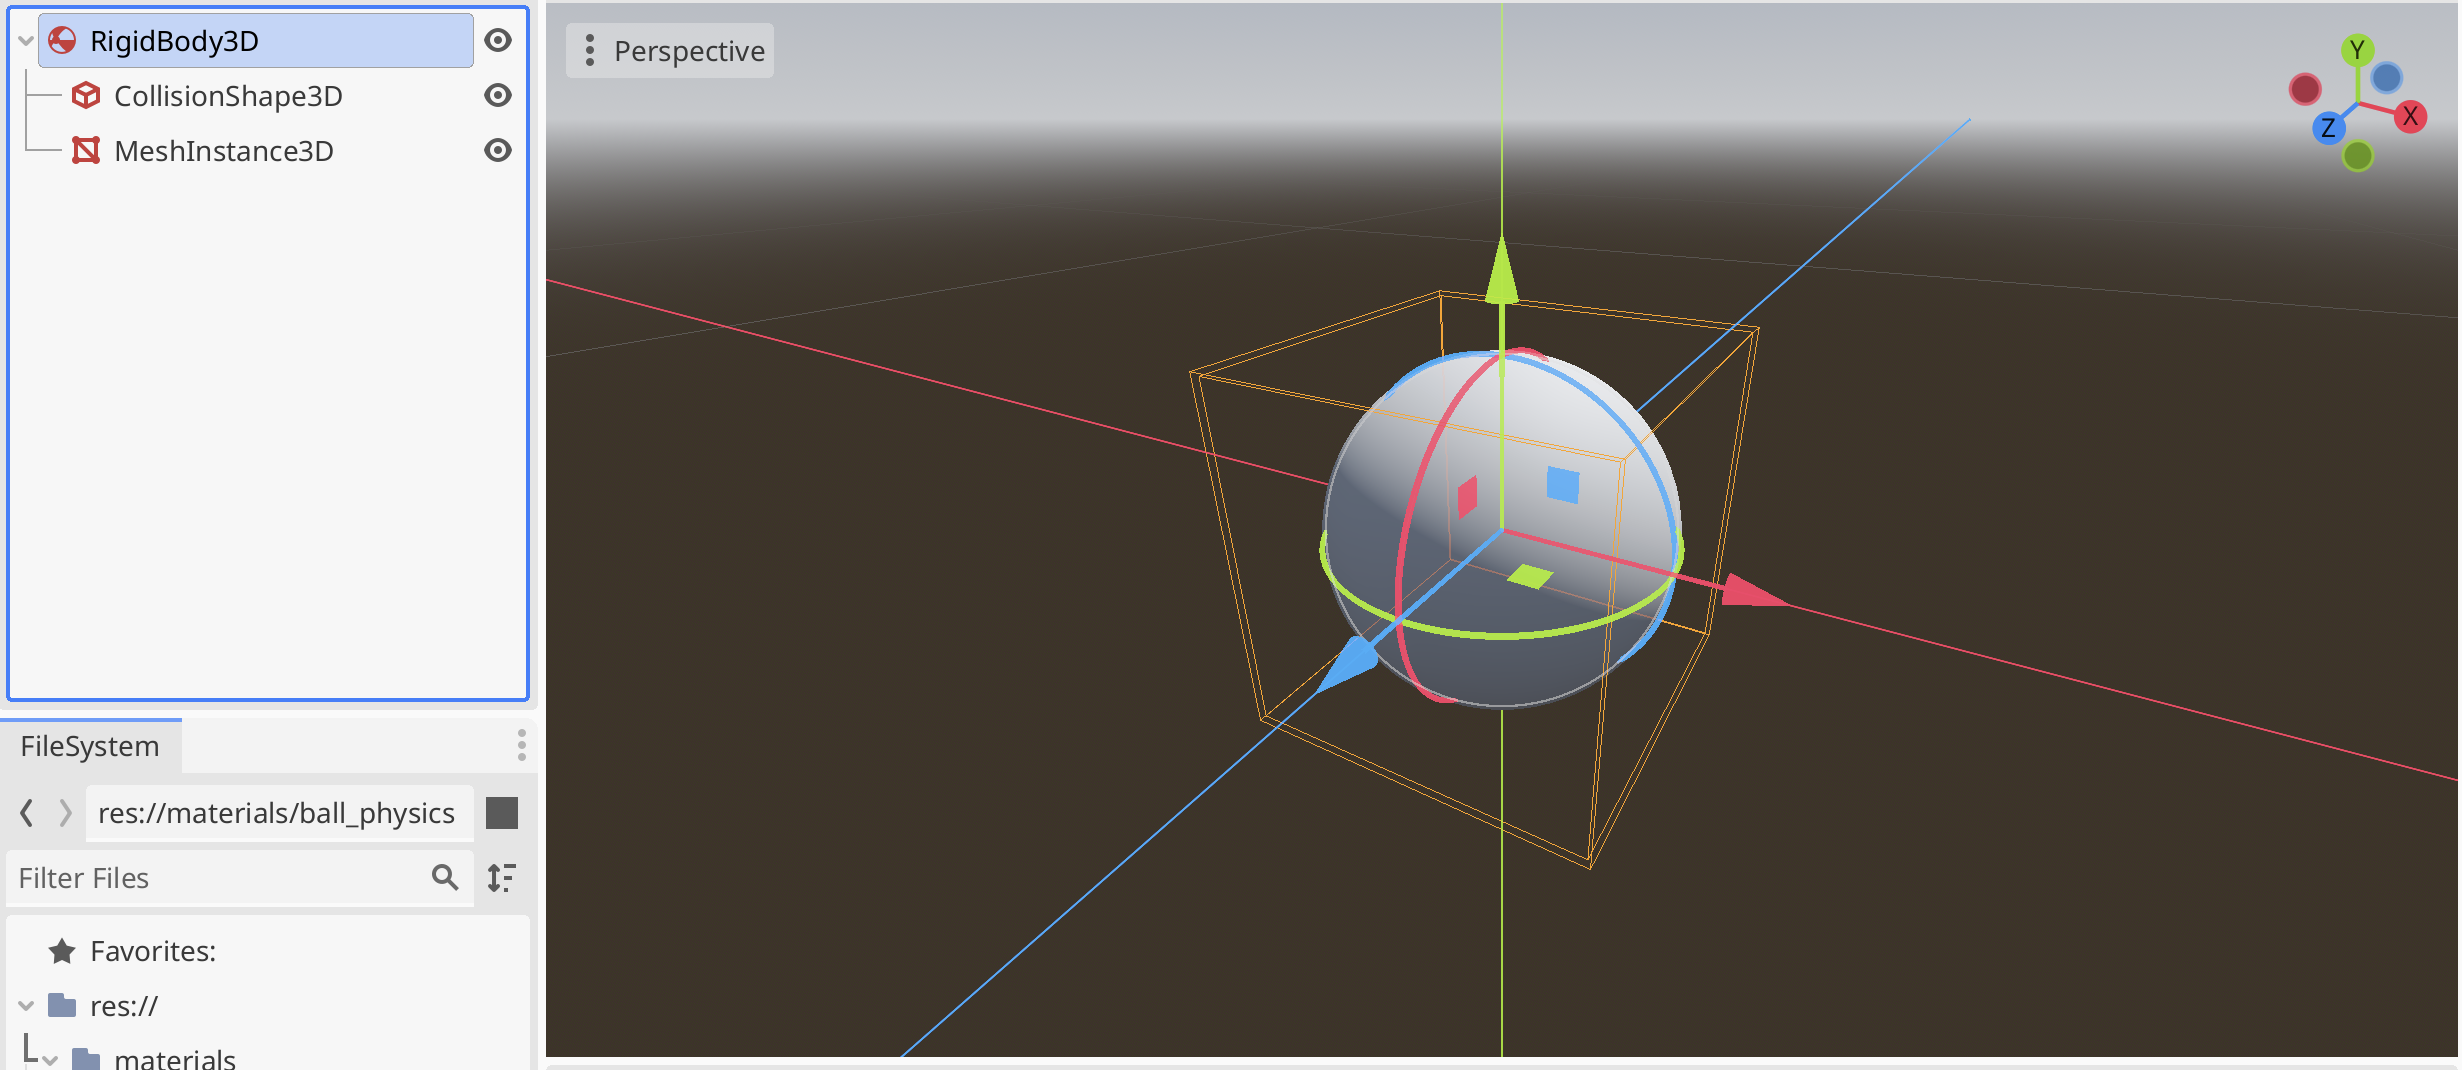
A RigidBody3D is a node that the physics engine will take care of moving. On it’s own, however, it can’t do anything. It needs to know what shape it’s simulating. As humans we also need to be able to see it. We accomplish this with two child nodes, The CollisionShape3D (containing a SphereShape2D resource) defines the shape, from a collision viewpoint, so the RigidBody3D can now do it’s work. So we can see something, a MeshInstance3D (containing a SphereMesh) is added to give us something we can see.
If might seem odd that we have to specify one shape for collision and one for visual purposes, but actually that really makes sense. Calculating physics and collisions is expensive (in terms of computer time). It’s really normal to use as simple a collision shape as we can. If this mesh was actually an irregular boulder, rather than a perfect sphere, we might still be able to get away with a simple collision shape, if it was close enough.
The ground was built like this:

Very similar, but instead of RigidBody3D, we have StaticBody3D. StaticBody3D is also managed by the physics engine, but it never moves. Like RigidBody3D it needs a collision shape, and again we need something we can see. For that we have a CollisionShape3D node (with a WorldBoundaryShape3D resource) and a MeshInstance3D (with a PlaneMesh resource). WorldBoundaryShape3D is interesting because it’s infinite in size. Even though our visible plane is only 2x2m, the ball will never fall off the side. This will not matter because we’ll be adding walls around our ground.
Running our Scene
Before we can meaning fully run our scene, we have to add a light and camera to it. We added two nodes, one a Camera3D and the other a DirectionalLight3D and positioned them appropriately. To run the scene, you just need to press the play button on the upper right-side and the game opens in a new window.
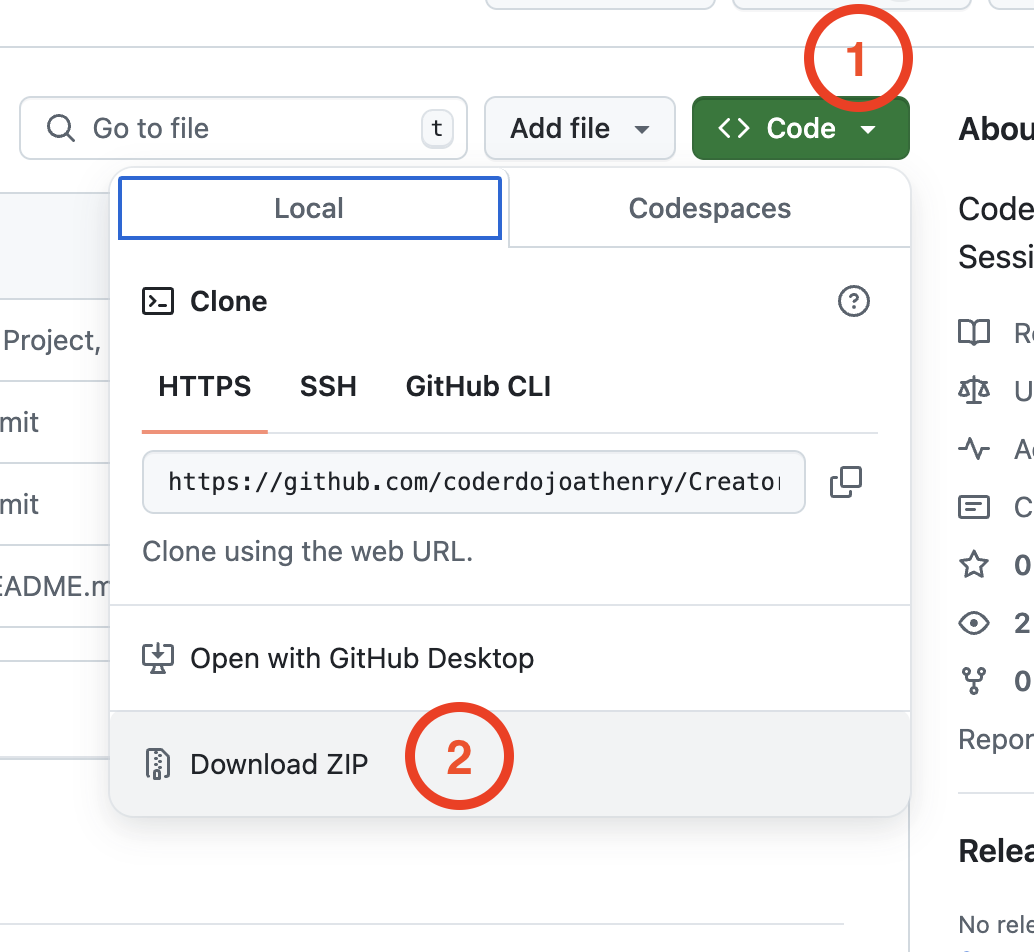
Getting the Code
All our code for this year will be available on our GitHub. This will contain all code we write this year. At any point, use the green button on that page to download a ZIP file containing all the up-to-date code:
In Godot, just use the “Import” button from the Project List to load a project that’s not already listed.

Pingback: Creators – Week 5 | CoderDojo Athenry